Plastering & Drylining Health & Safety Tips For Work On-Site

Plastering Health & Safety Tips

When it comes to staying safe on the job, health and safety is not something you should ignore in any profession. Although it can sometimes seem time-consuming and even frustrating, the whole idea of this practice is to keep you and those working around you safe.

If you’re not convinced of its importance, it was widely reported that 507,000 workers suffered from work-related musculoskeletal disorders in 2016/17 – many of which were a direct result of inadequate health and safety practices. The Health and Safety Act 1974 regulations are regularly tweaked to improve worker safety and reduce this number as much as possible, but a small number of injuries are always going to occur.

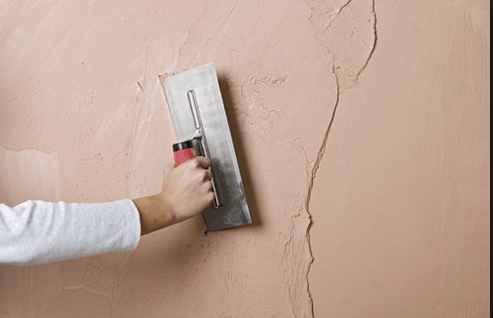
Construction sites are a dangerous place so it pays to take your time and consider how you can stay safe when completing the task in hand. Thankfully plastering isn’t classed as one of the more risky jobs on site (compared to scaffolding for example), but there are still particular elements that require certain safety measures to be followed.

With that in mind, we’re going to take a look at some basic health and safety tips for plasterers.

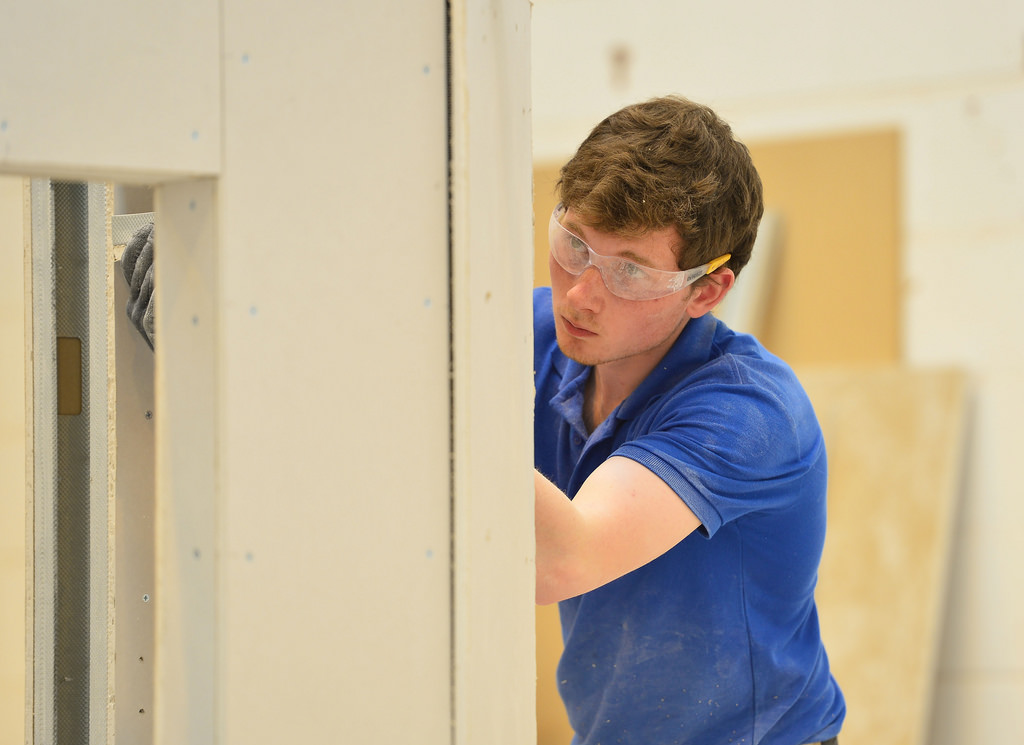
Personal Protective Equipment (PPE)

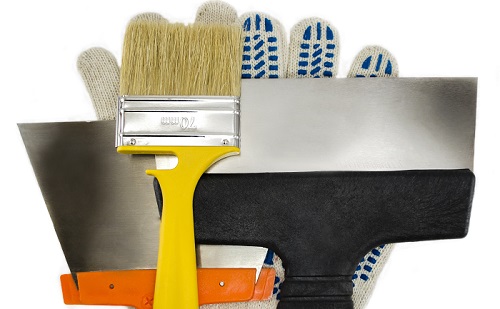
All plasterers and Dryliners are required to protect themselves from hazards with specific protective equipment when working on site. This includes odour masks, shoes that are suitable for use on ladders and protective eyewear designed to block airborne particles and flying pieces of plaster.
Without these pieces of equipment, you run the risk of being injured by debris caused by plastering or falling from a height when applying plaster to a ceiling or wall. This leads nicely onto our next tip for health and safety.

Working At Height

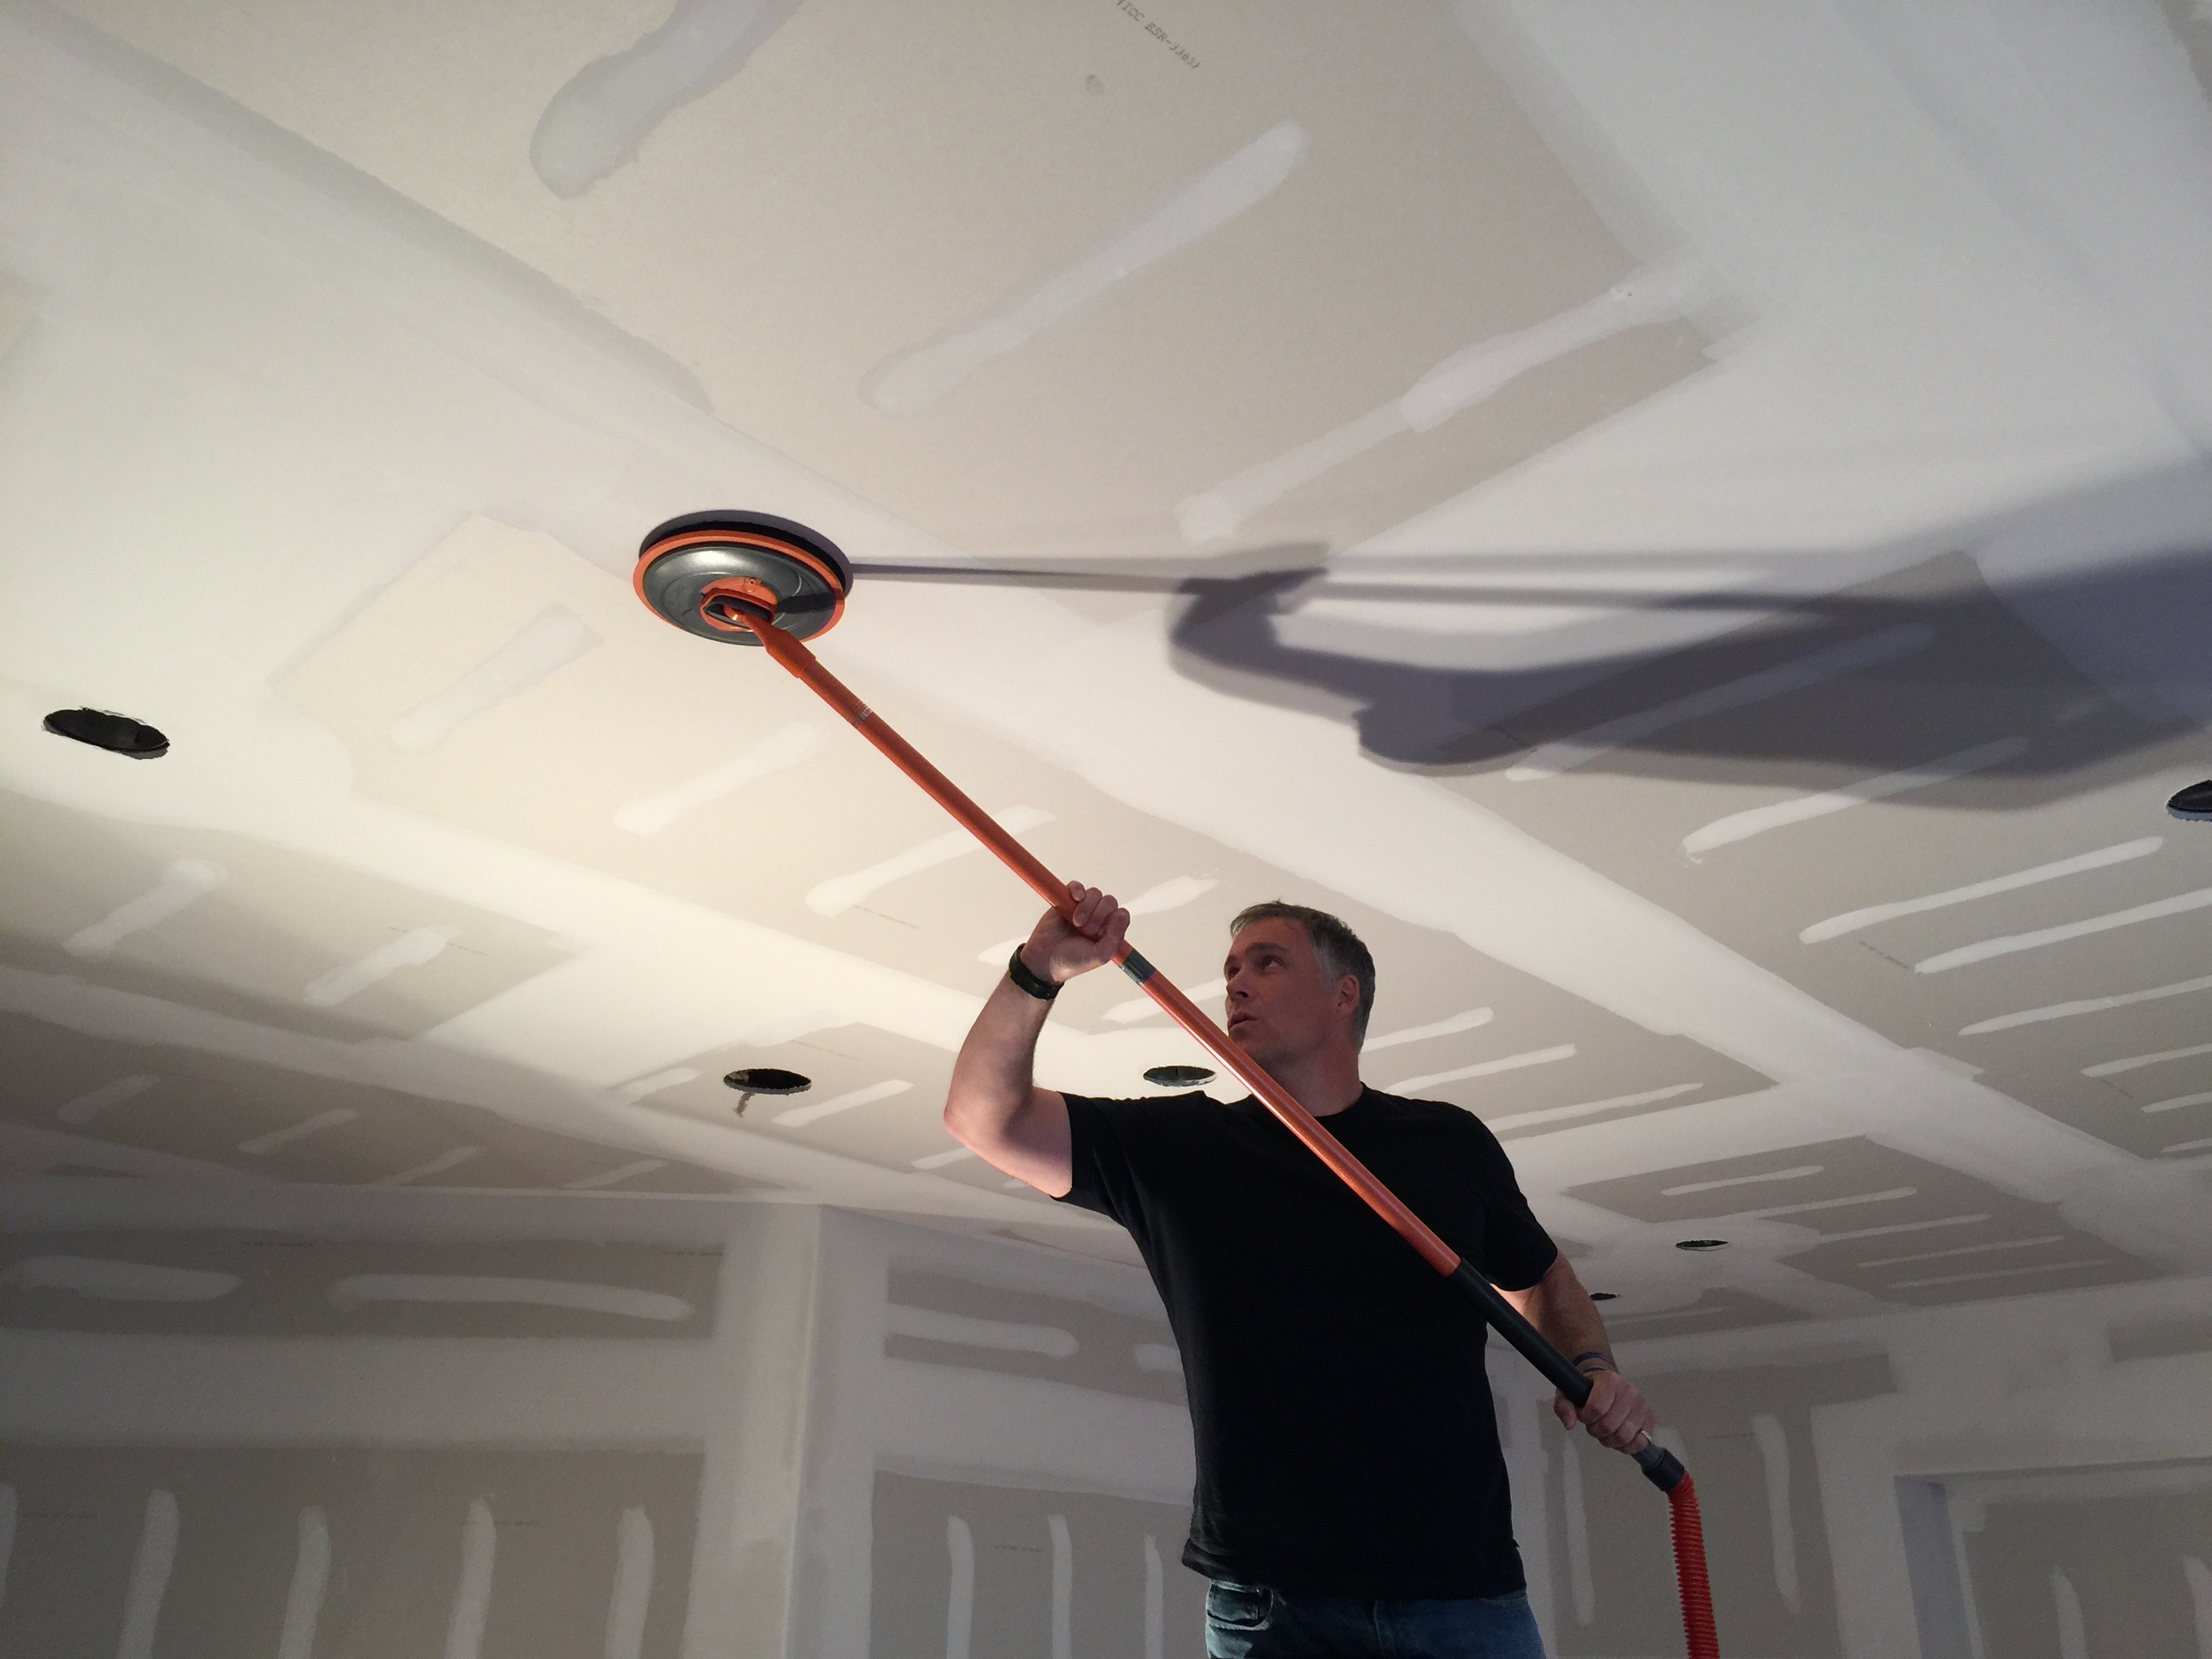
Whenever you climb a ladder or work at height, stability is crucial in order to work safely and minimise risk. There are unfortunately a number of hazards directly linked to working at height and there will always be an inherent risk, but taking the required steps to ensure everything is as safe as possible can make a huge difference.

Make sure your ladder is in good condition and secured on a level, stable base before climbing. When working, don’t lean or overstretch yourself – come down off your ladder and reposition it to reduce the risk of falling.

Plasterers also generally have to use hazardous equipment such as heat strippers, drills and hammers to get the job done. With that in mind, having a stable base for your ladder or plastering stilts is even more important. If you can’t maintain your balance when working at height, you’re at risk of serious injury.

Working Alongside Other Tradespeople

Plastering is usually completed during the stages of a build where other tradespeople will still be carrying out their jobs around you – plumbers, tilers, carpenters etc for example. As you’ll be working in close proximity to others, it’s important to bear in mind their safety as well as your own.

In most instances, a cross trades risk assessment is required to ensure all workers can complete their jobs safely without impacting anyone else around them. Different tasks being completed mean different risks to those on site, so as there will be a bigger range of health and safety issues at play, it makes sense to understand all risks and work towards minimising them as much as possible.

General Health & Safety Guidance

All construction sites should undergo a full risk assessment as well as identifying who will be responsible for the safety and wellbeing of the workers during the build. This person should also be in a position to keep themselves up-to-date with new information regarding hazards or materials.
If you are involved in this on your site, here are some questions you should consider:

  • Is the workplace well organised and efficient?
  • Is the correct protective equipment available?
  • Are the correct health and safety signs/notices being displayed?
  • Are site visitors aware of the various health and safety risks?
  • Is there a first aid resource?
  • Who will report any and all health and safety breaches?

The CSCS Health, Safety & Environment Test

This is a minimum requirement for all plasterers regardless of whether you are a labourer, skilled worker or looking to move into a supervisory position on site.

The test is official recognition that you understand and meet the various health and safety standards that relate to your job. Alongside that, it’s also an indication that you remain up-to-date with the latest health and safety standards. To find out more about this test, visit the official CSCS site here.

Summary

Staying safe when plastering is straightforward if you’re able to correctly follow the appropriate regulations. Get yourself the right protective equipment, make sure you follow health and safety protocol when on site and you should be able to stay safe.

If you’d like to find out more about the minimum health and safety requirements for plasterers, visit the UK Government HSE site here for further details and example risk assessments.

The Different Types Of Plasterboard Joint Tape

Plasterboard Joint Tape

Getting the right materials for any job is vital. Fortunately these days it’s not hard to find just the right quality product, designed specifically for the task in hand.

That’s why plasterboard joint tape comes in two types, so when you’re planning the finishing materials for your next job you can make sure it fits the purpose. How do you know which kind of joint tape to pick? No problem. Here’s all the information you need on plasterboard joint tape.

Basically, for plasterboard joining you’re looking at using either scrim tape, or jointing tape. There are good reasons why either of these can be your perfect choice, depending on the circumstances, and of course there are often ways around it if you need to use the other. Let’s look at the difference between the two.

Scrim Tape

Scrim tape is a newer product and it’s made from fibreglass. It’s great to use on a flat join because it comes self-adhesive, so it’s ready to stick into place, without the need to add an extra compound or filler underneath. Because the fibreglass is woven into a mesh, it has flexibility and strength that keeps it firmly in place while you spread the jointing compound over the join.

Remember that, although you can fold scrim tape, and it can sometimes be perfect for internal joints, for angles it’s usually not going to give you the same crisp edge you’d get from a pre-creased jointing tape.

Jointing Tape

So how about jointing tape? Jointing tape is made from paper, which has its own pros and cons. In practice, many professionals still prefer it for most jobs as it’s cheaper and comes in larger quantities so it’s convenient to have on hand for a range of jobs. But it’s a matter of preference.

If you need a tape you can fold and crease for a corner or angled join, you’re probably going to be looking at jointing tape over scrim tape. Jointing tape comes ready creased, but it isn’t self-adhesive. It’s not as strong as scrim tape, and you’ll need to add extra jointing compound, although experienced tradesmen usually find ways around this.

Metal Angle Tape

Last but by no means least, we have metal angle tape. Perhaps the least well-known plasterboard tape variety, this option is specifically designed for external corner joints and unique angles like those around bay windows for example.

With such a specific purpose, you need to have the right circumstances to use this tape – there’s little point using it on a flat joint due to the two strips of thin steel embedded into the trim. This is what helps to create a crisp, clean finish on external corners and ensures a sharp line on all angles.

It’s the perfect solution for areas where rigid angle beads aren’t suitable, so if you’re looking for a simple way to tidy up angles and external edges with minimal fuss, metal angle tape could be the option for you.

Summary

So, in summary, the professionals have their own preferences and workarounds. But if you’re new to this kind of job, it’s generally worth using scrim tape for a flat surface and joint tape for an angle.

For a perfect result, it’s essential to choose the right plasterboard joint tape. An unwanted crease or bulge will be hard to hide, whereas a smooth and simple join is going to make it so much easier for you to achieve a professional overall finish. 

Why Buy When You Can Borrow! Reasons To Hire Your Taping Tools

With years of experience in the plastering and drylining industry, we understand that buying the specific tools you need for a project isn’t always the most cost-effective solution. Having to find the cash for tools can be challenging, especially if you’re struggling to secure work on a consistent regular basis and we all know that even a small set of taping tools is expensive.

The other potential pitfall is that you might only need one or two tools for a short stint of work, so it can often feel like buying a whole set of tools isn’t worth your while – what are you going to do with them after the job is finished? If it is your first time using the tools will you ever use them again?

This is where looking into taping tool hire can be a smart move. Here at Gypsumtools, we are proud to offer a fantastic tool hire service that can be fully customised to suit your unique requirements. Hire taping tools with us for 90 days, 6 months, 9 months or even an entire year – just choose the length of time that suits your work schedule, we’ll do the rest.

Unsure about hiring? We understand, but there are plenty of reasons why you should hire specific drylining tools you need instead of investing in them.

For example, automatic taping tools are fantastic in speeding up the taping process and ensuring the final finish of your project is consistent and of a high quality. Buying brand new taping tools can be expensive, so hiring the ones you need for a short term work can make a lot more sense from a financial perspective – especially if planned jobs fall through at the last minute, allowing you to speedily get through the one job and move onto another.

Here are some further reasons why hiring taping tools could suit you better than purchasing them outright:

  • Whatever tool you hire from us, it will always be the latest model – meaning you’ll have the best piece of equipment for that task in your toolkit and therefore a better chance of delivering a higher quality finish.
  • You’ll make significant savings on the upfront cost of purchasing taping tools as you’ll only have to pay a one off upfront cost and a refundable deposit.
  • There’s no ongoing cost to you as the user of the tools; any problems give us a shout and we’ll do our best to advise or fix your tools if anything were to go wrong.
  • You can save time on the job by having the exact taping tools you need delivered to your site by our UK-wide delivery service.
  • Hiring the specific taping tools you need can allow you to customise your toolkit on a project-by-project basis.
  • If you’re unsure whether a specific tool could be the one for you, hiring it first gives you a fantastic chance to try it before you choose to buy it outright.
  • As part of the tool hire service we provide to our customers, we’re more than happy to offer advice on best use practises as well as a demonstration of any tools if needed.
  • You can also purchase a service when taking out a hire package with us, ensuring that if any any damage is caused to the tools, we’ll sort you out with replacements until your original tools are fixed and returned to you.

If you need even more persuading that hiring can be just as efficient as buying, Gypsumtools stock one of the UK’s largest range of taping tools, meaning you’ll be able to choose from an extensive selection of the must-have industry products. All these tools are available for hire across a range of different time periods to provide maximum flexibility to our customers. And guess what… we have another brand that’s going to available for hire VERY soon!

We work with some of the biggest brands in the drylining industry too, including the likes of Level 5 and Northstar so you can be assured of each and every tools’ quality and reliability – all available at highly competitive prices, for a minimum of 90 days and a refundable deposit which is payable before your lease period begins, simple.

Our hire team pride themselves on stocking the best kit at the best prices and we’re here to help everyone get hold of the tools they need to get the job done. In-house experts are always on hand via our Leicester trade counter to offer their advice on the most suitable taping tools for your project, as well as the most cost-effective hire plan for your needs.

To find out more or enquire about hiring any of our taping tools, give us a call on 08456 254 321 and speak to a member of the team. Or you can visit our ‘Equipment Hire’ page and download a brochure that suits you.

Find out how you can make huge savings on our taping tools with our Taping Tool Kit Builder, featuring DeWalt and Level 5 taping tools.

Milwaukee Tools – ‘Disruptive Innovation’ Since 1924

Milwaukee Tools

With steadfast dedication to the construction industry that stretches back nearly 100 years, Milwaukee Tools have been leading the way with their unique and revolutionary solutions to the most common trade problems.

One thing you want from any drylining or plastering tool is performance – and that is where the philosophy of Milwaukee Tools has delivered time and time again. The ‘disruptive innovation’ ingrained into this brand has helped it to repeatedly create tools that deliver unrivalled reliability and offer a new level of productivity for their users.

As proud stockists of Milwaukee Tools here at Gypsumtools, we are delighted to offer our customers access to one of the most trusted industry-leading brands on the current market. With a wide range of power tools, accessories and hand tools to choose from, there is something for almost every trade profession.

The tools that Milwaukee bring to the table are often trade-specific and provide a unique solution to common on-site issues – whether it be through their Lithium-ion technology used in their M12, M18 and M28 drill systems or their Shockwave Impact Duty driver bits which have been engineered to be the most reliable, best fit driver bits in the world. There are no boundaries with this brand – they will take on and overcome almost any challenge the drylining world can throw at them.

So how do they manage to do this so consistently? The key is working alongside professional tradesmen all over the world, allowing Milwaukee to understand the ever-changing demands of the construction industry and design their products accordingly. Their aim is always to help professionals work faster and smarter, not ignoring the small details that can make a world of difference. It’s this level of ‘disruptive innovation’ that continues to deliver exceptional new products time and time again.

Throughout their history, Milwaukee have been responsible for some of the biggest breakthroughs in power tool design:

1924 – the ‘Hole-Shooter’ was the first lightweight, portable one-handed drill
1949 – Milwaukee developed the first right-angle drill
1951 – the Sawzall Reciprocating Saw, the first self-contained portable electric hacksaw
1979 – the first U.S-made annular grinder
2005 – Milwaukee becomes the first power tool manufacturer to use lithium-ion technology
2008 – the first manufacturer to use Ice Hardened strengthening technology

This isn’t even the full list of company achievements, but as you can see, it does go some way to demonstrating the incredible and unrelenting desire Milwaukee have to develop and design tools that really do help the end user. While some manufacturers out there have shifted their focus to the mass markets in recent times, Milwaukee have continued to remain focused purely on the core user group.

It’s not just the manufacturing process that they invest in either. Milwaukee Tools also benefit from established partnerships with some of the top universities around the world which plays a key role in their recruitment process, allowing them to fast-track the very best young talent in engineering, marketing and sales.

Combining this with heavy investment in the next line of products, Milwaukee can constantly look to the future safe in the knowledge that their tools stand at the forefront of the plastering and drylining marketplace. As a brand, they pride themselves on being defined by unprecedented speed, agility, innovation and most importantly, quality.

Making the workplace a safer and more productive environment, forms the cornerstone of Milwaukee Tools mission – something that we echo here at Gypsumtools.

If you’re looking to buy your next set of drylining or plastering tools, look no further than Milwaukee Tools. As an organisation, they are always looking to reach new heights and hit that next level of performance for the benefit of all their customers.

You can view our full range of Milwaukee Tools by clicking here.

The Top 10 Plastering Tools You’ll Need To Get The Job Done

Plasters tool kit

When it comes to a specialist trade skill like plastering, it’s no secret that having the right tools can make a world of difference.

Not only do the best plastering tools save time on the job, they also deliver a better end result and can give your project that extra touch of quality. From trowels and snips to drills and saws, we’re going to run through what the team here at Gypsumtools believe to be the top 10 must-have plastering tools for any industry professional:

1. Finishing Trowel

In a similar way to the pointing trowel, the finishing trowel is another crucial tool in any plasterer’s kit. It utilises a wider, flatter blade to smooth out the plaster more effectively and provide that exceptionally smooth finish to all your surfaces. This is a tool you’ll be using a lot so it makes sense to invest in a high quality tool like the RST SS Finishing trowel.

2. Window Trowel

When you can’t use your other larger trowels around windows, most plasterers will reach for their window trowel. As its name suggests, this tool is specifically designed for use around windows thanks to its smaller blade face which gives you better manoeuvrability across the wall in tighter spaces. An important tool if you work on a lot of residential projects.

3. Inside and Outside Corner Trowels

Yet another crucial tool in the professional plasterer’s kit – the corner trowel. Instead of tackling the complexities of finishing your corners with a more traditional trowel, corner trowels allow you to smooth out your plaster with accuracy and simplicity. Save time on site by reaching for your inside and outside corner trowels instead of trying to get by with a traditional flat blade.

4. Mortar Stand

This is one you might consider obvious, but again it’s another simple accessory that can make life on site that little bit easier. A mortar stand is a small foldable table that you can use to hold your plastering material or grout, giving you that ease of access whilst working. Don’t overlook the simple tools as they can make a big difference!

5. Bucket Trowel

One of the key items in any plasterer’s arsenal is the trusty bucket trowel. This tool is commonly used to scoop plaster up out of your mixing bucket and onto your plastering hawk. Because of the weight involved when transferring the plaster, you’ll need a strong and robust bucket trowel as part of your kit. This really is a must-have tool.

6. Mixing Bucket

Similar to the mortar stand, a bucket will have multiple uses when working on a project. In most cases, you’ll want a decent size bucket – at least 15 litres should be sufficient depending on your specific requirements. Before you start any plastering job, you’ll need to keep your bucket clean and dry prior to mixing any plastering materials.

7. Hawk

If you don’t already have a plastering hawk, you’re not doing it right! The number one must-have tool for any professional plasterer, the hawk is a portable surface where you can hold your plaster material when on the move. It allows you to apply your plaster quickly and easily across both walls and ceilings. There are a wide range of plastering hawks available varying in sizes but you’ll want a clean surface with rounded edges just like this Nela option.

8. Snips

Having a reliable pair of snips is always important in modern plastering, primarily because you’ll likely need to trim and cut your beading. Make sure the snips you choose have the ability to cut both popular types of beading metal – cold steel and stainless steel. Also, having longer handles on your snips can give you better leverage and make the task of trimming up beading much easier. All plasterers should have a durable set of snips as part of their kit.

9. Plasterers Float

When you’ve added the final layer of plaster to your wall or ceiling, you’ll need to give it one final pass over with a plasterers float to give it that all-important smooth, high quality finish. This is another very important tool that should be carried by all plasterers as without it, you won’t be able to smooth down the top layer of plaster and you could see your surface end up uneven.

10. Scarifier

The final tool on our list is the scarifier – a large metal comb that allows you to scratch away at the render before applying your second coat. The scarifier is an important tool for any plasterer as it gives you the ability to comb lines directly into the render which will create a stronger bond when the next layer is applied. If you want a high quality finish on your walls and ceilings, we’d definitely recommend investing in one of these.

So there you have it! Add this list of plastering tools into your kit and you’ll be ready for any challenge the job can throw at you.

Looking for a great way to get all the tools you need in one place? Our range of apprentice plastering kits are perfect for budding plasterers looking for top quality tools!

Get in touch for more information on our full range of plastering and drylining tools.

Full Circle Air Radius 360 Dust-free Sanding System

Full Circle Air Radius 360 Dust-free Sanding System

If you’re looking for a new set of tools that perform brilliantly when it comes to dust-free sanding, then read on because we think you’re going to like this post!

We are of course talking about the Full Circle Radius 360 Air Sanding System – the tool that has revolutionised the way thousands of professionals sand and smooth their walls, ceilings, corners and details.

With over half a million units already sold, the Radius 360 Air has become the must-have tool on sites across the world and is continuing to grow in popularity. It’s the number one choice among drywalling professionals thanks to its perfect blend of dust-free drywall sanding and easy-to-use precision when it comes to dealing with detailed areas.Full Circle Air Radius 360 Dust-free Sanding System One of the biggest reasons to use this sanding system over other products is its fantastic 98% dust-free operation. Dust is one of the biggest issues when drywalling for a number of reasons, most notably the health risks that can arise if it’s inhaled. The Radius 360 Air provides near-perfect dust removal whilst maintaining the fast and effortless movement that high quality professional sanding needs.

Having taken a big step forward from the original Full Circle Radius 360 design, this latest sanding system meets the needs for almost all commercial and industrial projects that demand effective dust extraction.

The swivel within the tool that attaches to the handle has been tweaked to lower the centre of gravity and redirect dust directly through the handle itself. This makes the system incredibly lightweight and simple to use compared to more standard drywall sanders that are heavy and awkward to handle. The lighter, more nimble design of this tool also means less pressure is needed on the sanding head to achieve the perfect finish, so it’s a system that will save you both time and effort.

This amazing Radius 360 Air Package also comes with two separate sanding solutions – the circular Radius 360 Air and the rectangular Flex Air. Having both these in your arsenal means you’ll be perfectly placed to tackle almost any sanding challenge while keeping the site free from dust and debris. Changing the sanding heads is easy too – simply twist the cam lock, swap the heads over and lock into place once again.

Like the majority of orbital power sanders available on the market, the Radius 360 Air comes with a round head to distribute pressure evenly across the surface and prevent the tool head from flipping.

As part of this set, you’ll also receive the Full Circle Flex Air which is perfect for inside corners and detailed areas thanks to its rectangular abrasive pad. This kind of tool was previously very challenging to use as there would often be a rigid hose attached to the base at a fixed position – this prevented fluid movement across the surface and would even cause the hose to kink if used incorrectly.

The hand swivel built into the Flex Air sanding system offers the full 360 degrees of movement without the threat of the hose kinking during use. This brilliant feature means you’ll be able to make light work of any surface at almost any angle and enjoy that perfectly smooth finish you’re looking for.

More traditional dustless sanders used to cover the attached handle with a rubber boot which made manipulating the sanding system clumsy and awkward. This is what sets the Radius 260 Air apart – its unique ball-and-socket mechanism gives you the complete range of motion that isn’t compromised by a rubber boot or protective cavity. Full Circle Air Radius 360 Dust-free Sanding System Furthermore, the independent movement of the shroud from the tool base provides the ability to deliver almost perfect dust-free sanding and guarantees you’ll enjoy a fantastic scratch-free finish every time; regardless of whether you’re using the tool on walls, ceilings or corners.

So why should you consider the Full Circle Radius 360 Air Sanding System?

The variety of unique features built into this particular system sets it apart from the competition, and you’ll benefit from near flawless dust-free sanding time and time again. The complete and unrivalled range of motion these tools provide give them the edge on most competitor products – you won’t find these features in any other dustless sanding tool on the market today.

If you still need more convincing, take a look at the system in action here.

Columbia Taping Tools – Innovative And Reliable Drywall Tools For Plastering Professionals

If you’re considering investing in some new high quality drywall equipment, Columbia Taping Tools should be one of the first brands you turn to.

Every product made by the team at Columbia is built to the highest possible standard – no exceptions. They guarantee this quality on all their products based on the materials that go into every single tool they make.

Other companies might try to cut corners and save money by sourcing their materials from more affordable locations, but Columbia are proud to manufacture all their drywall taping tools in Canada using only the very best American steel, aluminium, rubber and plastic.

When you use drywall taping tools made by Columbia on site, you’ll instantly recognise their exceptional build quality and durability compared to other taping tools on the market. These tools are built to work as hard as you do, and last for years rather than months.

This unique approach to taping tools comes from Columbia’s founder, Bernie St James. Bernie ran his own business as a drywall taper for many years, but wasn’t satisfied with the quality of the tools available on the market. They would often be made cheaply, with little attention paid to detail or actual on-site performance – and that’s when he started Columbia Taping Tools all the way back in 1979.

Using his own high standards as a benchmark, Bernie was able to develop a complete range of drywall taping tools that focused around exceptional craftsmanship and reliability. All of Columbia’s products are built using these principles of real-world experience and a passion for good, honest hard work.

When you buy anything from our range of Columbia Tools, not only will you get a top quality product, you’ll be benefitting from over 35 years of industry experience and get to use some of the most innovative tools available on the market. The outstanding build quality is obvious on all Columbia tools, and they take great pride in manufacturing products that their customers love from the very first use.

Not only that, all Columbia drywall taping tools are backed by one of the best product guarantees in the world. Have an issue with a Columbia tool? Regardless of whether it’s a Predator automatic taper, an extension handle, a flat box or any other product, simply get in touch with us and we’ll do everything we can (with Columbia’s help!) to get you back to work.

This fantastic guarantee covers a full five-year period, so you can purchase your taping tools safe in the knowledge that they will be repaired or replaced in the unlikely event something does go wrong.

Here at Gypsumtools, we’re delighted to be working in collaboration with Columbia Drywall Taping Tools and offering their fantastic product range on our website, over the phone, or at our trade counter in Leicester – where you can touch and feel it before you make your purchase. We have absolute confidence in their range of tools and we would highly recommend them to any drywall professional.

If you want to enjoy the privilege of using some of the best drywall tools on the market, take a look at our full Columbia product range.

Find out how you can make huge savings on our taping tools with our Taping Tool Kit Builder, featuring DeWalt and Level 5 taping tools.

Plaster Or Plasterboard – Which Is Better?

Wet Plastering A Wall

When it comes to home improvements, there are always plenty of decisions to be made. Hard floor or carpet? Fibreglass or foam insulation? Paint or wallpaper? The list goes on.

Relining a wall brings about just one more choice – wet plaster or plasterboard? We’ve decided to take a look at this age-old battle to see if there really is a clear winner, or the choice comes down to your personal preference.

So if you’re looking to renovate your home, repair damage or just reline an old wall, chances are you’ll want to know which product is better for your needs. As established plastering and drylining specialists, our team are always on hand to help – but let’s take more of a detailed look at the two options in isolation.

Plaster

Generally the preferred option for masonry professionals in the UK, a traditional plaster finish can give your walls and ceilings a uniquely smooth result that plasterboard just can’t compete with. Not only does wet plaster give an exceptional finish, but it’s also known to be incredibly durable and resistant to degradation over time.

Choosing wet plaster also gives the added advantage of limitless restrictions – regardless of the size, shape or fiddly details like window bays or door frames, you can plaster any area given the right level of application and skill. We’d also throw in here that wet plaster provides a better airtight seal than plasterboard, meaning your room is better prepared to retain warmth and restrict water ingress from external sources.

Now you’re probably thinking ‘wet plaster is the winner’ – but there are some downsides to choosing this plastering method.

The biggest of these is the skill and craftsmanship it takes to apply wet plaster efficiently, which is why good plasterers train to hone their skills for many years as apprentices prior to working independently. Attempting to plaster a wall or room yourself is definitely not recommended – without the necessary experience, you’re almost certain to end up with an uneven finish and cracks when the plaster has dried.

Wet plaster is a fantastic option if you have money to invest and time on your side – if not, let’s take a look at the alternative.

Plasterboard – Drywall

If you’re looking for an effective finish to a wall, but just don’t have the time to get men on-site or wait for the plaster to dry, plasterboard is a fantastic alternative to the traditional wet plastering method.

Ready-made boards that you attach to your wall – plasterboard is as literal as it sounds. Simply measure up your wall or room, order the appropriate number of boards and that’s it. The only task left for you is to secure the boards to your wall, fill in the joints and screw holes with jointing compound to leave a single, smooth finish – we recommend 4T or Wondertex to do this. Thanks to their construction, plasterboard rarely cracks as the plaster is already dry and installing it is far easier than tackling wet plaster without prior experience.

The most challenging aspect will likely be the task of taping the joints of the drywall together, with jointing compound and tape, which again you’ll need the appropriate tools and materials to complete successfully – you’ll want a taping knife in a few sizes to make this step easier.

It’s fair to say plasterboard is definitely the more convenient of the two options, but if you’re looking for that uniquely smooth finish only wet plaster can bring, you’re going to need to pay more and wait longer. If your wall or room is unusually shaped, your hand may be forced when it comes to this choice, but it’s likely that installing plasterboard here would take longer anyway – cutting unique shapes with a jab saw, fastening them to a unusually-shaped wall and then filling in the joints and screw holes with jointing compound using a taping knife is only for the very brave.

Remember you’ll have to wait for this to dry and then hand sand the access off before to leave a smooth finish.

Summary

In summary, both types of plaster product have clear benefits. If you have the time and money to invest in a higher quality finish, wet plaster is almost certainly the preferable option. It brings a more durable, smoother finish with no joins between boards or screw holes to manually fill with drywall compound.

Plasterboard, on the other hand, is more time and money efficient – you can simply cut and install the boards, fill in the joints & screw holes and you’ll have your wall and ceilings relined in no time!

Still unsure which type of plastering option is best for you? Get in touch with our team and we’ll be happy to help.

OX Tools & Where To Buy Them

ox tools uk

OX Tools is recognised in the construction industry as a manufacturer of tried and tested tools that are not only dependable, but affordable too. Want to know more about their range and the benefits they can bring to you on the job? Read on!

About The OX Tools Brand

Celebrating an amazing 40 years of manufacturing high performance products, OX Tools was originally born in Australia in 1974. After building up a great reputation as being tough, dynamic, dependable and affordable, the brand brought their tools over to the UK.

Many industry professionals and individual DIYers alike regard OX tools as an ‘extra man on site’. Using American, German and other European technology, OX products are known for their innovation and toughness. High quality at a low price.

The OX Tools Range At Gypsumtools

Wondering where you can get your hands on the range from OX Tools? You’ve come to the best place! Here at Gypsumtools, we have a number of products that you’ll want to add to your toolbox. View the OX Tools products and buy online in no time at all!

Why not add a few more essentials to your basket? As there’s free delivery on orders over £99! Plus all the handy advice you’ll need to get the job done with your new tools.

OX Speedskim Plastering Rule

OX Tools’ Plastering Rule is perfect for use on ceilings, walls and floors leaving the work with a perfectly formed, flat surface to continue with.

It has a semi-flexible, plastic blade and is very effective for use on medium or larger areas. This tool enables any plasterer to flatten and rule off with no trouble at all.

What’s more, the plastering rule also features the Speedskim Technology™ button release interchangeable blade feature.

Screen Shot 2017-12-19 at 10.34.41

OX Speedskim Finishing Rule

The Speedskim technology has been designed with you in mind. The revolutionary Speedskim Stainless Flex Finishing Rule is designed to increase meterage output and enhance the finish of the job whilst reducing the effects of fatigue and RSI.

Making your job much easier, it is also designed to take replacement blades with a smooth blade change mechanism and can be used with a universal pole attachment to access those hard-to-reach areas (both sold separately).

This high-quality tool enables you to achieve the same great finish for all gypsum based finishing plasters, whether it be applied by hand or spray.

ox tools

View the whole range of OX Tools.

If you have any questions or queries about any of the products, give us a ring on 08456 254 321 or email [email protected] and we’ll get back to you as soon as we can.

Best practices for Sanding Drywall with a Power Sander

power sander drywall

Drywall is an extremely popular construction material for finishing interior walls. It’s durable, cost-effective, easily installed and repaired, so there’s little wonder why it’s the first choice for both DIYers and contractors.

However, sanding can be slow and tedious work unlike the heavy duty work of moving and installing panels of drywall which is much quicker. It’s often described as one of the worst jobs in home renovating!

Why? Well, it can often be the case that you end up cleaning for much longer than you are actually sanding the drywall!

If you don’t plan correctly, you will need to vacuum several times as dust gets into the smallest cracks although vacuuming drywall dust can even void the warranty on many vacuums. Even then, the dust is so fine that it gets into everything and is difficult to remove, or even to vacuum.

To avoid all of this drama, make sure you invest in the appropriate sander equipment and protect yourself and your belongings from dust before you get started. Remember that you will be preparing your walls for paint or wallpaper, so you will need to make sure you achieve a smooth finish.

A good primer or sealer may help hide any imperfections on your walls but sanding is the last chance to get everything right beforehand. Sanding can only be done well if you have taken care with all the other processes, like taping and mudding.

If your sanding is not done well, it will show when the paint is dry. At the top of the list of important know-how is proper sanding technique.

Sanding drywall is the last step in the drywalling process. So after you’ve hung and taped drywall, follow these steps to sand it perfectly smooth.

Preparing Your Drywall for Sanding

If you’re using basic sanding tools and products, the only way to prevent dust damage and inhillation is to:

  • Seal off the room with plastic in the doorway so that dust does not escape into the rest of your house.
  • Properly ventilate the room, but do not open all windows, as this will cause the dust to circulate.
  • Lay a drop cloth on the floor to catch the dust.
  • Covering any furniture in the room with plastic.
  • Wearing goggles and a dust mask to protect yourself from dust inhalation.
  • You might also want to wear a hat to keep dust out of your hair.
  • A Dust Mask offers some protection against large particle inhalation.

Whilst all of this is good advice for a dusting novice, there are a number of tools that we at Gypsumtools stock that can prevent all of these problems…

Sanding Tools for Drywall

We’ve already covered off some of the protective clothing and materials you can use to prevent any damage to your room, but what about the Drywall Sanding Tools themselves?

Giraffe® Wall & Ceiling Sander

Giraffe® Wall & Ceiling Sander

The Giraffe® Wall & Ceiling Sander is electronically controlled, has soft-start, overload protection and also speed selection with adjuster wheel too.

With it’s dust-proof on/off switch and effective dust extraction, this tool really does promote a dust-free working environment

Flex Safety Vacuum Cleaner With Automatic Filter Cleaning System

Flex VCE35 M Class Vacuum Automatic Filter Cleaning System

The Flex Safety Vacuum Cleaner comes with an Automatic Filter Cleaning System giving you an excellent extraction result.

The Class M safety vacuum cleaner is suitable for all dusts.

Vitrex Sander For Drywall

Vitrex Drywall Sander

The Vitrex sander for drywall has a super powerful motor that makes sure enough power is transferred to the sanding pad for smooth operation, always.

The double dust extraction system helps keep the work area clean and free from debris.

Sanding Drywall Steps

As mentioned before, Drywall Sanding can be frustrating and messy, but it can also be fun and easy if you follow these simple steps:

  • Avoid Oversanding – Oversanding can damage the face of your drywall and leave scuff marks. Always sand lightly to start with, you can sand more if it’s not enough.
  • Use a Pole Sander – Pole Sander’s are perfect for reaching hard to get places such as tall walls. It also allows you to do longer strokes as you sand. Always keep the sanding head angled slightly to avoid any slippage.
  • Wet sanding – You can use water as lubrication to get rid of grit particles that are removed from sanding. Without any liquid, materials can build up in the sandpaper and leave behind scratches that ruin your wall.
  • Hand sanding – Power sanders are crucial for getting the majority a job done quickly and efficiently as well as giving you a great finish. However, if you want to finish off little bits that you may have missed with the Power Sander, hand sanding works a treat, even on Drywall.
  • Use a Sanding Sponge for Corners – Sanding sponges are much less likely to damage the opposing wall when sanding a corner

For more information on Power Sanding Tools & Drylining Tools then check out our blog or contact us

The Makita Tools Range & Where You Can Get Them

Makita is one of the biggest manufacturers of power tools in the world. Now with over 100 years of experience, Makita products are globally renowned for their performance and quality.

It’s little wonder then, that Makita tools are incredibly popular with plasterers, dryliners and handymen alike. Looking for Makita stockists and UK dealers? Need to find out where you can get cheap, new Makita power tools? This article has all the answers.

About Makita Tools

Makita Corporation is a manufacturer of power tools founded in 1915 in Japan. It now has factories across the world from Brazil, Mexico, Canada & United States in the Americas to China & Japan in Asia to Romania, the United Kingdom and Germany in Europe.

A vast majority of their tools are sold in North America & annual sales were reportedly around $2.9 billion in 2012!

The Makita Tools Range at Gypsumtools

Gypsumtools is the place to go for everything Makita. We have a selection of Combi Drills & Impact Drivers and even a Makita Jobsite DAB Radio! Checkout the full Makita product range

With next working day delivery, free delivery on orders over £99, Saturday delivery as well as expert help & advice, shopping at Gypsumtools for your Makita products simply just makes sense!

Makita DHP458Z Combi Drill LXT

makita combi drill

The Makita DHP458Z Combi Drill LXT is an incredibly compact tool with an overall length of just 225mm. This makes the drill the shortest in its class but it doesn’t compromise on power and efficiency.

It also comes with enhanced dust and drip-proof technology making it perfect for outdoor jobs and projects in tough environments. The drill comes with a metal gearbox for long lasting life and a battery fuel gauge too.

Not only this, but with two variable speeds, an adjustable side handle for extra control during usage and an electronic brake, what’s not to love?!


Makita MAKBMR104W BMR104 Jobsite DAB Radio

makita dab radio

The Makita BMR104 Jobsite DAB Radio has been created based on the Model BMR102 and has the capability of receiving Digital Audio Broadcasts. It runs on Makita rechargeable batteries and AC Adaptor.

It also has a super easy to read digital tuner, LCD display, 2 speaker stereo system and an AUX-IN jack for connecting external audio sources. Wow!

Makita DTD146Z Impact Driver LXT

makita impact driver

The Makita DTD146Z Impact Driver LXT has a 4-pole motor, an awesome, ergonomically designed handle as well as a compact design with an overall length of just 138mm.

The Impact Driver also features a handy LED job light with preglow and afterglow functions. Nice.

You can view the rest of the Milwaukee range here

Please bear in mind – if you have any questions about any of the above products, then just give us a ring on 08456 254 321 or you can email [email protected] and we’ll get back to you ASAP.


The Milwaukee Tools Range & Where to Buy Them

milwaukee power tools

Milwaukee is a huge brand and well renowned in the drylining and plastering industries. If you’re wondering what products they make and where you can buy them from then wonder no more, as you’ve come to the right place.

About Milwaukee Tools

The Milwaukee Electric Tool Corporation is a brand which produces a range of top quality, useful tools for the plastering and drylining industries.

These tools include corded/cordless power tools, knives, screwdrivers, trims, hand tools, pliers and tool combo kits.

Milwaukee Electric Tool has been an industry leader in the power tool industry since it was founded in 1924.

These days, Milwaukee is renowned for the M12 and M18 cordless system of power tools which provide ultimate power, speed, torque and durability, perfect for a wide variety of professional applications.

The Milwaukee Tools Range at Gypsumtools

If you’re looking for the best place in the UK to purchase Milwaukee Tools then Gypsumtools is your one-stop shop! Just head over to the Milwaukee product page to view and buy products online in just a few clicks!

With free delivery on orders over £99, next working day delivery, expert help & advice as well as Saturday delivery, there’s no point looking elsewhere for your Milwaukee tools!

Milwaukee Combi Drill

milwaukee combi drill

The Milwaukee Combi Drill is a 1 x 18 Volt M18 CPD Fuel™ Compact Percussion Drill with POWERSTATE™ brushless motor.

The POWERSTATE motor give you upto 10x longer motor life and 25% more power.

Not only this but the REDLITHIUM-ION battery pack gives you upto 2.5x more run time, 20% more power and 2x more battery life than other lithium-ion technologies.

When you combine this with the battery fuel gauge that displays remaining charge, the brightest LED workspace illumination and an all metal reversible belt clip for hanging tools quickly and efficiently, what’s not to love!?

Milwaukee Aviation Snips

Milwaukee Aviation Snips

The Milwaukee Straight Cut Aviation Snips have forged cutting heads which allow for incredible durability and rust protection. The hard chrome plated blades help to reduce corrosion as well as increasing tool life.

The machined steel, serrated jaws of the Milwaukee Aviation Snips can cut up to 18ga CRS (Cold Rolled Steel) and 22ga SS (Stainless Steel).

Milwaukee Rasping Jab Saw

Milwaukee Rasping Jab Saw

The Milwaukee Rasping Jab Saw has a 150mm, thick, strong drywall blade that makes it more resistant for plunge cuts.

It’s also coated against corrosion, fitted with a rubber overmold for comfort and grip and the built-in rasping holes allow you to quickly expand holes or smooth out rough edges.

View the rest of the Milwaukee range

Remember if you have any questions about any of the above products, you can always give us a ring on 08456 254 321 or email [email protected] and we’ll get back to you as soon as we can.