
Drywall is an extremely popular construction material for finishing interior walls. It’s durable, cost-effective, easily installed and repaired, so there’s little wonder why it’s the first choice for both DIYers and contractors.
However, sanding can be slow and tedious work unlike the heavy duty work of moving and installing panels of drywall which is much quicker. It’s often described as one of the worst jobs in home renovating!
Why? Well, it can often be the case that you end up cleaning for much longer than you are actually sanding the drywall!
If you don’t plan correctly, you will need to vacuum several times as dust gets into the smallest cracks although vacuuming drywall dust can even void the warranty on many vacuums. Even then, the dust is so fine that it gets into everything and is difficult to remove, or even to vacuum.
To avoid all of this drama, make sure you invest in the appropriate sander equipment and protect yourself and your belongings from dust before you get started. Remember that you will be preparing your walls for paint or wallpaper, so you will need to make sure you achieve a smooth finish.
A good primer or sealer may help hide any imperfections on your walls but sanding is the last chance to get everything right beforehand. Sanding can only be done well if you have taken care with all the other processes, like taping and mudding.
If your sanding is not done well, it will show when the paint is dry. At the top of the list of important know-how is proper sanding technique.
Sanding drywall is the last step in the drywalling process. So after you’ve hung and taped drywall, follow these steps to sand it perfectly smooth.
Preparing Your Drywall for Sanding
If you’re using basic sanding tools and products, the only way to prevent dust damage and inhillation is to:
- Seal off the room with plastic in the doorway so that dust does not escape into the rest of your house.
- Properly ventilate the room, but do not open all windows, as this will cause the dust to circulate.
- Lay a drop cloth on the floor to catch the dust.
- Covering any furniture in the room with plastic.
- Wearing goggles and a dust mask to protect yourself from dust inhalation.
- You might also want to wear a hat to keep dust out of your hair.
- A Dust Mask offers some protection against large particle inhalation.
Whilst all of this is good advice for a dusting novice, there are a number of tools that we at Gypsumtools stock that can prevent all of these problems…
Sanding Tools for Drywall
We’ve already covered off some of the protective clothing and materials you can use to prevent any damage to your room, but what about the Drywall Sanding Tools themselves?
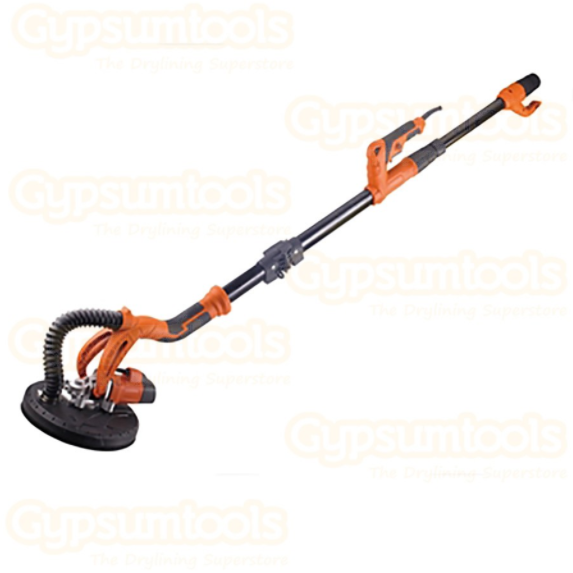
Giraffe® Wall & Ceiling Sander
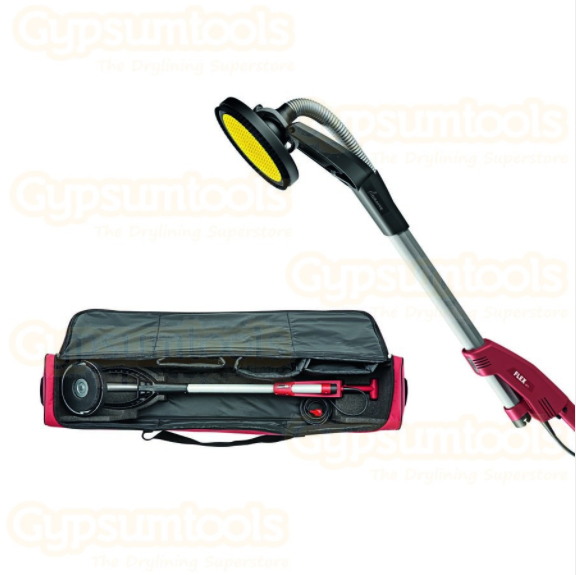
The Giraffe® Wall & Ceiling Sander is electronically controlled, has soft-start, overload protection and also speed selection with adjuster wheel too.
With it’s dust-proof on/off switch and effective dust extraction, this tool really does promote a dust-free working environment
Flex Safety Vacuum Cleaner With Automatic Filter Cleaning System
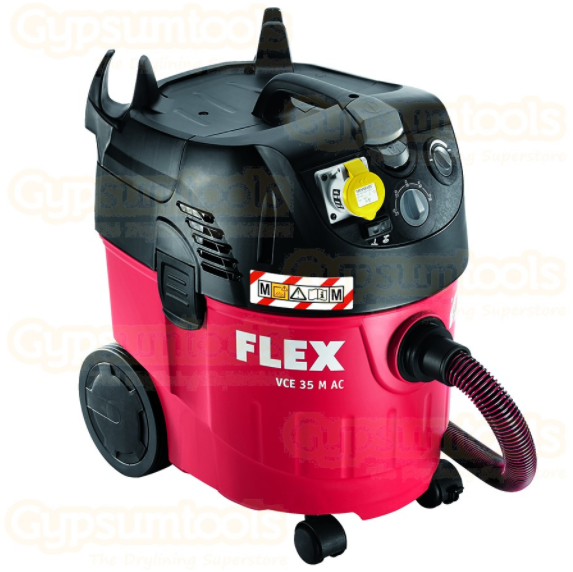
The Flex Safety Vacuum Cleaner comes with an Automatic Filter Cleaning System giving you an excellent extraction result.
The Class M safety vacuum cleaner is suitable for all dusts.
The Vitrex sander for drywall has a super powerful motor that makes sure enough power is transferred to the sanding pad for smooth operation, always.
The double dust extraction system helps keep the work area clean and free from debris.
Sanding Drywall Steps
As mentioned before, Drywall Sanding can be frustrating and messy, but it can also be fun and easy if you follow these simple steps:
- Avoid Oversanding – Oversanding can damage the face of your drywall and leave scuff marks. Always sand lightly to start with, you can sand more if it’s not enough.
- Use a Pole Sander – Pole Sander’s are perfect for reaching hard to get places such as tall walls. It also allows you to do longer strokes as you sand. Always keep the sanding head angled slightly to avoid any slippage.
- Wet sanding – You can use water as lubrication to get rid of grit particles that are removed from sanding. Without any liquid, materials can build up in the sandpaper and leave behind scratches that ruin your wall.
- Hand sanding – Power sanders are crucial for getting the majority a job done quickly and efficiently as well as giving you a great finish. However, if you want to finish off little bits that you may have missed with the Power Sander, hand sanding works a treat, even on Drywall.
- Use a Sanding Sponge for Corners – Sanding sponges are much less likely to damage the opposing wall when sanding a corner
For more information on Power Sanding Tools & Drylining Tools then check out our blog or contact us