What Is Drywall Taping? 

drywall without taping

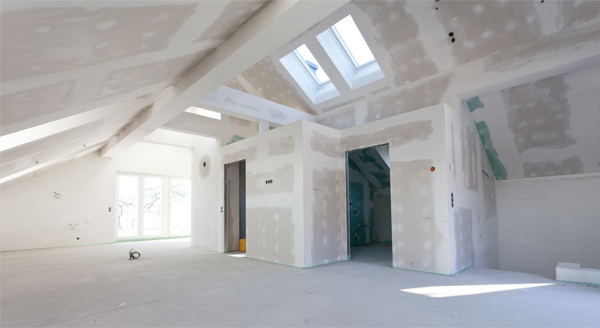
If you have a spot of DIY or home improvement on the cards and haven’t come across the art of putting up drywall before, then you might be wondering what is drywall taping.

Essentially, it’s a really useful way of covering the joints and seams between drywall panels to leave a smooth and flawless finish on your wall.

Looking to learn how to tape drywall corners? Unsure how to tape drywall ceiling or simply how to use tape for drywall? Then read on…

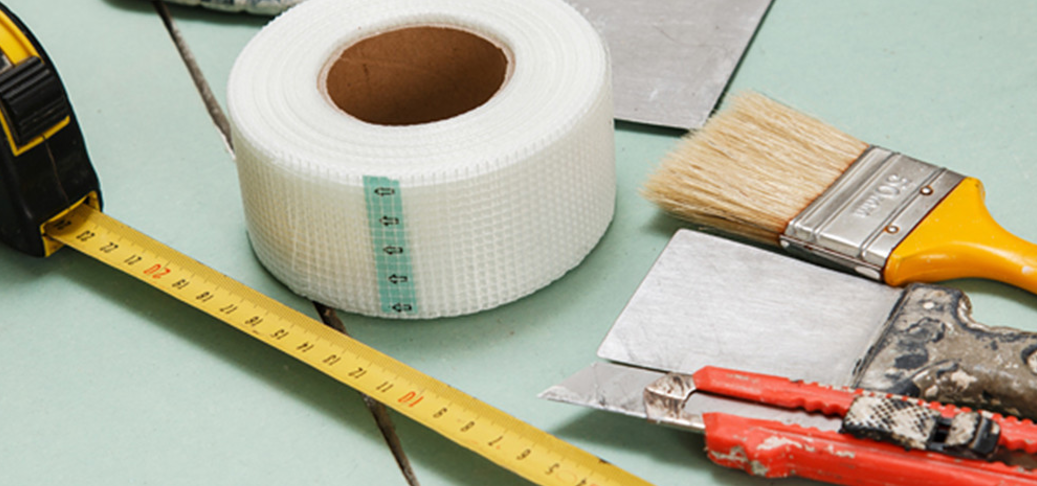
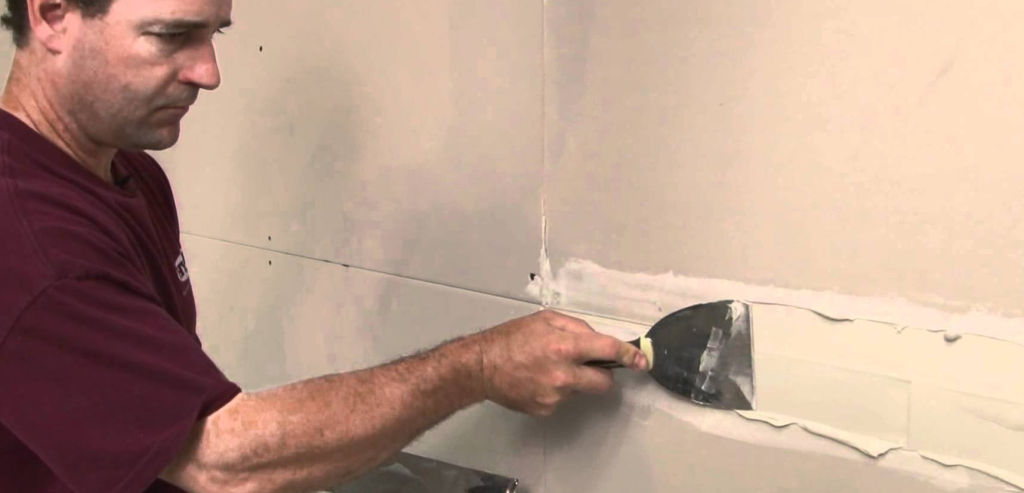
When putting up drywall panels, you would fill in the seams or gaps with a small amount of joint compound, spreading and smoothing it evenly with a putty knife to the level of the wall surface. Then you can gently smooth the paper tape over the top until it sticks to the wall. If some of the mud comes out from under the tape, it can be feathered away to give a smooth surface.

Drywall taping is the way you create a strong bond between the sheets of drywall. Then a thin layer of joint compound is smoothed over the top to finish.

When drywall taping is done correctly, it’s impossible to detect where one-panel finishes and another begins, once the wall is painted, so it is the choice of many a drywall professional, especially when time and quality of finish are important.

Why Do We Use Tape On Drywalls?

Drywall tape is made from plain paper, which is a similar texture to the drywall panels. It comes in a roll which can be applied along the joints by hand or by using an automatic taping tool.

As well as covering the basic joints between two adjacent panels, it can also be used to cover internally. At this point the tape would be folded in half before being pressed into the corner, thus creating a seal that hides the area where the panels join.

Some people in the drywall industry ask about the need for tape for drywall and whether it would be just as effective to fill the joints with mud and smooth it over.

drywall without mudding

Why You Should Use An Automatic Taping Tool For Speed 

As we mentioned earlier, it is possible to apply the tape by hand, but if you’re able to buy or rent an automatic taper which applies compound/mud at the same time, then you can save yourself an awful lot of time, effort and money. The difference in taping time between using a machine and doing it by hand is actually pretty impressive.

The automatic taping tools are not only quicker at getting your drywall job finished, but they are also safer to use, as you can reach areas such as ceilings without the need for ladders or stilts.

If you’re looking to invest in an automatic taper, then we have some great examples by Level 5 and Northstar which will work perfectly with your tape.

Order Your Tape Online

When you’re in need of some extra tape for your drywall job, or you’re looking for the kit you need to get started, you can order your drywall tape online with Gypsumtools today and benefit from safe and speedy delivery direct to your door.

If you have any issues with your ordering process or have a few questions then please get in touch and a member of the team will be in touch to help you out!

Find out how you can make huge savings on our taping tools with our Taping Tool Kit Builder, featuring DeWalt and Level 5 taping tools.

Drywall Tool Repair 

Drywall Tool Repair

Drywall Tool Repair

Whether you’re a professional dryliner, or have a spot of drywall DIY on the cards, it always pays to have the right tools for the job and to know that they’re in the best working order for when you need them.

That’s why, at Gypsumtools, as well as offering our customers a wide range of drywall tools and accessories to buy from new, we also provide drywall tool repair and servicing which is carried out by our highly experienced and qualified technicians.

When you want to know that your drywall kit is in tip-top working order, not only can they do any repairs that are needed, but they conduct a full inspection to identify any parts which might not be working the way they should. These can then be replaced if necessary.

These days people often go for the automatic taping tools to help them with finishing drywall, because they know that they can help save on time and effort, while getting a high quality finish at the same time.

Some of the benefits of using tools such as an automatic taper include the fact that it uses just the right amount of compound with less wastage, offers a safer job thanks to the greater reach, and a quicker completion time, saving you money and allowing you to move on to the next job faster.

Why You Should Service & Repair Your Auto Taper

When you’ve made the decision to buy an automatic taping tool, it goes without saying that you will want it to last for as long as possible and continue to give you great results for years to come. And, despite the fact that they’re built to last, this is the main reason why you should service and repair your auto taper.

Taking care of your drywall tools is the only way that you can ensure you get the maximum lifespan out of them and avoid paying for more costly repairs further down the line, if they are identified before they become worse.

So what sort of things can you expect from a taping tool service?

  • Skilled in house taping tool technicians
  • Staff with up to 10 year’s experience in the field
  • Full inspection of the tool to locate any problems
  • Repairs made if necessary
  • Clean and lubricate all repairs
  • Removal and replacement of worn parts
  • Full service of any types of taping tool
  • Factory adjustments made where needed
  • Genuine spare parts used

And we will keep you informed every step of the way, so you can rest assured that no hidden costs will pop up suddenly. If you need any parts replacing, we will call to let you know before we carry out the work.

We Will Collect, Repair And Deliver

There’s no taking time out of your busy work day to get your tools serviced and repaired either, because we will collect, repair and deliver them back to you, while you get on with other parts of the job.

So, not only will you save time and money by having a fully serviced and functional taping tool, but there’s no losing out on work while you get it repaired.

We provide a service and clean for a range of drywall tools, including automatic tapers, compound pumps, nail spotters, flat boxes and corner applicators and finishers.

Contact Us Today to Discuss Your Drywall Tool Repair

Save yourself a drywall nightmare by getting your taping tool repaired or serviced before it breaks completely without warning. Give us a call today to discuss your drywall tool repair and have it working the best it can.

What Is Joint Compound? 

When renovating, redecorating, or building somewhere new, chances are you’ll come across joint compound at some point in the taping process. And of course, if plastering is your profession, it will be something you’re already fully acquainted with.

For those wondering what is joint compound, then it’s a material that can be used as an alternative to traditional plastering to finish joints, corner bead, trim and fasteners, as well as for skim coating whole walls and ceilings. It’s not always referred to as joint compound either, often you might hear it described as mud or drywall taping mud too.

How Is It Used?

Joint compound is a creamy, toothpaste-like material, commonly used these days in hanging drywall in new builds and renovation projects, thanks to the speedy and simpler application than you might find with plaster.

It is spread across a surface to give it a smooth finish or cover up any blemishes or holes. And, in fact, many prefer it, because there is less level of skill needed and it is widely considered to be more forgiving than plaster, because of the greater possibility to smooth out and rectify mistakes.

What types of Joint Compound are there?

There are two main types of joint compound and here are the things to weigh up when you’re considering which joint compound to use:

Setting type joint compound

  • Like plaster, setting compound comes as a powder which needs to be mixed with water and sets to a very hard finish.
  • It is more moisture-resistant (which makes it great for damp areas, such as bathrooms).
  • It sets very fast (perfect if time isn’t on your side).
  • It comes with a variety of drying times, depending on the job you need it for and the area that you’re covering.
  • It hardens quickly and shrinks very little, which means less chance of cracks.

Ready-mixed joint compound

  • Considered to be the easiest option as it comes ready-made, which means no extra time spent mixing it up and less time clearing up afterwards.
  • Easier to spread then the setting type.
  • Water soluble (a plus point if you need to rectify mistakes, not so much of a good thing if you’re working in a damp area).
  • Sands very easily.
  • The fact that it hardens slowly over time through evaporation (or air drying) means it can be easily manipulated.
  • And there’s no racing against time before it dries, so it’s perfect for large areas.
  • The downside is that it takes a long time to dry (sometimes 24 hours), so you may only want to use it for a final coat or minor wall imperfections.

How is joint compound different from plaster

Plaster, as we know, is a material which has been used for centuries and there’s a good reason for that – it’s super tough. That’s why the walls of great castles and cathedrals have remained unblemished for hundreds of years. Plaster is pretty much impossible to damage with water and many kinds of impact, which is why these kind of walls have remained intact for so long.

Joint Compound Vs Plaster

But the thing about plaster is it takes a lot of skill to apply. And if you don’t know what you’re doing, then it’s a lot harder to fix your mistakes than it is with joint compound. So, while a highly experienced plasterer may take pride in the workmanship and levels of expertise needed to use plaster (not to mention, the durability of plastered walls), another plasterer, who is looking for speed and precision might favour joint compound instead.

Joint compound is also much easier to sand, which is why, when fixing plaster walls, people will often use this, instead of gypsum plaster to do it.

Order Your Joint Compound online

We have a range of joint compounds available at Gypsumtools. Order your joint compound online with us today.

The Benefits of Premixed Jointing Compound 

Drylining professionals and plasterers in general will all be aware of the greatness of things that help save time, money and effort in the workplace, while enabling them to achieve an excellent finish.

That’s why, when products hit the market that help you do just that, it’s a welcome sight all round. If you’re wondering about the benefits of premixed jointing compound and whether it really is as good as it says on the tin, then read on, because we have a perfect example of all the plus points above.

Our GT3 Midweight All-purpose Joint Cement is designed for the drywall finishing professional and made under strict quality and process controls exclusively for Gypsumtools.

Its aim is to save on effort and use of materials, not to mention offering the plastering industry the opportunity to finish drywall faster, with easy application and no dust or waste.

When finishing gypsum panel joints it can be used for everything from embedding tape to finishing joints, fasteners, corner beads and drywall trims to topping and texturing.

It is especially perfect for use with Level 5 automatic taping tools (which we also have in stock) and it also comes in handy when applying manually.

Coming straight from the box, premixed jointing compound is not only ideal when no water is available to mix it up, but it’s the fact that it’s ready to use virtually straight away, which makes it the choice of many professionals, water supply or no water supply.

It is also 30% lighter than traditional plaster and sands easier than other compounds, making your job easier and faster with excellent finishes.

Save Time & Money

Not only does the ready mixed compound give a super smooth, virtually pock free finish, but the ready mixed nature of it means you’ll save around an hour and a half in prep time per day, minimise the effort needed to do the mixing and reduce the amount of clearing up needed afterwards.

So, what you’re looking at is a big saving on the muscle fatigue that comes from lots of mixing time and an excellent finish in a fraction of the time. The fact that you’ll be able to get it finished quicker will also mean you can move onto the next job in less time and save money by doing so.

How to prepare your premixed compound

The creamy, smooth texture of the premixed compound is ready and waiting the minute you open the pail – all you need is two minutes of stirring with a Mixing Wheel.

You should ensure that it’s stored at room temperature for at least 24 hours prior to using it and contents should be poured into a mixing container, such as a clean, plastic bucket. After you’ve given it a light mix, also remember to do a small test to check it’s the consistency you need. If you find you need to add a bit of water, only use half a pint at a time, remix and test again. (Remember to not overmix as it’s this which might lead to pocking).

The compound should only be applied over dry surfaces and each coat should dry completely before applying another.

round up of the benefits of premixed compound

  • Save time
  • Save money
  • Less effort in preparation
  • Faster and easier to apply
  • No need for water
  • Reduce dust and mess
  • High quality finish
Order in Pallet Bulk Size or In Trial Size

Why not try out our premixed joint compound on your next drylining job and see how well it does? You can order online in pallet bulk size or if you’re simply looking to give it a go, try our trial size for starters.