So you’re about to embark on the road to becoming a fully trained professional plasterer? That’s great news – but what exactly do you need to get started?
Understanding what tools an apprentice plasterer needs can be challenging, especially if you’re completely new to the industry and starting from square one. That’s where we come in!
As one of the UK’s leading suppliers of plastering and dry lining equipment, we’re perfectly placed to help you get the tools you need at a great price.
What tools do you need as part of your apprentice kit? Don’t panic, we’re going to run through a complete kit so you know exactly which tools you need to start your plastering journey.
This is the complete apprentice plastering kit checklist so get your notepad out, here we go!
The Checklist
As a minimum, any plastering apprentice will need the following tools to start work on site:
- Plastering Trowel
- Bucket Trowel
- Hawk
- Water Brush
- Corner Trowel
These tools are required for any novice plasterer learning their trade – as time passes, you’ll need a few more as your skill level improves, but the list above covers the basic techniques. All our apprentice kits contain these tools as a minimum, so check these out if you’re looking for a comprehensive collection of plastering tools.
Before we get to the tools in more detail, there’s one brief but important point that needs to be made. We often get asked if buying cheap plastering tools is worth it, and the short answer is no – you’ll never get a high quality finish from a low quality piece of equipment, so if you’re serious about becoming a professional and reputable plasterer, you need to invest in your tools set.
Not only do the better tools give you a better finish, they’ll also speed up your work and generally make life on site that bit easier for you.
Anyway, back to the list! First up, we have the most important tool in your arsenal…
Plastering Trowel
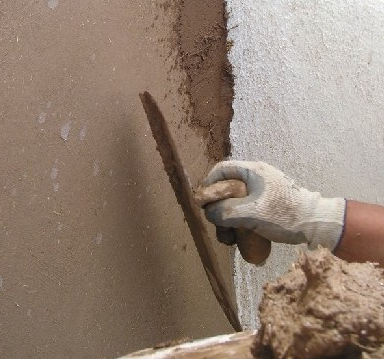
If you’re going to plaster a wall or ceiling, you’re going to need a trowel of course. Choosing the right trowel for you can be tough as there are thousands on the market, but our apprentice kits use trowels selected from respected brands like Marshalltown and Nela.
When you’re starting out and learning how to plaster, we’d suggest starting out with a 14” trowel as this brings the perfect balance of size and control. Too small a trowel and you’ll struggle to hold the plaster when applying it to a wall; too big and you won’t be able to develop your technique effectively.
Learning how to use your plastering trowel correctly will be tough at first, but once you get the hang of it you can look to upgrade your tool.
Whatever you do here, don’t go for something cheap – your plastering trowel is what will deliver the high quality finish so it makes sense to invest. We recommend the Marshalltown 14” trowel which comes as part of the Marshalltown apprentice kit.
Bucket Trowel
Another key tool is the bucket trowel, used for scooping up your plaster before applying it to the surface. Again there are thousands of options here just like the plastering trowel, but it’s slightly less critical to invest in quality here as this tool doesn’t directly impact the finish of your work.
All our apprentice kits contain a bucket trowel as standard.
Hawk
You have a choice of material when it comes to plastering hawks – plastic or aluminium.
In some cases, apprentices can find plastic hawks easier to use due to their lighter weight. That said, because they’re made from plastic they have a tendency to snap after periods of extended use.
Aluminium hawks are included in our apprentice packs as they are stronger and more durable, making them a longer-lasting option. They can be slightly more tricky to use because of their weight, but aluminium is still quite light and there’s no risk of the hawk snapping.
Water Brush
All apprentices will need a water brush as this is used towards the end of the plastering process to give a perfect finish to the final coat of plaster.
It’s also a handy tool to have around when you’re running behind schedule and the plaster is starting to set – a quick wipe with your water brush and you can save your walls.
Again, water brushes are dime a dozen but the cheap knock-off versions will leave bristles in your plaster and delay you on site. Invest in a reliable branded tool here.
Corner Trowel
Last but by no means least, we have the corner trowel. Another crucial tool in your kit, the corner trowel is used to smooth down the plaster in the corner of a room.
When you’re working on an entire room, you’re going to need to plaster in the corners where the walls meet. Without a corner trowel, leaving a high quality finish at a 90 degree angle will be almost impossible.
Our apprentice kits always include a corner trowel as standard, usually from reputable brands like Marshalltown and RST.
Summary
This concludes our list of the key plastering tools any apprentice needs to start their journey of becoming a professional plasterer. This isn’t an exhaustive list and it’s likely that you’ll need many more tools on the job, but this list is a great place to start.
Don’t forget to check out our range of apprentice kits designed to give you all the tools you need at a fantastic price!


