
The History Of Plastering

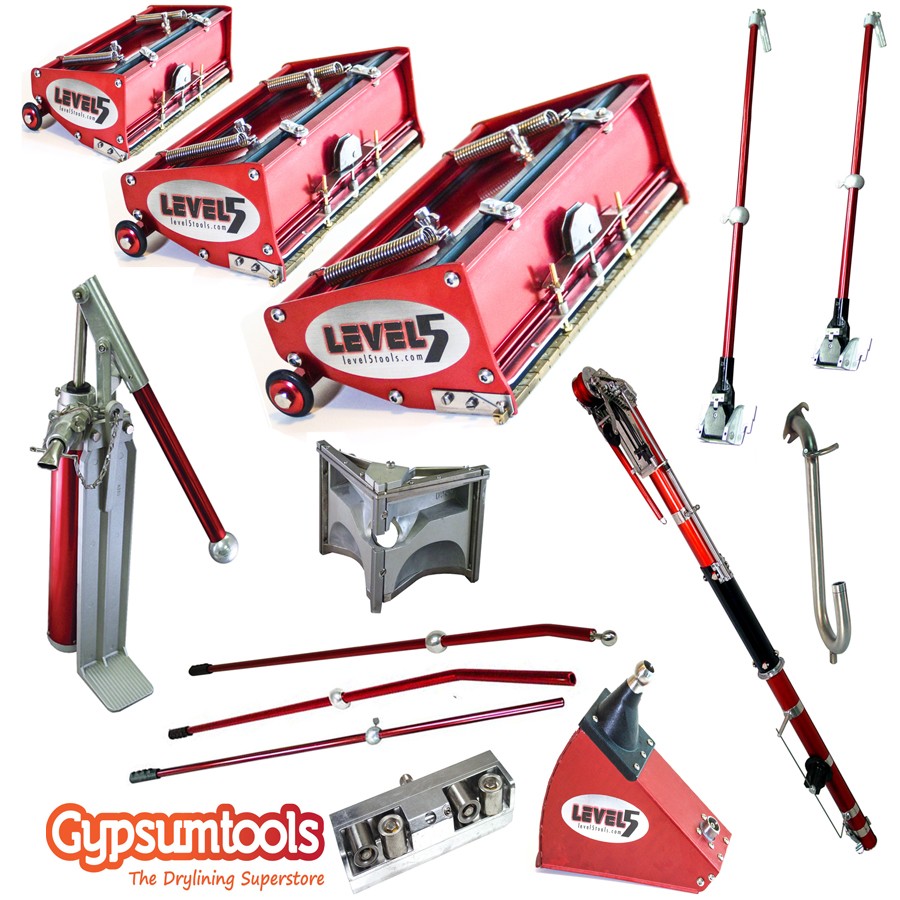
When it comes to putting up drywall, it certainly pays to have some of the best tools there are. Ones that you know won’t let you down, no matter how tough the job is and ones that will keep going strong from the moment they’re out of the box.
At Gypsumtools we scour the corners of the globe to find the best plastering tools available at the best possible prices, so that they make the grade whether you’re a professional plasterer or a DIY enthusiast with a one off job.
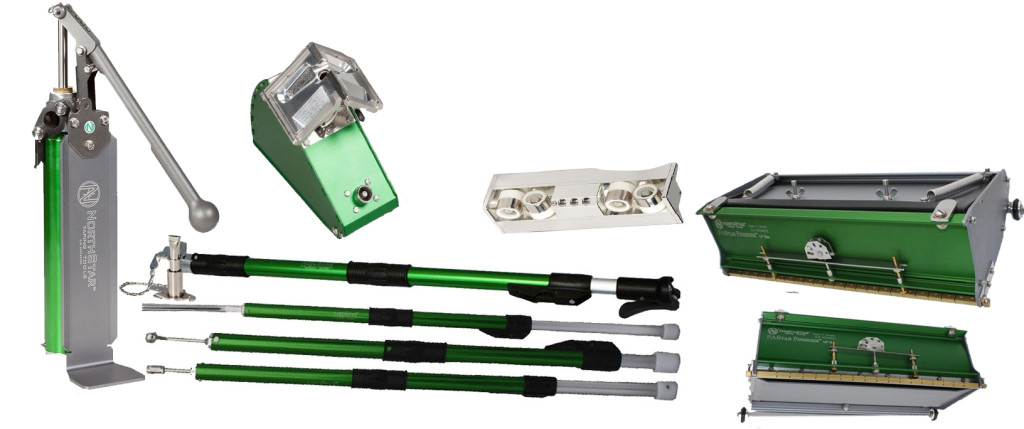
It’s because we take pride in sourcing the best plastering products that we are pleased to announce that Gypsumtools is now stocking NorthStar Taping Products.

Putting up drywall can be a tiring job, with the finishing part often proving to be the most trying bit, especially if you don’t have the right kit to hand. NorthStar’s aim is to take the pain away by offering a range of top quality, ergonomically designed tools that you can rely on.
If you’re looking for more information about NorthStar products, or would like to browse through the complete taping range, we are pleased to say that, as the exclusive UK distributor, you’ve come to the right place to find out more.
NorthStar is one of Canada’s leading automatic taping and plastering tool suppliers, with over 40 years’ experience in the field. It’s a company which is committed to the sort of ongoing innovation and excellence that puts them firmly in the running as a plasterer’s brand of choice.
Their flagship product, their automatic taper, has an impressive list of selling points, including adjustable paw roller systems which let you run the tension you prefer and adjust for wear, an adjustable cutter spring system that allows for tension adjustment and easy blade change adjustment, as well as an open cutter spring system which provides strength and allows for easy cleaning and lubrication.
We are really pleased to say that Gypsumtools is stocking the complete taping range by NorthStar, because we know that these products can go a long way towards making our customers’ lives easier, by offering them reliable tools that will get the job done in no time.
You can choose from a range of NorthStar tools and packages – from the automatic taper on its own, all the way through to the NorthStar Pro Performance Set, and Pro Premium Set.
One handy piece of kit especially worth taking note of for completing a drywall job quickly and well is the NorthStar Starter Finishing Set. This comes with flat boxes and handles, corner applicator, finisher and roller, plus handles, as well as a loading pump and filler nozzle.
As with all Gypsumtools products we offer fast delivery times from our UK warehouse, whether it’s on site or to your home (Next working day delivery on orders made before 12pm).
To find out more about this excellent new range of products that we have in stock, you can either take a browse through our products online or contact us to discuss NorthStar Taping Tools.
Our friendly, professional and experienced staff are always on hand to offer help and advice where it’s needed.
Find out how you can make huge savings on our taping tools with our Taping Tool Kit Builder, featuring DeWalt and Level 5 taping tools.
Most people love a bargain and in this day and age, as we all take a deep breath and pull our belts firmly in, the chance to save yourself a wodge of cash on some top quality tools is one to not be sniffed at.
At Gypsumtools we pride ourselves on our reputation for offering a great range of plastering tools and equipment to suit any plastering job, whether you’re a professional plasterer, or DIY enthusiast who fancies a go at a bit of drywall.
This mark of quality works across the board as far as we’re concerned and that’s why, even when it comes to the stuff that’s in our cheap plastering equipment clearance section, you can still rest assured that it will be of a great standard and get the job done well.
The only difference is that in some cases it’s half the price…

If you’re looking for some discounted plastering equipment that is still top notch, why not take a browse through some of the bits and pieces that have made it through to our bargain discount area.
From plastering tools to accessories, there’s quite a bit in there at the moment, so it might be a handy time to pick up a new piece of equipment that you need. Here are just a few heavily discounted examples to choose from:

The great thing about our bargain discount area is that you’re looking at rock bottom prices for equipment that we’ve still hand picked ourselves. So this is pretty much the best of the best when it comes to the lowest prices and the highest quality.
If you like what you see in our discount section, you can order your products today for next working day delivery on orders made before 12pm. So, if a piece of kit fails on a job, you’ll know its replacement is winging its way to you with no need to down tools to go fetch it.
For further information about any of our products, feel free to drop one of our team a line with any questions. With over 50 years experience in the trade we’re always on hand to help where we can.
We’ve talked in previous blog posts about how the use of automatic drywall taping tools can have a host of benefits when compared with doing the work traditionally by hand. But, when you invest in an automatic taper, you’ll want to know that it has the sort of mark of quality that won’t let you down in a hurry. After all, the pluses of using it have to outweigh the initial cost of buying one.
When we source plastering tools and equipment from companies all over the world, we listen to what people are saying about them and we see for ourselves how they work. We want our customers to have the best quality tools at the best prices and that’s where more than 50 years experience in the plastering industry comes in useful.
At Gypsumtools we like the Level 5 brand, because, unlike many budget brands that are out there, the quality of their tools is pretty superior, with prices starting at the sort of figures you might pay for even second hand tools.
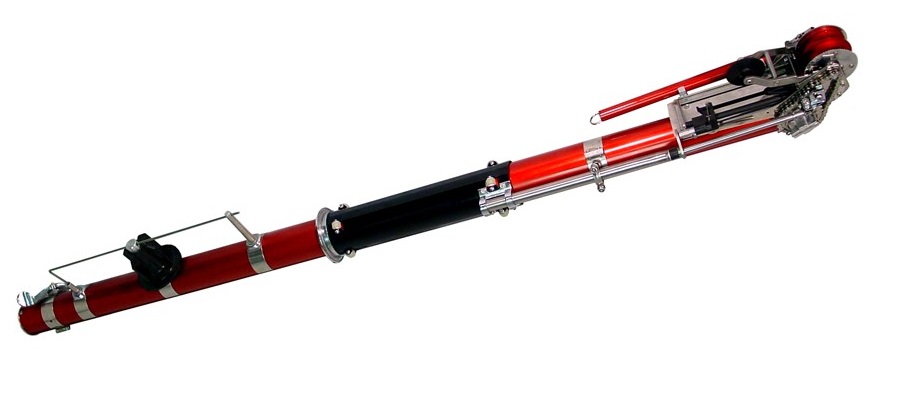
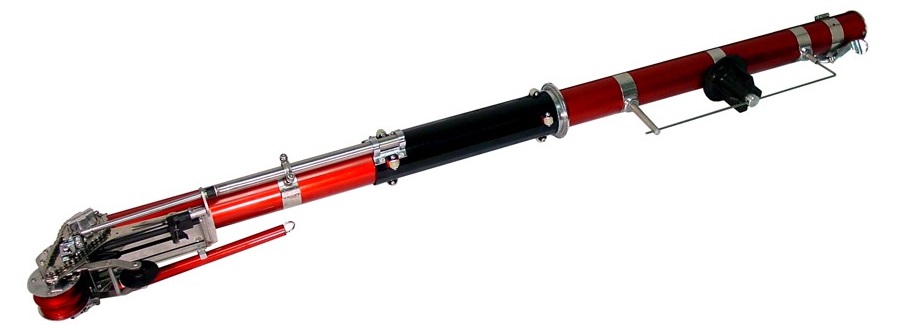
So, that’s why, when you’re a professional plasterer looking for a decent every day automatic taping tool to add to your kit, a good option is to buy Level 5 Drywall Bazooka online.

The name bazooka speaks for itself really, but if you are wondering how can a drywall bazooka taping tool help you, then the benefits are definitely worth taking note of.
First off, there’s the time saved, because you know it’s going to apply the correct amount of compound at the same consistency throughout, saving you time in concealing your drywall joints and getting an impressively flawless finish at the end.
The safety element comes in with the fact that it can reach places you would normally need a stepladder or stilts for and it also means less muscle fatigue in trying to get to those hard to reach places. And because it decreases the time taken to do it to a good standard, it means less drain on your energy resources at the end of a laborious job.
https://www.youtube.com/watch?v=rRmJkndlrGQ
If you want to find out more about the Level 5 Bazooka Taping Tool, take a look at the demo video and details that we have on it online. Some of the great features of the bazooka include corrosion-resistant, coated, aircraft-grade aluminum which resists job site damage and provides superior durability while prolonging the plunger life and reducing seal leakage.
Stainless steel side and internal plates mean greater performance and durability, offering a tool which will not corrode over time. Also, the cast aluminum head components are precision-machined from high-grade cast aluminum for added strength, while the manufacturers claim that the urethane cup seal lasts 50% longer than those used in other products.
![]()
If you’re looking for an automatic taping tool that is of excellent value, but still great quality, you can contact us with your Bazooka Taping Tool enquiry today. Or for further information, why not take a browse through our extensive range of plastering products online.
Find out how you can make huge savings on our taping tools with our Taping Tool Kit Builder, featuring DeWalt and Level 5 taping tools.
There’s a lot to be said for taking pride in using traditional plastering methods and seeing a job done properly, professionally and well. However, the fact that there are tools out there which make the job easier, while still achieving flawless results, should definitely not be ignored.
Finishing drywall can be a painful, lengthy and laborious task when done by hand, because, after you’ve put all the panels up, the task of effectively concealing all the joints can take some time – not to mention if you have a load of sanding to do afterwards.
So, how can a drywall automatic finishing set help you?
Well, first off, there’s the consistency factor, because drywall taping tools will apply the correct amount of paper tape and compound at the same time, with the same consistency and thickness all the way along. Because of this, you will be guaranteed a more flawless end result which means less unhappy customers and less call backs.
The taping tool is also safer because it reduces the need for balancing on stilts and stepladders to get up to hard to reach places, creates less dust because of less sanding afterwards and there’s no need to be stopping every five minutes to scoop up more compound, so again, no climbing up and down ladders.
There’s no worry about creasing the tape on your corners either, because the finishing set comes with a corner roller. And, talking of corners, the corner applicator and finisher allow you to finish both sides of a corner at the same time. Just that should be enough to make you turn your back on the traditional applicator knife!

Yes, there are certainly a lot of upsides to using a drywall automatic finishing set, but you might be wondering why buy the complete set? Why not just buy it in separate parts?
As with any set of tools, there comes a certain amount of discount to be had with buying in bulk. Not only this, you will know you have everything you need to get the job done. There’s no forgetting an essential piece of kit and having to down tools to go get it.
If you check out our Level 5 Starter Finishing Set, for example, it comes with everything you need – from flat boxes and a compound pump to 8” corner applicator, 3” finisher and rollers plus handles.
The Level 5 brand is widely respected around the world because it offers high quality, innovative and effective tools that come at the same prices that some worn out tools sell for. It also has a five year warranty on the rare chance that something might go wrong.
https://www.youtube.com/watch?v=ICYz5tGm96c
If you’re interested in new drywall finishing tools that will get the job done quickly and professionally every time, then you can order your Level 5 auto taping tool set from us today.
At Gypsumtools, more than 50 years experience in the plastering industry means we actively look for the sort of plastering tools and equipment that will do the best job for our customers while not breaking the bank. If you have any questions, feel free to contact us with your drywall automatic finishing set enquiries. Our professional and friendly team would be more than happy to assist.
The last thing you want is imperfections on your wall that are going to bug you for years to come so first off, make sure when you plaster a wall that you follow the six stages of plastering in the correct order, that you keep your tools clean and have the right kit to hand.
We have put together the ultimate guide to plastering a wall which will take you through the stages you need to follow, show you what you need and explain exactly how to master the perfect layer of plaster – with some handy hints and tips added in along the way!
Click here to see our plastering tools and equipment – we stock everything you need!
You may be wondering about the kit needed to get you started. After all, its always a good idea to be prepared well in advance, so you don’t have to down tools and leave the job halfway through to stock up. It therefore would be useful to make sure you have the following:
1.Plasterer’s trowel and bucket trowel
4.Hawk
7.Plaster
8.Clean Water
10.Stepladder or stilts
11.Flat Mask
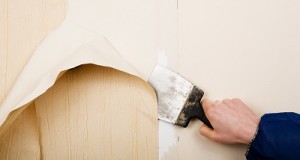
Using a hawk and trowel correctly can be quite a challenge to start with if you’re not used to handling them, so before you put the layer of plaster on the wall, practise using them effectively so you don’t end up in a mess.
Before you start, make sure your wall is clean by removing bits of existing plaster, dust or wallpaper as you go and check the suction of your wall to make sure it isn’t too porous. If this is the case, it will suck the moisture out of the plaster so fast that it won’t have a chance to work before it dries. So, control the suction of your wall with water or PVA, which should satisfy the thirst of the wall, stopping it from stealing the moisture from your plaster too quick.
Low suction backgrounds, such as painted surfaces will also need to be properly prepared, perhaps by using a mix of PVA glue and water to ensure the plaster sticks to the wall. You could also try adding a handful of sand to the PVA glue mixture to give it a rougher texture and better adhesion when you apply PVA. You’re then ready to start plastering your wall.
Click here to see out plastering tools and equipment – we stock everything you need!
Plaster and water mix together roughly half and half – so half a (clean) bucket of water should make a full bucket of plaster. When mixing up your plaster it should have a thick, creamy consistency with no lumps. Try adding just enough to make a heap on top of the water to start with and the dry plaster must be added TO a bucket of clean water, NOT the other way around.
TIP – When plastering a room, try not to do two walls that are touching each other as you risk damaging one wall while plastering the other. Turn all radiators off in the room too, to stop the plaster drying too quick. Beginners should start on a small area first to ensure they’re getting the technique right, so start with an area which only takes 30 mins or less for the first coat.
Tilting the hawk towards you, skim a small amount of the plaster from your hawk onto your trowel in one swift smooth movement (this can take some practice). Then run a horizontal top border line along the top section of the area you are looking to plaster and try to work from right to left. Work the plaster right into the edges creating a flat even layer of plaster. Don’t worry at this point about small holes and ridges, or smoothness, as long as that first coat is flat and even. It should be around 2mm thick (no more).
Every time you do a sweep upwards, go over it with a fairly flat trowel at an angle of 10-15mms to flatten everything you’ve just done. Remember you are looking for a flat and even surface here, with no bulges – don’t worry too much about trowel marks at this stage.
It could be the case (especially if it’s your first time) that you haven’t gradually decreased the angle of your trowel as you moved along the wall, perhaps you flattened the trowel to the wall too soon or overcompensated and things got quite messy. If this is the case and you have ended up with lots of levels of thickness you can go over it again with a fairly flat trowel angled at about 10mm to flatten out where you’ve been. Combine the flatness of the trowel with firm pressure all the way through to flatten and fill in any holes.
If you’re going too quick and not flattening the trowel quickly enough, you may get the scraping effect which means the top edge of the trowel is coming away from the wall, so it needs to come in a bit. The secret here is to go slowly and keep an eye on the gap between the trowel and the wall, using a firm pressure as you go.
Click here to see our plastering tools and equipment – we stock everything you need!
Also, when you plaster a wall, remember to try and remove annoying bits of grit straight away and make sure you keep everything clean. The next stage is to flatten the first coat off and give your trowel a quick clean. The sole purpose of this stage is to get your wall flat and knock the ridges back because if you don’t at this stage, you are just plastering over an already uneven wall once it has dried and this can only lead to an even more uneven, bumpy wall further down the line.
So, wait until the plaster is tacky and run your trowel over the wall. It’s important to wait until the wall has dried to a tacky consistency (and this can take between 5 and 15 minutes) because if not, you won’t notice the improvement.

Perhaps try putting a small amount of plaster on a piece of off cut and work out how quickly it dries before you attempt a large section of your wall – after all, it’s when the wall has gone tacky (firm, but not hard) that the imperfections can be removed using a trowel. If the plaster has dried completely, only sanding the wall will remove the holes and ridges and this can be a painful and laborious task.
Once you’ve flattened out your first coat of plaster, next is time for the second coat. This is similar to the first layer of plaster but it’s thinner, so use smaller amounts on your trowel. Aim for around 1mm of thickness and a flat even coat.
Also remember to push firmly with your trowel again, because if you don’t push hard enough when you run the trowel over the wall, you could end up with a series of holes. So push hard enough to push the plaster along the whole length of the trowel and into the holes using firm pressure. Move the flattish trowel along the wall with a leading edge of around 10-15mm and combine this with firm pressure.
Click here to view our entire range of plastering and drylining tools!
Don’t worry so much about trowel marks, you may even notice ridges caused by the trowel get worse when doing this, but these will be pushed out in the next stage when the plaster is a little firmer. Try and just focus on not leaving too many holes and make sure everything ends up nice and flat by the time you have finished the second coat of plaster.
Ensure all excess plaster is removed from the corner, then it can be formed with a brush. A paintbrush is useful here – just wet it with clean water then flick off the excess water. Point the paintbrush more at the wall you are skimming up to and run the brush in big strokes up and down the corner. Generally at this stage the plaster can be quite wet so use a little pressure.
Any brush marks left in the corner can be lightly trowelled out – but again if it is really wet it may be better to leave until the next stage. You can use water at this point to get a good clean, but don’t flick too much water on your walls unless you need it, or you can end up with a slurry effect on the plaster. Pass the trowel over sections of the wall and look for hollow areas or holes, then work the plaster into them. Moving from left to right, cover the whole area, working the plaster around the wall to keep it flat and fill hollow areas.
Again the trowel marks will come out later on. Leave the wall to get tacky once more and then it’s time to get the trowel marks out – this is called the trowelling up process. As the plaster sets it will darken in colour, which means it’s time for the final trowel.

Bear in mind that as you complete the finish, the float can pull plaster from high spots on the wall to the lower spots, but remember, you can always add more plaster where and when it is needed or wipe any surplus from your float onto your hawk. The main thing when plastering a wall is to remember to work through all of the different stages one at a time and bear in mind that it gets easier as the setting process begins to happen. If you have done this it should minimise the amount of sanding needed once the wall has dried and save you extra time, effort and frustration in the process. 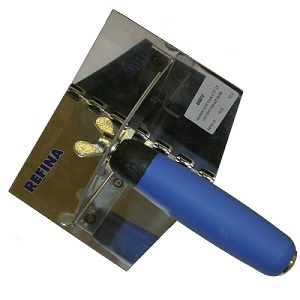 A quick guide to corners… If you make sure your corners are done well, then it gives you a greater chance of making sure that the rest of your wall will look good too, so it’s worth taking the time to get it right.
Try these following steps to help you along… Use a trowel or scraper to fill the corner gap between the plaster walls with the first coat, making sure to scrape off any excess. Once the first coat is dry, use the trowel or scraper blade to take off any small ridges. Then, cut a piece of paper tape to the height of your wall. Fold the tape in half so there is a crease running down the centre of it. You can then apply a thin coat of plaster base coat to both sides of the internal corner and press the tape over the top.
Once it is in place, use the trowel or scraper to flatten it onto the wall, squeezing out any excess plaster, then leave it to dry. Use your paint scraper or trowel to apply a top coat of plaster on both corner faces. Then run an internal corner plaster tool over the top coat to give it a flat and flawless finish.
If you’re looking to plaster a wall for the first time and you are unsure of the kit you need, you can order your plastering tools from Gypsumtools, with members of our team readily on hand and available to answer any queries you might have. With over 50 years experience in the plastering industry, we are always looking for the best tools and techniques that there are in plastering, so give us a call, drop us a line or take a browse through our products online to find out more.
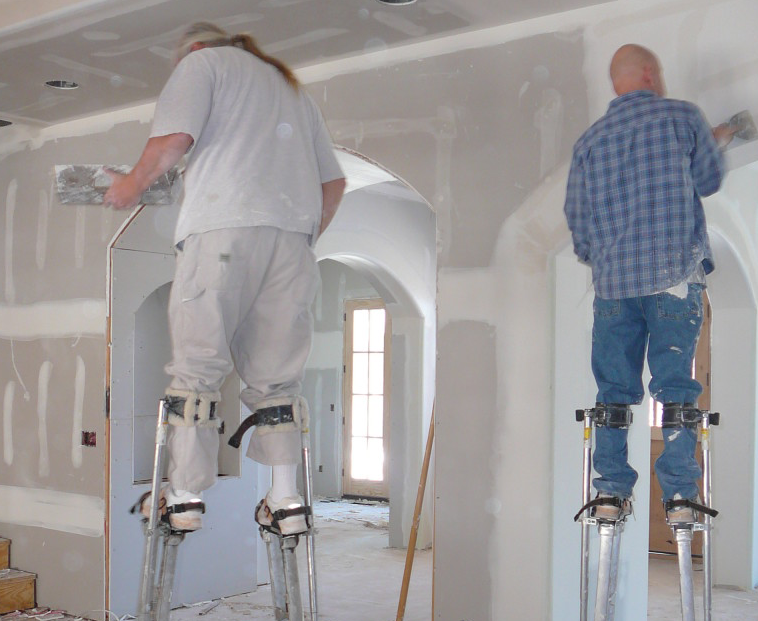
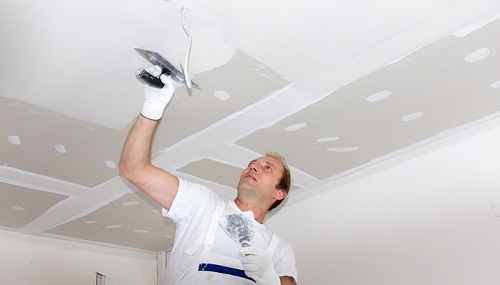
Unless you are moonlighting as one of the Chicago Bulls or LA Lakers, chances are that during your plastering career you might have come across the issue of how to get your plaster in those hard to reach places, such as ceilings and the tops of walls.
Most ceilings are well over six foot high and in the past a milk crate, step ladder or plank balanced on two crates did the trick. But, with too many dangerous accidents occurring from unsafe working environments and many building sites and businesses clamping down on the health and safety pitfalls involved, it might be that over the years you’ve looked to an alternative solution.
One of the options you can try is plasterers’ stilts. And if you are wondering what are plasterers’ stilts and the image of clowns in a circus keeps popping into your head then don’t be disheartened.
Contrary to the sort of stilts that are used to wow the crowds under the big top, these are sturdy, easy to put on and take off, don’t take years of practice to perfect using them and if used in the right circumstances can be very safe.
Take a look at our stilt range for some of the industry leading stilts for plastering!
Stilts for plasterers have been used in the drywall and suspended ceiling industries for years and can be an extremely useful tool to have in the workplace, saving you time, effort and labour.
Once you’ve got the hang of them, they make an excellent addition to your toolkit and, if you would like to know how else they can help, there are several benefits and a few things to bear in mind when thinking of investing in a pair.
But make sure…
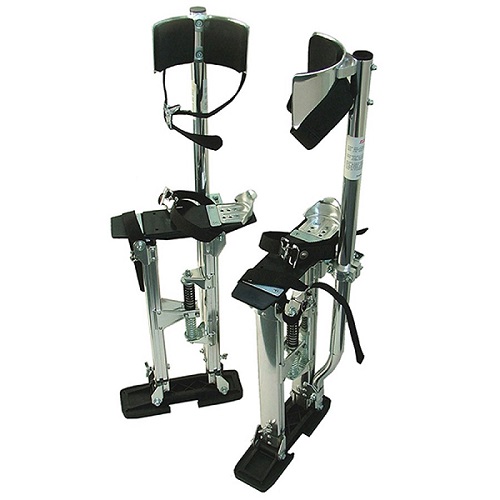
If you’re looking for some cheap stilts for plastering but ones that are leaders in the industry, then look no further! We have an excellent set of plasterers’ stilts in stock from the popular and dependable quality budget brand Faithfull, which have been designed to save time in both the plastering and decorating industries.
For a Faithfull Plasterers Stilts overview, you might be pleased to know that, while they are extremely well made, using lightweight aluminium, they are sturdy, efficient and adjustable, coming in six two-inch increments which range from 18-30 inches.
The maximum load bearing amount is 114kg (so remember to take into account your hawk, trowel and plaster) and they won’t break the bank like other plasterers’ stilts.
If you’re a professional plasterer who is looking for an easy and effective solution to getting a job finished in even quicker time, then maybe stilts could be your best bet.
You can order your stilts online today from Gypsumtools and have them with you on site tomorrow, when you order before 12pm.
We also offer free delivery on orders over £99 to any location across the UK, so you can rest assured you will be only paying for the goods you receive.
Have a browse through our extensive range of products online, or give us a call today for more information.
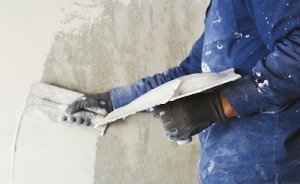
Unsure how to skim coat over paint, skim coat ceiling, skim coat with a roller or how to skim coat a textured wall? Well you’re in luck because in this article our experts explain how to do just that…
In the early stages of plastering a wall you don’t need to worry so much about smoothness, because it’s getting the walls as flat as possible that should be the real focus.
The last thing you want is different thickness’s of plaster that are drying and firming up at different times, meaning you have to mess around with figuring out which places to skim once you’re done and waiting for it to dry. Uneven thickness can often happen when too much time is spent on getting the first coats of plaster smooth and not enough time ensuring it’s flat, so don’t get too focussed on getting it smooth in the early stages.
If your plaster is flat, it means you can move along the wall naturally to enable you to finish the job and it’s then in the final stages where you get your wall smooth, removing any trowel marks or ridges as you go. And, you might want to check out these handy hints on how to skim a wall before you start.
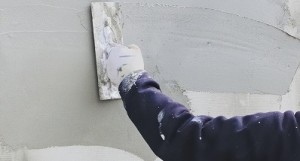
Some people, especially the professionals like to skim coat a wall the traditional way, using a hawk and trowel – and for this, you will need to be aware of the six stages of skimming. There’s no short cut around this and it’s vital that you follow each stage, letting the plaster firm up a bit before you move on to the next.
There’s no putting the plaster on and trying to smooth it out straight away either, because to get it right it takes several thin coats, removing trowel marks and ridges in between, when the plaster has gone tacky. You can also resolve issues like blistering in the walls.
If you’re slightly newer to plastering, or are just an occasional plasterer, the whole process of skimming a wall with a trowel and hawk may seem a little daunting. It takes a lot of practice to wield the trowel and hawk successfully, so you’ll be pleased to know there is a different, slightly easier way to skim a wall using a paint roller and squeegee knife.
As with the method above, you’ll need to ensure you have the right tools for the job to avoid frustration half way through and also make sure the wall is ready to skim, so be prepared beforehand and fix uneven sections, torn away paper and holes before you start.
This method can show you how to skim a wall the easier way and the tools you will need are as follows:
Start off by rolling the whole wall with fast drying stain sealing drywall primer to ensure the joint compound sticks better to it. Make sure to let the sealer dry thoroughly too.
You can then roll on a slightly thinned layer of all purpose joint compound with your heavy nap roller. The consistency should be a bit like mayonnaise – just thin enough to roll on a wall. If you get it too thin, it can cause shrinkage and subsequent cracks, but don’t worry if this happens the first time, just get it a little thicker for next time. Roll it on small sections at a time so that you can then smooth out the joint compound before it dries and try and keep it as even as you can.
After this first coat has gone on, you can then trowel it smooth with your squeegee knife. Keep a damp cloth and mud pan handy to wipe off any excess mud. And, don’t worry if you have to go over a few areas more than once. Start at the top corner and pull the knife vertically downwards, stopping around halfway, then, once you have rolled the joint compound on the bottom half of the wall, start at the bottom and pull the knife upwards.
After the wall is smooth, let the first coat of joint compound dry. Then it’s time for your second coat which will need to be spread with a trowel in a horizontal direction once it has gone tacky. The idea is to go at a right angle to the direction in which you went with the coat before. If you still see imperfections then it’s fine to do a third coat – just wait for the second one to dry first.
The process may seem drawn out, but it’s pretty quick because the layers of mud should be thin and as a result will dry fast. Then, the smoother you have your wall, the less sanding you’ll need to do afterwards.
After the last coat has dried you can then pole sand the wall to get it looking flawless. Hopefully this won’t take too much trouble if you’ve followed the stages of skimming a wall as mentioned.
If you have any questions about how to skim a wall, or if you need any further plastering help or advice, feel free to give us a call. With over 50 years experience in the plastering industry we can help you find the right tools and equipment to help you get the job done as easily and pain free as possible in no time at all.
If you have ever had the pleasure of taking in some of the magnificent sights of Venice, you will know that it is a city packed full of wondrous design and old world beauty.
Once you’re there, all it takes is a gondola ride down one of the city’s famous canals to experience the striking architecture that can be found on virtually every corner.
Because of this, it’s no surprise that even the special plaster which comes from this northern Italian city has the same awe inspiring passion, beauty, elegance and depth as the city itself.
So, what is venetian plaster? The answer lies in what it’s made of, how it’s applied and the finished effect.
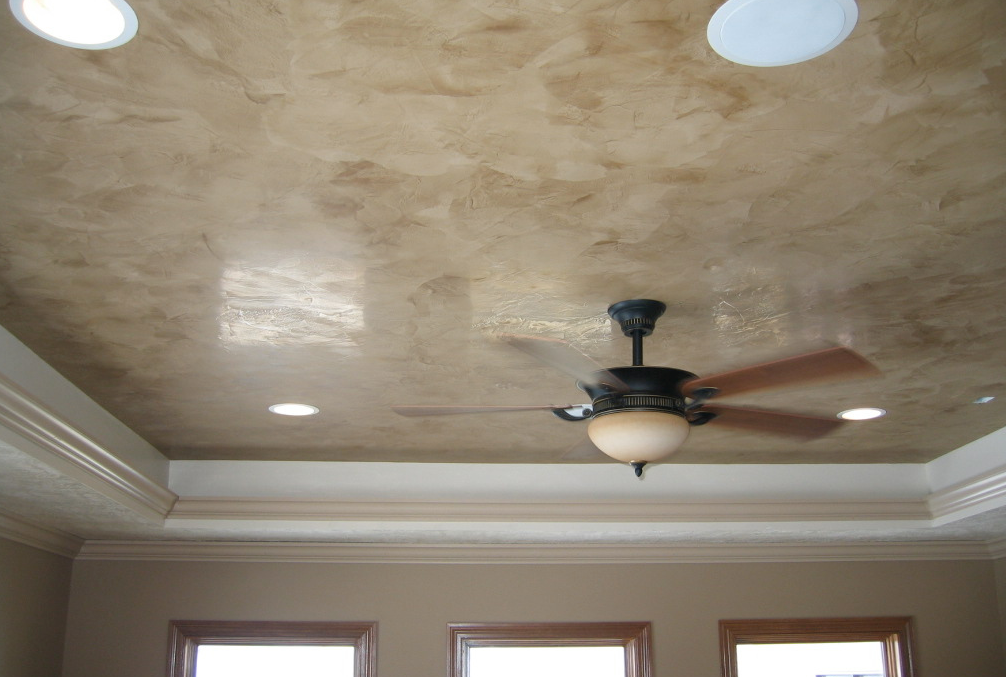
Traditional Venetian Plaster, otherwise known as marble plaster, Italian plaster or polished plaster is made of lime putty and marble dust and gives a highly polished finish to walls and ceilings, which can look like stunning marble itself. As a result it’s very often used successfully for decorative effect.
While it can be enhanced with acrylic resins, when it’s applied correctly, the plaster on its own can give a rock hard, deeply textured and smooth marble-like finish which displays a glossy, high sheen.
Venetian Plaster has been used for centuries and although it was originally used for building purposes its main use is now to compliment the interior design of a building, whether it’s old world traditional, contemporary design or even used in listed buildings for restoration.
It’s popular, not only for the striking and luxurious effect that it gives, but also because lime based venetian plaster is made with less harmful chemicals, which makes it hypoallergenic, as well as mould and algae resistant, not to mention the fact that venetian plaster can also regulate humidity.
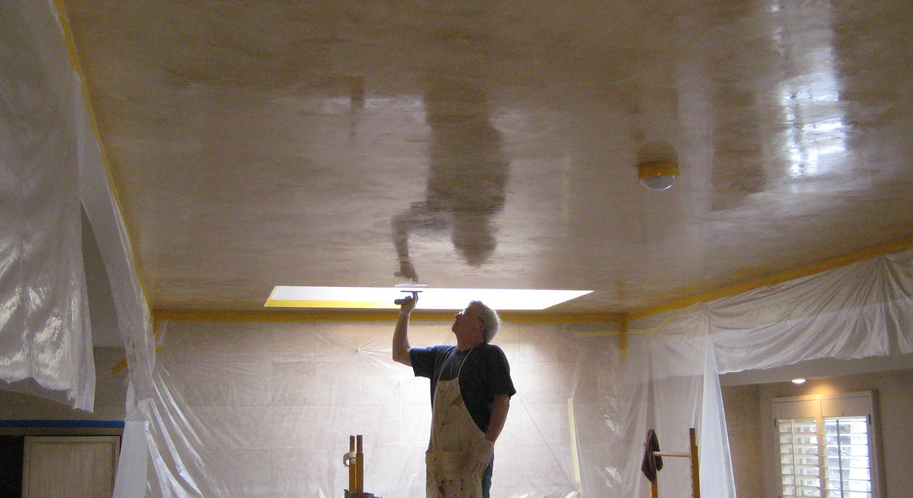
Venetian Plaster is usually applied over a primer and basecoat, as with regular plaster, but a change that has occurred in the application of it over time is the amount of coats needed. In the past the Romans used up to ten coats of plaster, whereas now, as technology has moved on, it only needs 1-4 coats thinly applied with a trowel to get the finish you need.
The glossy effect of the plaster gives a touch of prestige and elegance where it is used, because its crystalline beauty can look absolutely stunning. When applying the final layer of Venetian Plaster, there’s a special technique which is used to burnish the surface with a special steel trowel to give a glass like sheen that creates the impression of magnificent depth and texture.
Tools for venetian plastering include the use of a round edged plastering trowel. With this special kind of plastering tool, the technique that is used on the final coat of plaster is like a wet polishing that focuses heat and pressure to give deeply textured colours and a high shine.
It can be a pretty useful technique to use on surfaces where large slabs of marble cannot be easily installed, or in buildings with a tighter budget which means using real marble is simply too expensive.
Venetian Plaster has often be referred to as being a fake version of marble, but the fact is that the plaster in itself is made up of natural materials which, when combined, offer this striking effect. It can come in a variety of levels of sheen, textures and colours but it can also be tinted or coloured to achieve an affect that can’t be created naturally. When applied correctly, the finished effect is just as striking and aesthetically pleasing as marble itself and the finish will enrich the colour of the plaster giving warmth to the walls.
If you would like to find out more about the tools for venetian plastering that we have in stock or simply venetian plastering cost, take a browse through the wide range of products we have available and order your tools online today, or, to find out more about the products used, give us a call or message us online.
Our friendly and experienced staff are always available to help and advise.

As with many industries, when you first start out in professional plastering, it can mean some difficult decisions to make. What kit do you need, what are the best tools for the job and do you go down the sensible, more cost effective route, or do you go for the best in the business straight away?
One thing’s for sure – you’ll want to make sure that you can hit the ground running and there’s nothing holding you back when you start. But, likewise, you’ll also want to be sure you’re not investing in pieces of plastering kit that you might never use.
At Gypsumtools we have over 50 years experience in the plastering industry which has equipped us with a sound knowledge of what our many different customers might need at any one specific point in their career.
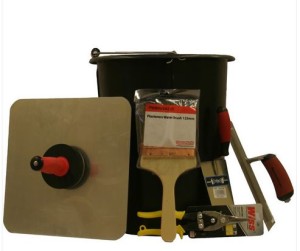
That’s why, when you’re just starting out in the plastering industry, we have designed plastering kits for plasterers apprentices that really do the trick.

Maybe you’re still learning the trade and are still at college, but getting fed up with borrowing kit. Or perhaps you’re about to complete the course and want to practise with your own set of tools before you leave.
Our plastering kits for plasterers’ apprentices are great for college students because they are affordable, contain exactly the sort of tools and equipment you’ll need and the contents of the kits have been hand picked by people with a passion for plastering.
The kits include a plasterer’s finishing trowel, bucket trowel, aluminium hawk, plasterers float, scratching tool and water brush. Also, with safety in mind, you get a hi-vis waistcoat, safety glasses and dual density black Chukka boots which are popular in the construction, engineering and agricultural industries for their strength and durability, not to mention the steel toecaps and midsole.
We’re not in the habit of offering our customers poor equipment and we pride ourselves on our reputation for only offering the best equipment at the best prices – whether they’re from trusted budget brands or the most highly sought after tools there are.

We also understand that different people need different things, even if they’re at the same sort of stage in their career, so this is why, when it comes to providing tools and equipment for a plasterers apprentice, you can even choose your own kit.
After so many years in the trade, we get that a plasterer’s trowel is a very personal thing and that’s why we believe you should be able to choose the tools that are right for you from the start. Why not take a look at what’s on offer?
To find out more about our plastering tools and supplies just give us a call, or drop us a line – our friendly and experienced staff are always on hand to help. Or, if you’re looking to get started and like what you see, then you can order your plasterers apprentice kit today. If you put your order in before 12pm, you’ll even get it by tomorrow.
Our plastering apprentice kits have been designed to offer the most cost effective and useful solution for anyone just starting out in the industry, so take a browse through our products and see what’s the right collection for you.

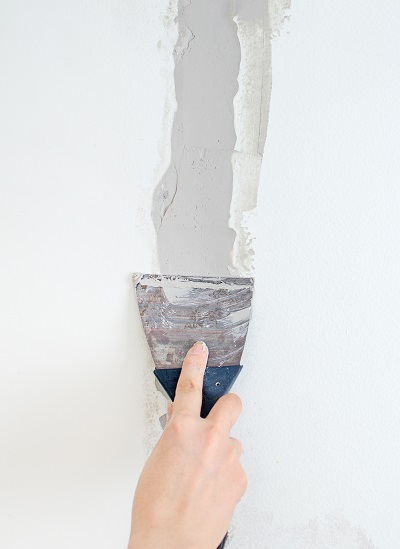
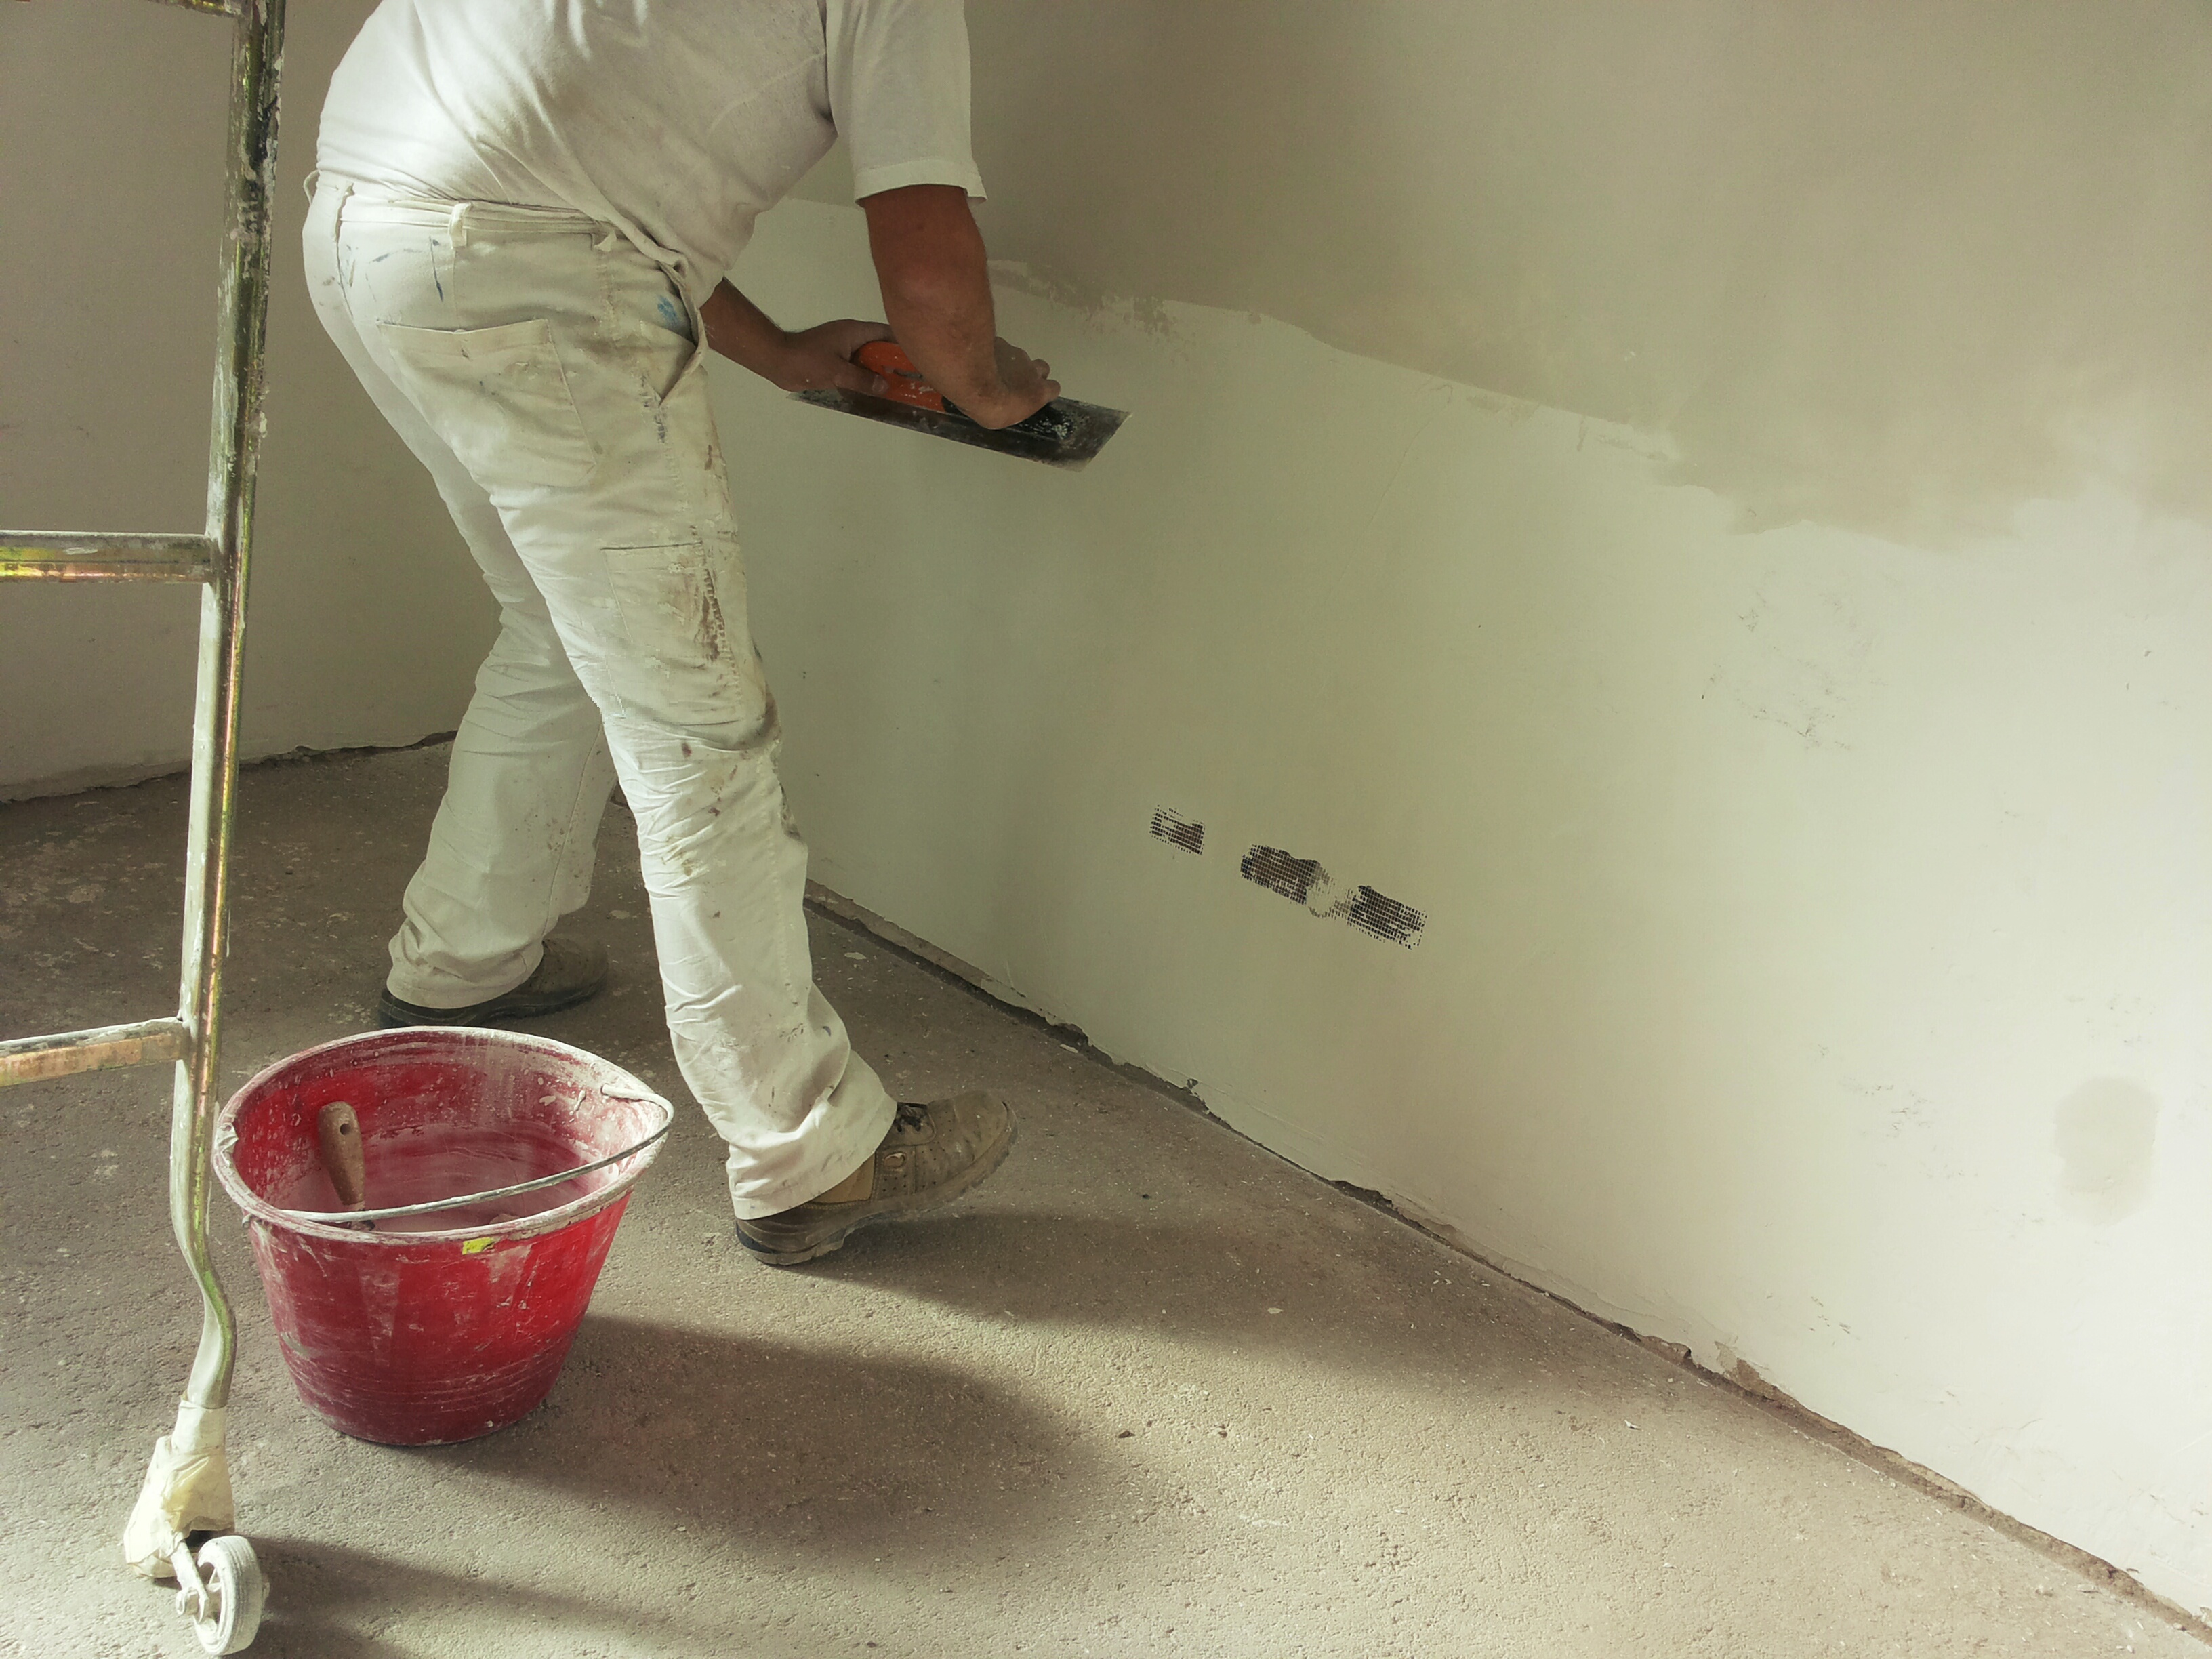
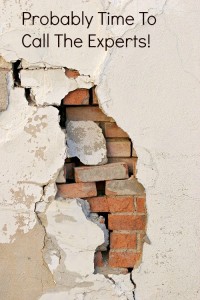
Cracks and holes in your plaster can occur when furniture and doors are moved around too roughly, perhaps a rail or picture frame is put up in the wrong place leaving an unsightly hole, or even when your house is simply settling into its foundations.
Unfortunately such cracks and holes can make your home look tatty and in need of repair, especially if they’re in really obvious places. But before you call out a professional to come and fix the problem, did you know that DIY plaster repair can actually be easier, more straightforward and pain free than you might think?
From polycell plaster repair or plaster repair patches to the best filler for plaster walls, Gypsumtools has it all!
If you’re looking to do a spot of DIY plastering on any cracks and holes in your home it really can be achieved yourself and we’ve got a few tips on plaster repairs that might just help you along.
Learn how to patch plaster wall holes:
• Get the right tools for the job and be prepared before you start – that includes making sure you have a good putty knife/wall scraper or plasterers trowel, patching plaster and joint compound.
• Get a dust sheet down to protect your floor and preferably undertake your patching job before you paint or wallpaper your wall.
• Clean out all of the loose plaster from around the hole or crack before you start and brush away any dust using a clean paintbrush – this will enable a better finish.
• Hairline cracks may need widening to give the patch a good area to stick to. And, for longer hairline cracks, take off bits of plaster at intervals along its length to give a better seat for the patch.
• Splash a bit of water on your wall first to stop it absorbing water from the plaster too quickly and causing it to dry out sooner than you need.
• Take care when loading your trowel up with plaster – you don’t want to apply too much
• Fill the crack with plaster using a plasterers trowel with an overlap onto the existing plaster. Then allow it to dry for 24 hours
• If after this time it has shrunk slightly into the crack, patch it again and allow it to dry for another 24 hours.
• For holes, carve under the edge of the existing broken plaster to allow the plaster patch to seep underneath.
• Make sure to dampen the edge of the hole before you start to ensure any unwanted plaster will come off easily.
• When you fill a hole with patching plaster, remember not to fill it level with the existing wall, but leave space for some joint compound to go on top after the patching plaster has dried for 24 hours.
• Once your plaster has dried completely you can then add the joint compound to the patch, going just over the edges to make it even with the existing wall.
• After your patch is completely dry you can then sand the surface to give a smooth finish.
For a wide range of DIY plastering tools to suit any budget, order your plaster wall repair products from Gypsumtools today. You can either take a look around our online store and order securely for next day delivery, or, if you’re nearby, why not pop in to our Leicester trade counter?
With over 50 years of experience in the plastering industry, we can offer friendly and knowledgeable help and advice on the right tools and the best way to help you get the job done in no time.

DIY Plastering – it’s probably not as messy, stressful, time consuming or as difficult as you might think. What’s more, it could save you a stack of money. Why not give it a go?
Maybe you’ve prepared a ‘kit list’ of DIY Plastering Tools and are in the process of shopping around to ensure you get the best deals, or maybe you aren’t sure of the brands you can rely on. Alternatively, you might not be 100% sure of the sorts of DIY Plastering Tools you need to invest in for your projects.
Trade customers and DIY Enthusiasts can order, quickly and easily, online or alternatively, can visit our Midlands based trade counter, conveniently located in Leicester.
Ordering DIY Plastering Tools from Gypsumtools is easy and doesn’t have to be as expensive as you might think. We offer fast UK wide delivery and a knowledgeable, professional team of experts, always on hand to help out; whether you need advice on your project, drylining brands or which products to pick.
Having an account with Gypsumtools enables easy reordering of supplies and an order tracking system so you can ensure you meet deadlines. We can also order in any products that we don’t have in stock, on request.
For DIY Enthusiasts and novices, we have put together an Essential DIY Plastering Tool List. Click on tool names to view our recommendations.
• Plasterers Hawk – a handheld flat surface which enables easy applications.
• Trowel – For application (Corner Trowel – for easy, edge to edge application)
• Dust Sheets – prevent mess!
• Buckets
• Stanley Knife
• Hammer
• Float – Ideal for applying top layer wall plaster. Creates good finish.
• Spirit Level – ensure finished surfaces are straight.
• Saws – We offer a variety of saws for trimming drywall and plasterboard.
Alternatively, we have created a great low cost plastering kit that contains all of the essential tools for your plastering DIY project.
Call one of our team of professional, friendly experts for helpful answers to any questions regarding products, brands, orders or projects. We will always do our best to advise you on the best and most cost effective way of completing your DIY projects.