50 Plastering Tips

Plastering Health & Safety Tips

As industry specialists, we always try to help make your plastering life easier in any way we can. That’s why we’ve put together 50 plastering tips to help you out!

If you’re new to plastering, it can be quite a scary concept to begin with! However, with the right plastering tools, techniques and confidence, there’s no reason why you shouldn’t get the results you desire from the start.


Click here to see our plastering tools and equipment – we stock everything you need!


So, have a read below and let us know what you think – and as always, get in touch with our team if you need further assistance.

Our Top Tips!

Here are a few pointers to help you along.

1. Plaster won’t stick to just any surface and you don’t want it to start falling away, so ensure your surface is ready to be plastered.

2. Make sure it is clean – remove bits of existing plaster, dust or wallpaper.

3. Check the suction of your wall.

4. High suction porous backgrounds can suck the moisture from the plaster meaning it dries too quick – so you may need to wet the wall before you start.

5. When wetting your walls use a fine mist spray gun to avoid having to keep reaching down to re-wet your brush.

6. Once the water starts running down the wall, you know you’ve controlled the suction.

7. Low suction backgrounds, such as painted surfaces will also need to be properly prepared.

8. While plasterboard or backing coat can be skimmed over without preparation – existing plaster or previously painted surfaces will need treating with a bonding agent, such as a mix of PVA glue and water to ensure the plaster sticks to the wall.

9. You could also try adding a handful of sand to the PVA mixture to give it a rougher texture and better adhesion.

10. Clean as you go along – it may sound over the top but it’s vital to have clean buckets, tools and equipment to ensure your plaster doesn’t go off and you get a better finish that lasts.

11. Also, dry plaster is a nightmare to remove from your tools and can cause drags in the plaster finish on your next job!

12. Always use clean water, again to avoid contaminating your plaster and make it go off or set too quick.

13. Always mix plaster by adding plaster to the water and not the other way around.

14. Add just enough plaster first to make a heap on the top of the water and mix it so that it’s lump free, then slowly add the plaster to get the correct consistency either with a wooden stick or mixer drill.

15. Plaster and water mix together roughly half and half – so half a (clean) bucket of water should make a full bucket of plaster.


Click here to see our plastering tools and equipment – we stock everything you need!


16. The plaster should be the consistency of melted ice cream – try standing a stick in it – if it can stand up, the plaster is mixed right.

17. Plaster must be applied when a surface feels tacky, but not too wet, to help it bond to the surface well.

18. When plastering a room, try not to do two walls that are touching each other as you risk damaging one wall while plastering the other.

19. Keep it cool in the room you are plastering – radiators should be turned off or the plaster will dry out too quickly, making it difficult to apply and crack.

20. Beginners should start on a small area first to ensure they’re getting the technique right.

21. Start with an area which only takes 30 mins or less for the first coat.

22. Ensure you follow the six stages of plastering correctly and confidently – from the first coat to the final finish.

23. A good plaster finish can be achieved with a combination of confident firm pressure and the correct angle of your trowel.

24. Don’t try and get your surface perfect in the first coat – it takes too much time and the plaster may dry too soon – imperfections can be ironed out in later stages.

25. When you first apply your trowel to the ceiling or wall, start with one edge of the trowel angled away from it.

26. As the plaster on your trowel gets less and less with your movement, the angle between your trowel and the surface gets smaller.

27. Watch for spillage when reducing the angle of your trowel!

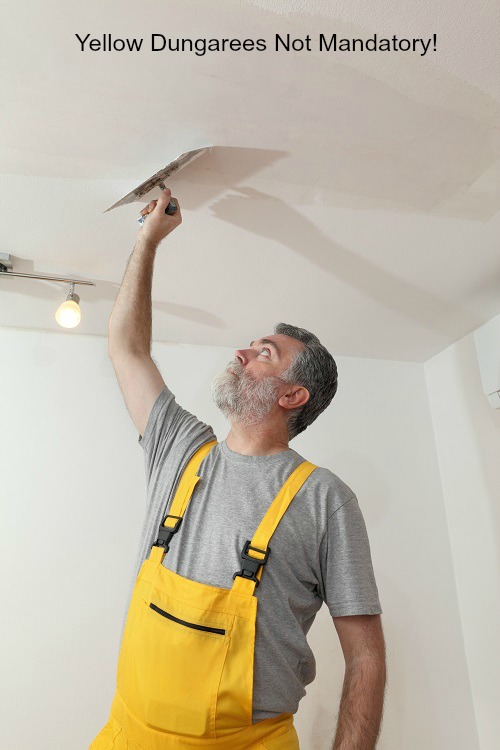
28. If you’re doing a ceiling, don’t stand directly under your trowel, just in case you get plaster in your eye!

29. Artex ceilings can be plastered by just using a thicker coat of plaster.

30. Don’t go into the edges between the ceiling and wall straight away with your plaster – it can be worked into the edges at a later date and avoid lumps of plaster clumping in the corners.


Click here to see our plastering tools and equipment – we stock everything you need!


31. But, when you do do your corners, make sure they’re flat – it makes the whole wall look good!

32. Ensure the thickness of the plaster is even on the first and second coat. Use firm pressure to ensure it is flat with no bulges.

33. You don’t need to worry too much about smoothness or trowel marks at this stage, just that it’s flat and even.

34. Make sure the first thin coat is wet and pliable when you apply the second coat.

35. Don’t worry about filling every little hole at this stage – it’s better to avoid your plaster firming up too quick.

36. After the first two coats, the ‘trowelling up’ process begins. This is time to fill all those holes, remove your trowel marks and get it smooth.

37. Make sure before you start the plaster is tacky – pliable enough to push the plaster into the holes, but not so wet you make new holes.

38. As the plaster sets it will darken in colour, which means it’s time for the final trowel.

39. Don’t over polish the plaster on the final dry trowel stage – it should be even and slightly polished, but feel like eggshell – any smoother, it makes paint and wallpaper a nightmare to stick to.

40. Ensure you have the right plastering tools, equipment and know how before you start, so you don’t end up having to stop half way through.

41. Make sure you know you can comfortably get to hard to reach areas with stilts or scaffolding.

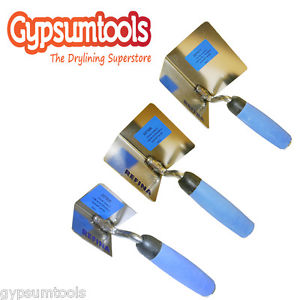
42. Love your trowel – it’s a vital piece of plastering kit. Make sure it’s clean, rust free and the correct type. Just any trowel will make the job harder.

43. For beginners, a good size to start with is 11 inches. While a larger trowels covers areas faster, it’s harder to control.

44. Wear your metal trowel in – it’s much easier to use this way – some can be bought pre worn.

45. Use tin snips to cut angle bead to make the job easier.


Click here to see our plastering tools and equipment – we stock everything you need!


46. Don’t sand down plaster – if you follow the six stages correctly there’s no reason why you would need to come back to sand it, causing more mess, imperfections and more hard work.

47. Remember! Flatten, Amend Holes, Smooth Trowel Marks

48. Always remember to keep your trowel flat on the wall.

49. Don’t forget to fill any holes in the plaster by applying firm pressure or getting more plaster in the hole and smoothing out.

50. Then when the plaster is quite firm, any trowel marks and ridges will be successfully smoothed out – providing you have kept it flat allowing your trowel to sit flat on the wall.

Order online today!

We believe plastering tools don’t have to break the bank. However, they must be good quality! Thankfully, we have a huge range in stock, from high quality budget buys to professional plastering tools.

If you do find yourself in need of a piece of equipment while you’re on a job, we offer a fast ordering service, free delivery on orders over £99 and next day delivery. If you have any questions at all, give a member of our team a call – they’re always on hand to offer help and advice.

DIY Plastering Products

diy-plastering-tools

So, you’ve got a plastering job that’s been bugging you for months now, or perhaps someone else is bugging you about getting it done. Maybe you’re bang up to date and love a bit of DIY, but not sure of the DIY plastering products you need for that particular job.

At Gypsumtools, we don’t only provide plastering tools and equipment for the professional plasterer. Our huge range of stock covers the sort of plastering products needed by DIY enthusiasts and professionals alike. And, with one of the largest ranges of drylining products available on the web today, we’re pretty confident we’ve got just what you need.

Chances are, if you’re indulging in a spot of DIY over the next few weeks you’ll be looking to get it done quickly, effectively and looking good as an end result. After all, days off are about having fun, not increasing your stress levels and when there’s beer to be drunk, there’s no point spending unnecessary time with trowel in hand instead of a pint glass.

Quality Budget DIY Plastering Tools

When you buy your quality budget DIY Plastering Tools, be well informed. Make sure they get the job done, but won’t cost you the earth – especially if the job you’re doing is a DIY project and you won’t need to use the tools massively often.

faithfull-plastering-tools

Take a look at the knockdown prices in our Faithfull range, for instance, which includes top quality, reliable products ranging from trowels to accessories, such as stilts and lights. This is a popular and well known brand which is perfect for DIY enthusiasts because it won’t break the bank.

einhell-plastering-tools

Then there’s our Einhell range of powerful, versatile drills and tools which make an excellent addition to your home tool kit and are perfect for the ambitious DIY enthusiast. You won’t believe the prices of these either, for what you get.

Order Securely Online Today

We’ve got more than 50 years in the plastering industry and a passion for the trade, which means we only put our name to the best tools out there. So, when you take a look at our quality budget DIY Plastering Tools, you can rest assured you’re buying the sort of products we would use ourselves.

Order securely online today and get free delivery on orders over £50 – you can also get it delivered to your door the next day if you order before 12pm.

Contact Us for Advice

And, if you’re unsure about what it is exactly you need, make use of our experienced and friendly staff. Contact us for free advice by giving us a call on 08456 2 54321 or emailing using our contact form. If you happen to be in the Leicester area and need adivce, nip in to to our trade counter where our staff would be delighted to help. We pride ourselves on good customer service and that’s why we’re always pleased to help with any plastering queries you might have.

Plastering Hand Tools

Hand tools

More than 50 years of experience in the plastering industry has taught us that no matter how good a plasterer you are, without the right plastering tools and equipment it’s virtually impossible to get a good plastering job done, not to mention the added time, stress and effort that it takes.

That’s why, at Gypsumtools we source only the best plastering hand tools that there are, from all of the best brands across the world. We take great pride in knowing the plastering industry from back to front and we know what our customers need and require, whether they’re from a large plastering firm, a self employed professional plasterer or a DIY enthusiast.

From trowels to plasterers’ knives, floats and hawks, we have a massive range of specialist plastering tools in stock that are guaranteed to meet your every need. Check out some of the tools used in plastering below:

Our Most Popular Hand Tools – Plastering Tools List

In our time in the plastering industry, we’ve managed to get a feel for the sort of tools that are really popular with our customers. The kind of tools that they keep coming back for time and time again. And here is just a selection of some plastering tools names:

Bucket Trowel – This Putz stainless steel bucket trowel has rounded corners and is great for avoiding damage to your bucket.

Hawk – A NELA heavy gauge aluminium Hawk which, with its sponge rubber callous preventer and non-slip handle, is perfect for holding your joint compound.

Corner trowel – This Refina Corner Trowel is a great piece of kit, because as well as being really well made, it’s adjustable which means you don’t have to carry loads of different sizes of tool about. Refina plastering tools are a trusted and quality brand in the industry.

Jointing Knife – These Gypsumtools stainless steel jointing knives with soft grip stainless blades are perfect for spreading joint compound, patching holes or smoothing wall coverings.

Finishing Trowel – a lightweight but very strong finishing trowel by Marshalltown designed to give you a lovely smooth finish to your work.

Plastering Float – this polyurethane float is light and warp resistant – ideal for applying wall plasters etc.

Midget Trowel – One of the fantastic NELA trowels in our huge range of NELA products which comes with a BiKo cork grip handle and a hardened stainless steel chrome blade for added flexibility and durability – great for concrete, plaster and drylining.

Order Now Blue Shopping Cart Horizontal

Order your Plastering Hand Tools

We have a vast range of plastering supplies and equipment available for delivery throughout the UK. You can order your plastering hand tools either online, or you can visit our Leicester trade counter – whichever option you choose you can rest assured that we have one of the biggest ranges of stock available in the UK today.

If on the slim chance you go to order your plastering hand tools and we don’t have what you need in stock, we will be more than happy to order it in. And, for any help or advice, just give our friendly and knowledgeable staff members a call today.

Drywall Finishing Tools for Sale

drywall-tools-used

Finishing drywall can be a dusty, tiresome and laborious job, not to mention being the last thing you want holding you up after you’ve just spent hours putting up a drywall. In fact, it can be the one job that many professional plasterers dread the most.

Thankfully, with the right tools and techniques, drywall finishing doesn’t have to be a nightmare and you can produce smooth, neat drywall joints and corners with little trouble at all.

There are some fantastic tools out there to choose from to help you get the job done effectively and quickly. At Gypsumtools, we pride ourselves on having one of the largest ranges of drylining tools on the web today and the sort of tools and equipment you need for drywall finishing with minimum stress.

Take a look at our range of drywall finishing tools for sale from all the best brands. Whether you’re a DIY enthusiast, or a professional plasterer, our stock is so extensive that we have tools to suit a range of needs, requirements and wallet sizes.

Drywall Finishing Tools can save time

It’s impossible to overlook the benefits of drywall finishing tools, because, from automatic tapers to corner finishers, they’ll help you to guarantee that no matter how big or small the job, the finished result is going to be one you can be proud of.

And there’s no doubting that drywall finishing tools can save time. Look at a drywall taping tool, such as an automatic taper, for instance, which can offer you the fastest method of applying paper tapes and air drying jointing compounds to plasterboard joints and angles there is. An automatic drywall taping tool will also apply just the right amount of joint compound, meaning less time sanding off the bits you don’t need after it’s dried.

With the drywall finishing tools that we have in stock at Gypsumtools, there’s no more need for time wasted, which will also save you on cost, efficiency and effort.

Level 5 Drywall Finishing Tools

With over 50 years experience in the plastering trade, we have a pretty good idea of the sort of tools and equipment that will help make our customers’ lives that little bit easier – especially when they’re doing the sort of jobs that aren’t the most fun, such as drywall finishing.

We really rate our range of Level 5 Drywall Finishing Tools, because not only will they save you time and effort, are hard wearing and easy to use, but they’re great value for money too. If you’re fairly new to the job, take a look at our Level 5 Drywall Starter Finishing Set which includes corner applicator, roller and finisher with handles, flat box and drywall compound pump.

Our range of Level 5 sets go all the way up to the Level 5 Pro Full Set which, as well as featuring the equipment above, also includes a compound pump with filler nozzle and gooseneck, an automatic taper and nail spotter.

https://www.youtube.com/watch?v=ICYz5tGm96c

Order Drywall Finishing Tools Online

You can’t really go wrong with our Level 5 drywall finishing tools, but if you’re looking to order drywall finishing tools online, why not have a browse through the site and take in the whole range of products that we have on sale.

You can order your plastering equipment online, or if you need any help or advice, just give us a call. Our friendly and knowledgeable staff pride themselves on an excellent level of customer service and would be more than happy to help.

Drywall Accessories Online

When you’re in the professional plastering business, the last thing you want to be doing when you’re busy with a drywall job is to have to down tools and stock up, wasting your valuable work time, while you make a visit to your local supplier.

So you might find it useful to know that the option to buy your drywall accessories online, easily and quickly is there for you, whenever you need it. You can find all of our drywall accessories online as well as at our Leicester trade counter, and they can be delivered the next day straight to your door, meaning you won’t need to leave the job at all.

At Gypsumtools our services are all about making our customers’ lives easier and more convenient. So, you might also be pleased to know we offer free delivery on orders over £50 to any location in the UK, whether you’re onsite or at home, as well as an excellent tool repair service and help and advice if it’s needed.

Gypsumtools Stock Quality Drywall Accessories

We currently have a huge range of drywall accessories in stock from tape and taping tools to drywall trowels and knives. And we stock all of the best brands, meaning that you can have a large choice of drywall accessories to choose from.

We take pride in our reputation as having one of the largest ranges of drylining products available on the web today and the knowledge that comes with over 50 years experience in the industry.

We know the sort of tools and accessories that professional plasterers need to have available quickly and easily to help them get the job done, that’s why Gypsumtools stock quality drywall accessories that you can be sure won’t let you down.

A Wide Range of Products

If you’re wondering whether we have what you need for your drywall job, we stock a wide range of products online and we’re pretty convinced you won’t be disappointed. And if, on the rare chance we don’t have what you need, we are more than happy to order it in quickly.

Our large range of plastering and drywall accessories will suit the needs of professional plasterers and DIY enthusiasts alike and our in depth knowledge of the plastering industry has ensured that our tools and accessories are the best there are when it comes to compatibility and endurance, giving you the best performance going.

Here are just a few of the drywall accessories we currently have in stock:

Drywall Trowel
Corner Trowel
Joint Taping Knife
Drywall Square
Wipe Down Knife
Stilts
Drywall Screws
Drywall Saw (and gloves)
• Taping Tools
• Fixings and Fasteners
Drywall Rasp
Drywall Trolley

Order Drywall Accessories online at Gypsumtools

So, for all of your drywall accessory needs, either order online, call into our Leicester plastering supplies trade counter, or just give us a call. If you have any questions at all, our friendly and knowledgeable staff are always on hand and more than happy to offer help and support with anything you might need to know.

Take a look at our comprehensive range of drywall accessories and get your order in today!

Automatic Drywall Taping Tools UK

taping-tool-uk

With the plastering industry becoming more and more competitive, the need to be on top of your game when it comes to having the latest tools and techniques is growing increasingly more important. Customers are demanding faster, cheaper and more effective results, while tools are reaching the market that are getting the job done in a fraction of the time.

It’s not only the plastering industry where tools have been developed that do some of the work for you, getting some of the harder to reach jobs done, while offering better results and a more satisfying end result.

The age of technology has benefited many a trade over the years, so it’s not surprising that many large plastering companies prefer to use Automatic Drywall Taping Tools, UK wide, because of the huge benefits, not only to profitability but also job results.

The Benefits of Automatic Drywall Taping Tools

When you look at it, the benefits of using Automatic Drywall Taping Tools far outweigh the small downsides which may include weight of the tool leading to muscle fatigue, initial expense and cleaning time. These benefits include:

• A better, more consistent finish – an automatic taping tool will ensure the correct amount of joint compound is applied, with the same consistency all the way across.

• Less sanding time, less compound wasted – Because the automatic taping tools apply just the right amount of compound, there’s less to be wasted when you have to sand the surplus off and less time wasted in doing the sanding itself.

• Safer working environment – Because many of the taping tools can reach those high up places it reduces the need for stilts, ladders and scaffolding which are one of the main causes of accidents in the plasterer’s workplace.

• Makes the job faster and easier – finishing can be done much faster with an automatic drywall taping tool than with hand tools, such as a taping knife, pan and hawk. The automatic taper will also apply the compound and tape to a joint at the same time, while both sides of a corner can be finished simultaneously with a corner finisher, meaning you don’t have to wait for one side to dry before doing the other.

• Save money – an automatic taping tool is proven to get the job done quicker with chances of a more consistent end result, meaning more profit on time saved and less unhappy customers and callbacks.

Make Life Easier with Level 5 Automatic Tools

The amount of time saved and the safer working environment achieved by using automatic drywall taping tools seem to cancel out the potential burden of added weight – because the job is done in a fraction of the time. And, when you imagine the amount of time and money you’ll save in being able to do a quicker, more consistent job, it outweighs the initial expense of buying the automatic tools in the first place.

https://www.youtube.com/watch?v=rRmJkndlrGQ

At Gyspumtools, we have a large range of drywall accessories and tools for professionals to make life easier with Level 5 Automatic Tools being among the best value for money. These tools have the Level 5 moniker for a reason, because they are efficient, dependable, easy to maintain and get good results every time.

Order Automatic Taping Tools Online

Take a look through our extensive range and order your automatic taping tools online today. From corner finisher sets to the excellent Level 5 Pro Full Set, which offers every accessory within the Level 5 range – we are sure we’ve got the right automatic drywall taping tools for you. And if you have any questions about any of our products or services, just give us a call – we’re always happy to help.

Find out how you can make huge savings on our taping tools with our Taping Tool Kit Builder, featuring DeWalt and Level 5 taping tools.

How To Plaster A Ceiling In Just 7 Steps

We all know that plastering can be a tricky job that takes time, effort and lots of practice – and plastering a ceiling can be one of the trickiest jobs to do.

However, with the right know-how and tools in place, plastering a ceiling can be completed by plasterers and DIY enthusiasts alike.

So, if you’re wondering how to plaster a ceiling, we’ve got some great tips from the trade! And remember, if you need to know more, our staff are always on hand to offer help and advice, just give us a call…

Once you’ve got the right tools and your plaster is mixed up correctly, you’re ready to go!

Step 1

Keeping your hawk tilted towards you, confidently scoop some of the heap of plaster from your hawk onto your trowel with one swift and smooth movement. Starting a couple of inches away from the edge of the ceiling swoop the plaster across the ceiling as quickly and confidently as you can, keeping the thickness even.

Step 2

When you first apply your trowel to the ceiling, start with one edge of the trowel angled away from it, then as the plaster on your trowel gets less and less with your movement, the angle between your trowel and the ceiling gets smaller. As you move you push the trowel flatter and flatter, until it is flat against the ceiling once the plaster has been used up. Just make sure, as you go along, that the plaster doesn’t spill over the edge of the trowel!

Step 3

You can then come back over the area that you’ve just plastered to flatten it, using a firm pressure and working the surplus plaster into the edges between the wall and ceiling. By not starting at the edges straight away you will avoid lumps of plaster clumping in the corners.

Step 4

Then, once you’ve reloaded your trowel, apply the next sweeping movement which slightly overlaps where you have just been before. The important thing with the first and second coat of plaster (and it’s a good idea to apply a second coat) is to ensure the ceiling plaster thickness is even. You don’t need to worry too much about trowel marks at this stage.

Step 5

The ‘trowelling up’ process then begins – here is the time to get your surface nice and smooth. If the plaster has just started to set and go a bit tacky, it’s time to remove your trowel marks. Concentrate on the main areas of your ceiling, rather than spending too much time around the fiddly bits such as pipes and architrave. Just keep an eye on how long the plaster is taking to set, so you can ensure you fit in doing those bits as well, to achieve a good finish with a smaller tool.

Step 6

Using your float you can now move it along the ceiling and it should naturally move the plaster from the thicker spots to the thinner spots for a nice even finish. Any surplus plaster can also be wiped off onto your hawk.

Step 7

And for the final, beautiful finish, once the plaster is setting hard, apply clean water to your ceiling with a wide brush, following closely behind with your float.

Plaster Ceiling Material Needed

• Mixing bucket and paddle
• Plaster
• Plasterer’s trowel
• Plasterer’s float
• Bucket trowel
• Mask and goggles to protect the eyes and mouth
• Bucket of clean water
• A wide brush
• Smaller tool for smoothing plaster around pipes and architrave

Technique for plastering a ceiling

Not only does plastering a ceiling take confidence and practice, but you’ll also need to ensure you’ve got the right technique for plastering a ceiling. Here are a couple of tips, which may help:

1. Find the height that’s right for you, so you can comfortably and confidently apply the plaster to the ceiling with a firm even pressure. Aim to stand with about a splayed hand’s width between the top of your head and the ceiling, so, if you’re not tall enough, perhaps look into installing some form of scaffolding or stilts.
2. A great tip is not to stand directly under the trowel once you’ve started applying the plaster to the ceiling, to avoid getting plaster in your eye – not a pleasant experience.
3. It is also possible to plaster a ceiling over artex, you’ll just need to apply a thicker coat of plaster.

If you have any queries or concerns at all, whether it’s regarding the plastering kit you need or where to start, just give us a call and we’d be happy to offer help and support.

Plastering Supplies UK

plastering-supplies-UK

At Gypsumtools, not only do we have one of the largest ranges of plastering tools, supplies and equipment on the web today, we can also deliver our plastering supplies UK wide.

It’s because of our 50 years experience in the plastering industry, that we know the last thing you want is to be in the middle of a job and then have to interrupt it, because you’re short of a piece of equipment, your supplies have run out or something has broken.

Our range of UK plastering supplies is really extensive and we can pretty much guarantee we’ve got what you need in stock. And not only that, we will deliver it straight to your door in double quick time. If, on the extremely rare occasion we haven’t got some of your plastering supplies in stock, you can rest assured that this won’t be the case for very long at all, because we’ll order them in straight away.

We supply across the whole of the UK

Our Midlands based trade counter is a perfect location in the centre of the UK to offer fast and reliable delivery of plastering supplies to your choice of location. So, whether it’s on site or to your home, our speedy delivery service means that you can get on with the job in hand, safe in the knowledge that the tools you need are on their way and will be there when you need them.

Our plastering supplies are used throughout the whole of the UK, because our customers know that even if we’re miles away from them, we can offer one of the most reliable, speedy and cost effective delivery services there is.

Plastering Tool Repair anywhere in the UK

It’s not just our extensive range of new stock that makes us the place to go for plasterers countrywide; we can also offer plastering tool repair anywhere in the UK too.

If your plastering tools break on the job, or they’re just in need of a good service or spare part, our highly qualified team of technicians can help you with fixing your plastering tools and then post them straight back to you, free of charge and ready to go in no time at all. For just £25 you can have up to three tools collected from you for free. Our technicians will then service them, take a look, advise you of the problem and give you a courtesy call to establish whether you would like the repair to be made and how much it will cost. Once the job is complete, your tools will again be posted back to you free of charge.

Free delivery to any UK location over £50

It’s because we pride ourselves on being a plastering supplies firm for the whole of the UK that we offer free delivery to any UK location on orders over £50. So, not only will you have the tools you need when you need them, but you won’t pay over the odds for delivery costs either.

Why not give us a call today to find out how our team of friendly and knowledgeable staff can get the tools you need delivered straight to you, wherever you are throughout the UK, at no extra cost.

Taping Tool repair service

Putting up drywall can be a long and laborious task, so chances are you’ll want to make sure it’s finished off to a good standard.

There’s nothing worse than getting out your taping tool only to find it needs repairing, or having it break on the job; the last thing you want is your workday ruined or interrupted by broken equipment, losing you money and time.

It’s because we realise how important your tools are to you that we offer our fast and effective taping tool repair service, getting you back on the job, finishing it off as soon as possible.

When you’re putting up a drywall it can be a long and laborious task, so chances are you’ll want to make sure it’s finished off to a good standard. There’s nothing worse than getting out your taping tool, only to find it needs repairing, or it breaks on the job, because the last thing you want is your workday ruined or interrupted by broken equipment, losing you money and time.

It’s because we realise the importance of these tools for any plasterer that we offer our fast and effective taping tool repair service to get you back on the job and finishing it off as soon as possible.

Taping Tool Repair Service online

Keeping your taping tools well maintained by having them serviced regularly ensures they last as long as they can and give you great value. It’s never been easier to get your taping tools repaired now we’ve launched our Taping Tool Repair Service Online.

If your taping tools need repairing, or you feel they could do with a service or new part, instead of forking out for costly new equipment just fill out our online form and let our experienced and helpful technicians do the rest. We’ll even collect your tools and drop them back off free of charge!

Having your taping tools serviced regularly and well maintained gets you great value out of them and will ensure they’ll last as long as they can. It’s never been easier to get your taping tools repaired now we’ve launched our Taping Tool Repair Service online.

If you feel your taping tools are in need of a service, new part or they’re broken and need fixing, instead of having to fork out for costly new equipment, all you need to do is fill out our online form and let our experienced and helpful technicians do the rest. We’ll even collect your tools and drop them back off to you free of charge!

Plastering Tool Repair Service from Gyspumtools

With many years of experience in the plastering industry, our technicians have a passion for the trade. That’s what makes Gypsumtools’ tool repair service so unique.

You can have up to three of your taping tools collected free of charge, and for only £25 our technicians will service them, diagnose the problem and contact you to discuss the issue and cost to fix. We also pride ourselves on our excellent customer service, so feel free to contact our technicians who will be happy to help with your query.

After your tools have been serviced, they will be delivered back to an address of your choice free of charge, with a quick turnaround to ensure optimum performance on your job. They’ll also last you longer, too!

Our technicians have many years of experience in the plastering industry and the plastering trade is a passion to them. That’s what makes the plastering tool repair service from Gypsumtools so special.

You can have up to three of your taping tools collected free of charge and for only £25, our technicians will service your tools, diagnose the problem and give you a call to let you know how much the repair will cost and see whether you would like to go ahead. We also pride ourselves on our excellent customer service, so any questions you may have about the tools, they would be happy to help.

Once the work has been completed, they will send your tools back to you free of charge. So you will have a set of taping tools that have been inspected, adjusted, serviced and repaired, delivered back to an address of your choice, in super quick time, ready to give you optimum performance and let you get the job done in no time at all. They’ll also last a good while longer too.

Contact Us

We realise that taping tools are some of the most important tools you can have for most drywall jobs and that you’ll want to ensure they’re in great working order. Contact us today to find out how our experienced technicians can help you with efficient taping tool repairs that will get you back to work as soon as possible.

Either fill out our online taping tool repair service form or for more information, please feel free to contact us on 08456 2 54321 where a member of our team will be happy to help.

Find out how you can make huge savings on our taping tools with our Taping Tool Kit Builder, featuring DeWalt and Level 5 taping tools.

Buy Drywall Corner Tools Online

In this article we explain why Gypsumtools is THE place to go for Drywall Corner Tools UK. Read on for more information or browse the site to see all of the Drywall Corner Tools for sale.

When you’re putting up a drywall, you’ll doubtless want to ensure the finish is as smooth and flawless as it can be throughout. After all, once your room is all freshly decorated, the last thing you want is snagging issues eating away at you in the back of your mind.

Drywall installation in itself can be a frustratingly tough job, with the corners being one of the hardest bits, so buy drywall corner tools online that will help make the challenge as stress free as possible.

Ensuring an even distribution of joint compound and keeping your drywall tape bubble free in those hard to reach corners can be a thankless task which can take plenty of time, lots of tries and leave you with a sore arm for your effort.

Ironically this is all part of your drywall finishing, at a time when you’re possibly feeling at your most weary. It’s therefore easy to see why it’s the least favourite job of many a professional plasterer.

The finishing process involves smoothing the joints between the drywall panels to get it ready for decoration and this includes the corners between the panels.

It’s important that you have the right tools for the job before you start, to ensure that it will be as easy and pain-free as possible and less timely.

Using a handheld corner trowel can be a really useful start, because it has a 90 degree angle which fits easily into a corner and flattens drywall tape or compound, leaving a smooth and professional looking job every time. It’s a drywall corner tool that offers an easy way to fill in the gaps between drywall panels with joint compound. After this is complete you can then apply your drywall tape to the joint compound, ensuring you have cut the tape to the right length and folded it in half before placing it on your corner.

The corner trowel can be used to smooth out any bubbles in your tape leaving a perfectly taped corner joint. If you’re looking to buy drywall corner tools online, at Gypsumtools we have a huge range in stock, that you can order for next day delivery or collect from our Leicester trade counter.

Take a look at this stainless steel Refina Internal Corner Trowel which is rust free and comes in three available sizes – 2”, 3” and 4”. It also has a soft handle to help reduce wear and tear on your hands. Or, there’s this Refina Adjustable Corner Trowel which is great for internal splayed angles.

If you’re not really sure where to start with your drywall corner tools, we have a Level 5 Corner Finisher Set that could be just the piece of kit that you need, because it comes with corner applicator, corner finisher and a handle of your choice, so you can really find the finishing tools that are perfect for you.

We have a huge range of drywall corner tools online and in stock, including trowels, finishers, rollers, applicators and attachments from some of the biggest names in plastering, so why not have a browse through our stock today? If there’s anything you’re unsure of, our staff have over half a century’s worth of experience in the trade and we would be more than happy to offer you help, advice and support wherever it’s needed.

What Tools needed to plaster a wall?

If you’ve got a plastering job on and are unsure where to start, one of the many questions you maybe asking yourself is ‘what tools are needed to plaster a wall’? It’s always good to start with the right equipment, that way, once you’ve started the job, there’s no need to down tools and pause what you’re doing when you realise there’s a plastering tool you haven’t got.

We’ve got a huge stock of plastering tools at Gypsumtools featuring products from all the best brands so you can ensure you’ve got the right equipment for the task in hand. Here is a handy list of tools needed to plaster a wall.

Trowel – this is a long rectangular tool which can be used for applying plaster to the wall or smoothing it out. Make sure you use a good clean trowel for the job, to ensure the best finish you can get. We have a multitude of plastering trowels in stock to choose from in some of the most popular brand names, including Marshalltown and Nela. If you’re not sure which one to pick, our staff are always on hand to offer advice.

Hawk – this is a metal square with a handle on the underside, which is a great tool for holding the plaster in place while you dip your trowel in and apply it to your surface. You just hold this in one hand, the trowel in the other and away you go. It does make the job take less time and is a popular choice for the professional plasterer, however if you’re not used to a hawk, it might be best to go with the cement pan (or mud pan) to start with and avoid the spills.

Knife – a good knife is certainly one of the materials you’ll need when plastering and it can be a great piece of kit for all manner of things, from cutting plaster, plasterboard, drywall or tape, to repairing holes in the plaster, or spreading plaster over a small area. There are different kinds of knife available for different plastering jobs, so whether it’s a utility knife, Stanley knife or a jointing knife you need for the work, have a browse through our range.

Water brush – these should be able to tolerate extended exposure to water and can be used as a simple water brush or also for painting ceilings or walls.

Stepladder – not strictly necessary if you’re really tall, or have a piece of wall to plaster that’s not very high. But, for ceilings and hard to reach places these can be invaluable pieces of kit, especially if they also come with a pan shelf for your mud pan.

Spirit level – once you’ve smoothed your plaster down with a trowel, or fixed your plasterboard in place, these are incredibly useful for making sure your work isn’t wonky!

Corner trowel – these are such useful tools when you’re plastering a wall. They’re great for getting into the corners at the edge between the wall and the ceiling when you’re plastering, creating a perfect 90 degree angle, whether you’re using drylining or plaster.

Pole sander – when you’ve done the plastering and you’re smoothing and sanding it down, this is a useful piece of kit for reaching the hard to reach places, to ensure a lovely smooth finish across the board and not just where you can reach.

What you have to remember when you’re wondering what tools are needed to plaster a wall, is to get prepared beforehand. Make sure you have everything you need all ready and prepared for your plastering job before you start.

If plastering is new to you and you’re really not sure where to start, take a look at our plasterer’s starter kit, which includes mixing bucket, bucket trowel, water brush, Hawk, plasterer’s trowel and Wiss straight cut snips. And remember, if you have any questions, we’re more than happy to help. Give us a call or pop in to our Midlands based trade counter today.

When you order online we also offer next day delivery straight to site and free delivery on orders over £50.

What Materials are needed for plastering?

what-materials-needed-for-plastering

At Gypsumtools we not only provide equipment and supplies for professional plasterers, but we’re also the first port of call for any DIY enthusiasts out there. If you’ve got a plastering job on the cards and are new to the game, you may be wondering what Materials are needed for plastering?

You could have already decided on whether it’s wet plaster or drylining that you need, because both have pros and cons. While wet plaster is the traditional method that offers better sound proofing and it’s easier to fix things to when its done, it takes a lot longer to dry than drylining, meaning that a drylining plastering job will be quicker all round.

But once you’ve made that decision, what materials will you need for your plastering job? Here are some pointers:

Plaster – When you’ve decided on wet plaster for the job, working out which plaster best suits your needs is a good place to start. Plaster is one of the oldest building materials used by man and was originally used centuries ago in primitive mud form, to hold buildings together.

These days it’s predominantly used to repair damaged walls or provide a smooth surface on interior walls and ceilings ready for decoration and the majority of plaster is cement based or gypsum based. Have a look at our gypsum based plaster and choose from our setting compound or jointing compound for drywall systems, or our Thistle multi-finish which will provide a smooth high quality surface on a wide range of backgrounds and make a great base for your decoration.

Plasterboard – if wet plaster isn’t your thing and it sounds far too complicated a process, drylining is an option that has been around since the 1940s. It involves using plasterboard, which is two layers of gypsum held between two outer layers of lining paper. The plasterboard is stuck to the wall using adhesive and it’s a great option if you’re looking for some good sound proofing. It will also offer a smooth finish that is ready to decorate pretty much straight away.

Plasterboard adhesive – this is the material that will help you attach your plasterboard to your brick or block work. It’s often a preferable method to screwing the plasterboard to the wall as it goes straight onto bare brick and won’t leave unsightly holes that will need filling in. There are two methods to using adhesive – either dot and dab or the direct bond method. They’re pretty straight forward, but we’re always around to offer advice if you’re unsure.

Bucket of clean water – this is really handy for keeping tools clean, wetting your sponge or adding to your plaster to make it thinner and easier to spread about. View see our bucket range.

Extra bits of kit – think preparation before you start the job and get some good dust sheets to put down to protect your carpets and furniture, an effective dust mask for when you’re sanding the surfaces down, as well as sponge and sandpaper for a smooth finish.

We’re always open for advice!

At the end of the day, if you’re really not sure, our staff have more than 50 years of experience in the plastering industry, so whether you’re online or you’re making a visit to our trade counter, if you’re not sure what materials you need for plastering or what plastering tools you need, just give us a shout.