Cracks and holes in your plaster can occur when furniture and doors are moved around too roughly, perhaps a rail or picture frame is put up in the wrong place leaving an unsightly hole, or even when your house is simply settling into its foundations.
Unfortunately such cracks and holes can make your home look tatty and in need of repair, especially if they’re in really obvious places. But before you call out a professional to come and fix the problem, did you know that DIY plaster repair can actually be easier, more straightforward and pain free than you might think?
From polycell plaster repair or plaster repair patches to the best filler for plaster walls, Gypsumtools has it all!
Tips on Plaster Repairs – How to Patch Plaster Wall Holes
If you’re looking to do a spot of DIY plastering on any cracks and holes in your home it really can be achieved yourself and we’ve got a few tips on plaster repairs that might just help you along.
Learn how to patch plaster wall holes:
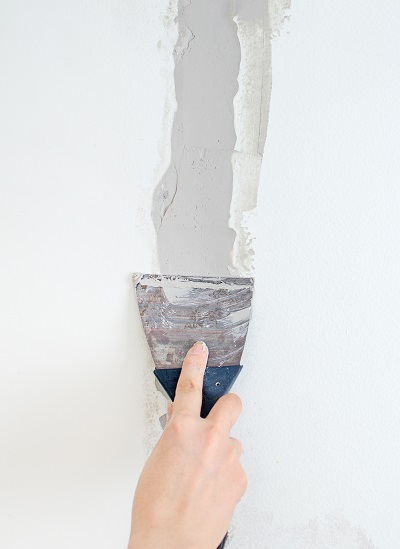
• Get the right tools for the job and be prepared before you start – that includes making sure you have a good putty knife/wall scraper or plasterers trowel, patching plaster and joint compound.
• Get a dust sheet down to protect your floor and preferably undertake your patching job before you paint or wallpaper your wall.
• Clean out all of the loose plaster from around the hole or crack before you start and brush away any dust using a clean paintbrush – this will enable a better finish.
• Hairline cracks may need widening to give the patch a good area to stick to. And, for longer hairline cracks, take off bits of plaster at intervals along its length to give a better seat for the patch.
• Splash a bit of water on your wall first to stop it absorbing water from the plaster too quickly and causing it to dry out sooner than you need.
• Take care when loading your trowel up with plaster – you don’t want to apply too much
• Fill the crack with plaster using a plasterers trowel with an overlap onto the existing plaster. Then allow it to dry for 24 hours
• If after this time it has shrunk slightly into the crack, patch it again and allow it to dry for another 24 hours.
• For holes, carve under the edge of the existing broken plaster to allow the plaster patch to seep underneath.
• Make sure to dampen the edge of the hole before you start to ensure any unwanted plaster will come off easily.
• When you fill a hole with patching plaster, remember not to fill it level with the existing wall, but leave space for some joint compound to go on top after the patching plaster has dried for 24 hours.
• Once your plaster has dried completely you can then add the joint compound to the patch, going just over the edges to make it even with the existing wall.
• After your patch is completely dry you can then sand the surface to give a smooth finish.

Order your Tools from Gypsumtools
For a wide range of DIY plastering tools to suit any budget, order your plaster wall repair products from Gypsumtools today. You can either take a look around our online store and order securely for next day delivery, or, if you’re nearby, why not pop in to our Leicester trade counter?
With over 50 years of experience in the plastering industry, we can offer friendly and knowledgeable help and advice on the right tools and the best way to help you get the job done in no time.