The Evolution Of The Wall

Plasterer adding second coat

A wall is an everyday thing that we don’t normally think twice about when we see it, whether it’s an interior or exterior wall in a shopping centre or in a prestigious gallery. But just imagine how varied and versatile its uses have been over the (literally!) thousands of years it’s been used in civilisations right across the world.

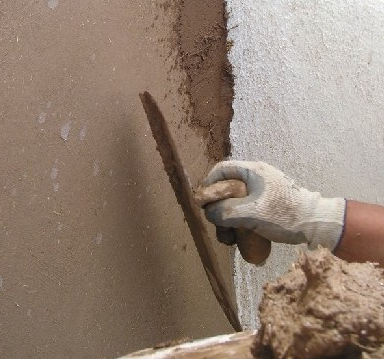
From mud-made walls to the fine art that dryliners, fixers jointers and plasterers now carry out. It’s also easy to forget that plaster and jointing compound in its basic form is a combination of things like sand, rock, cement, lime, and water.

Plaster Has Revolutionised Wall Building

The main point of building a wall right from its earliest days, was to bring windproof, waterproof protection to dwellings so that everyday people could stay safe and dry, whatever the weather. And then of course, over the years building internal walls and ceilings became an art. We’ve seen plaster and jointing compound being used for aesthetic effect to create a look of richness and beauty in the extravagant homes and prestigious buildings such as museums, theatres and palaces.

All those aspects of making a wall remain part of the use and purpose of the material, but time has led to sizeable industry improvements in technology and skill, in keeping with the needs of contemporary life.

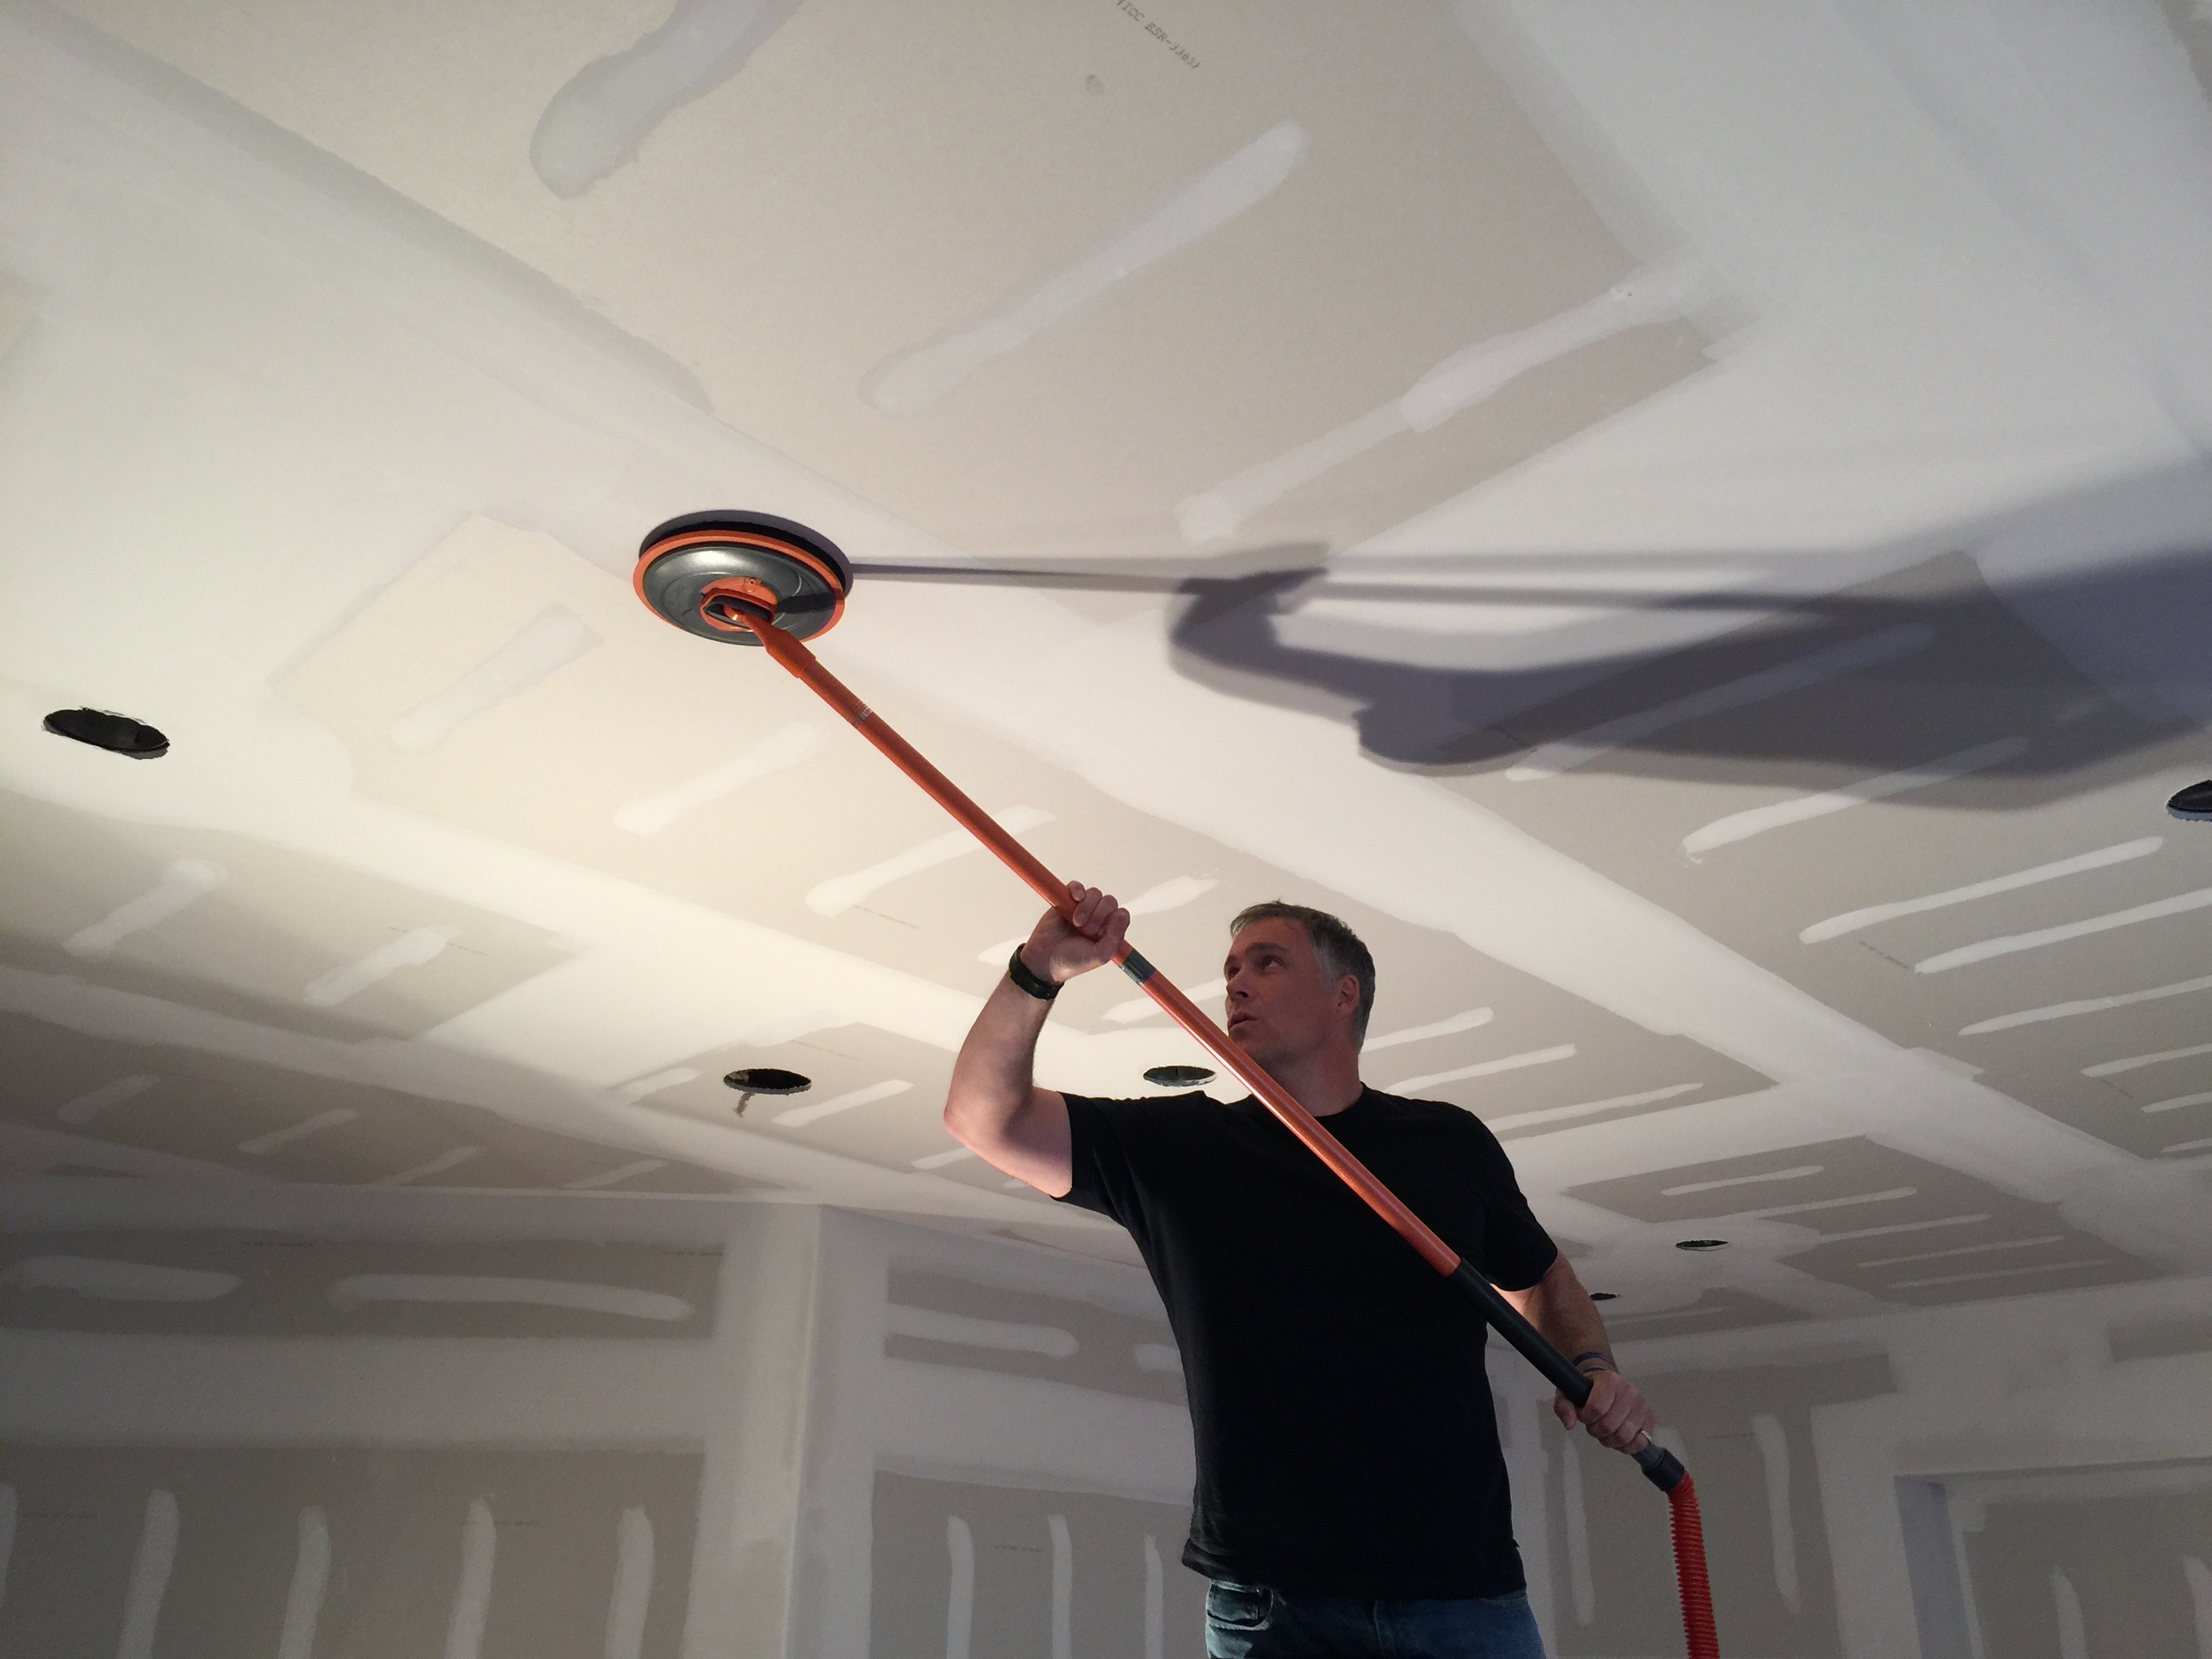
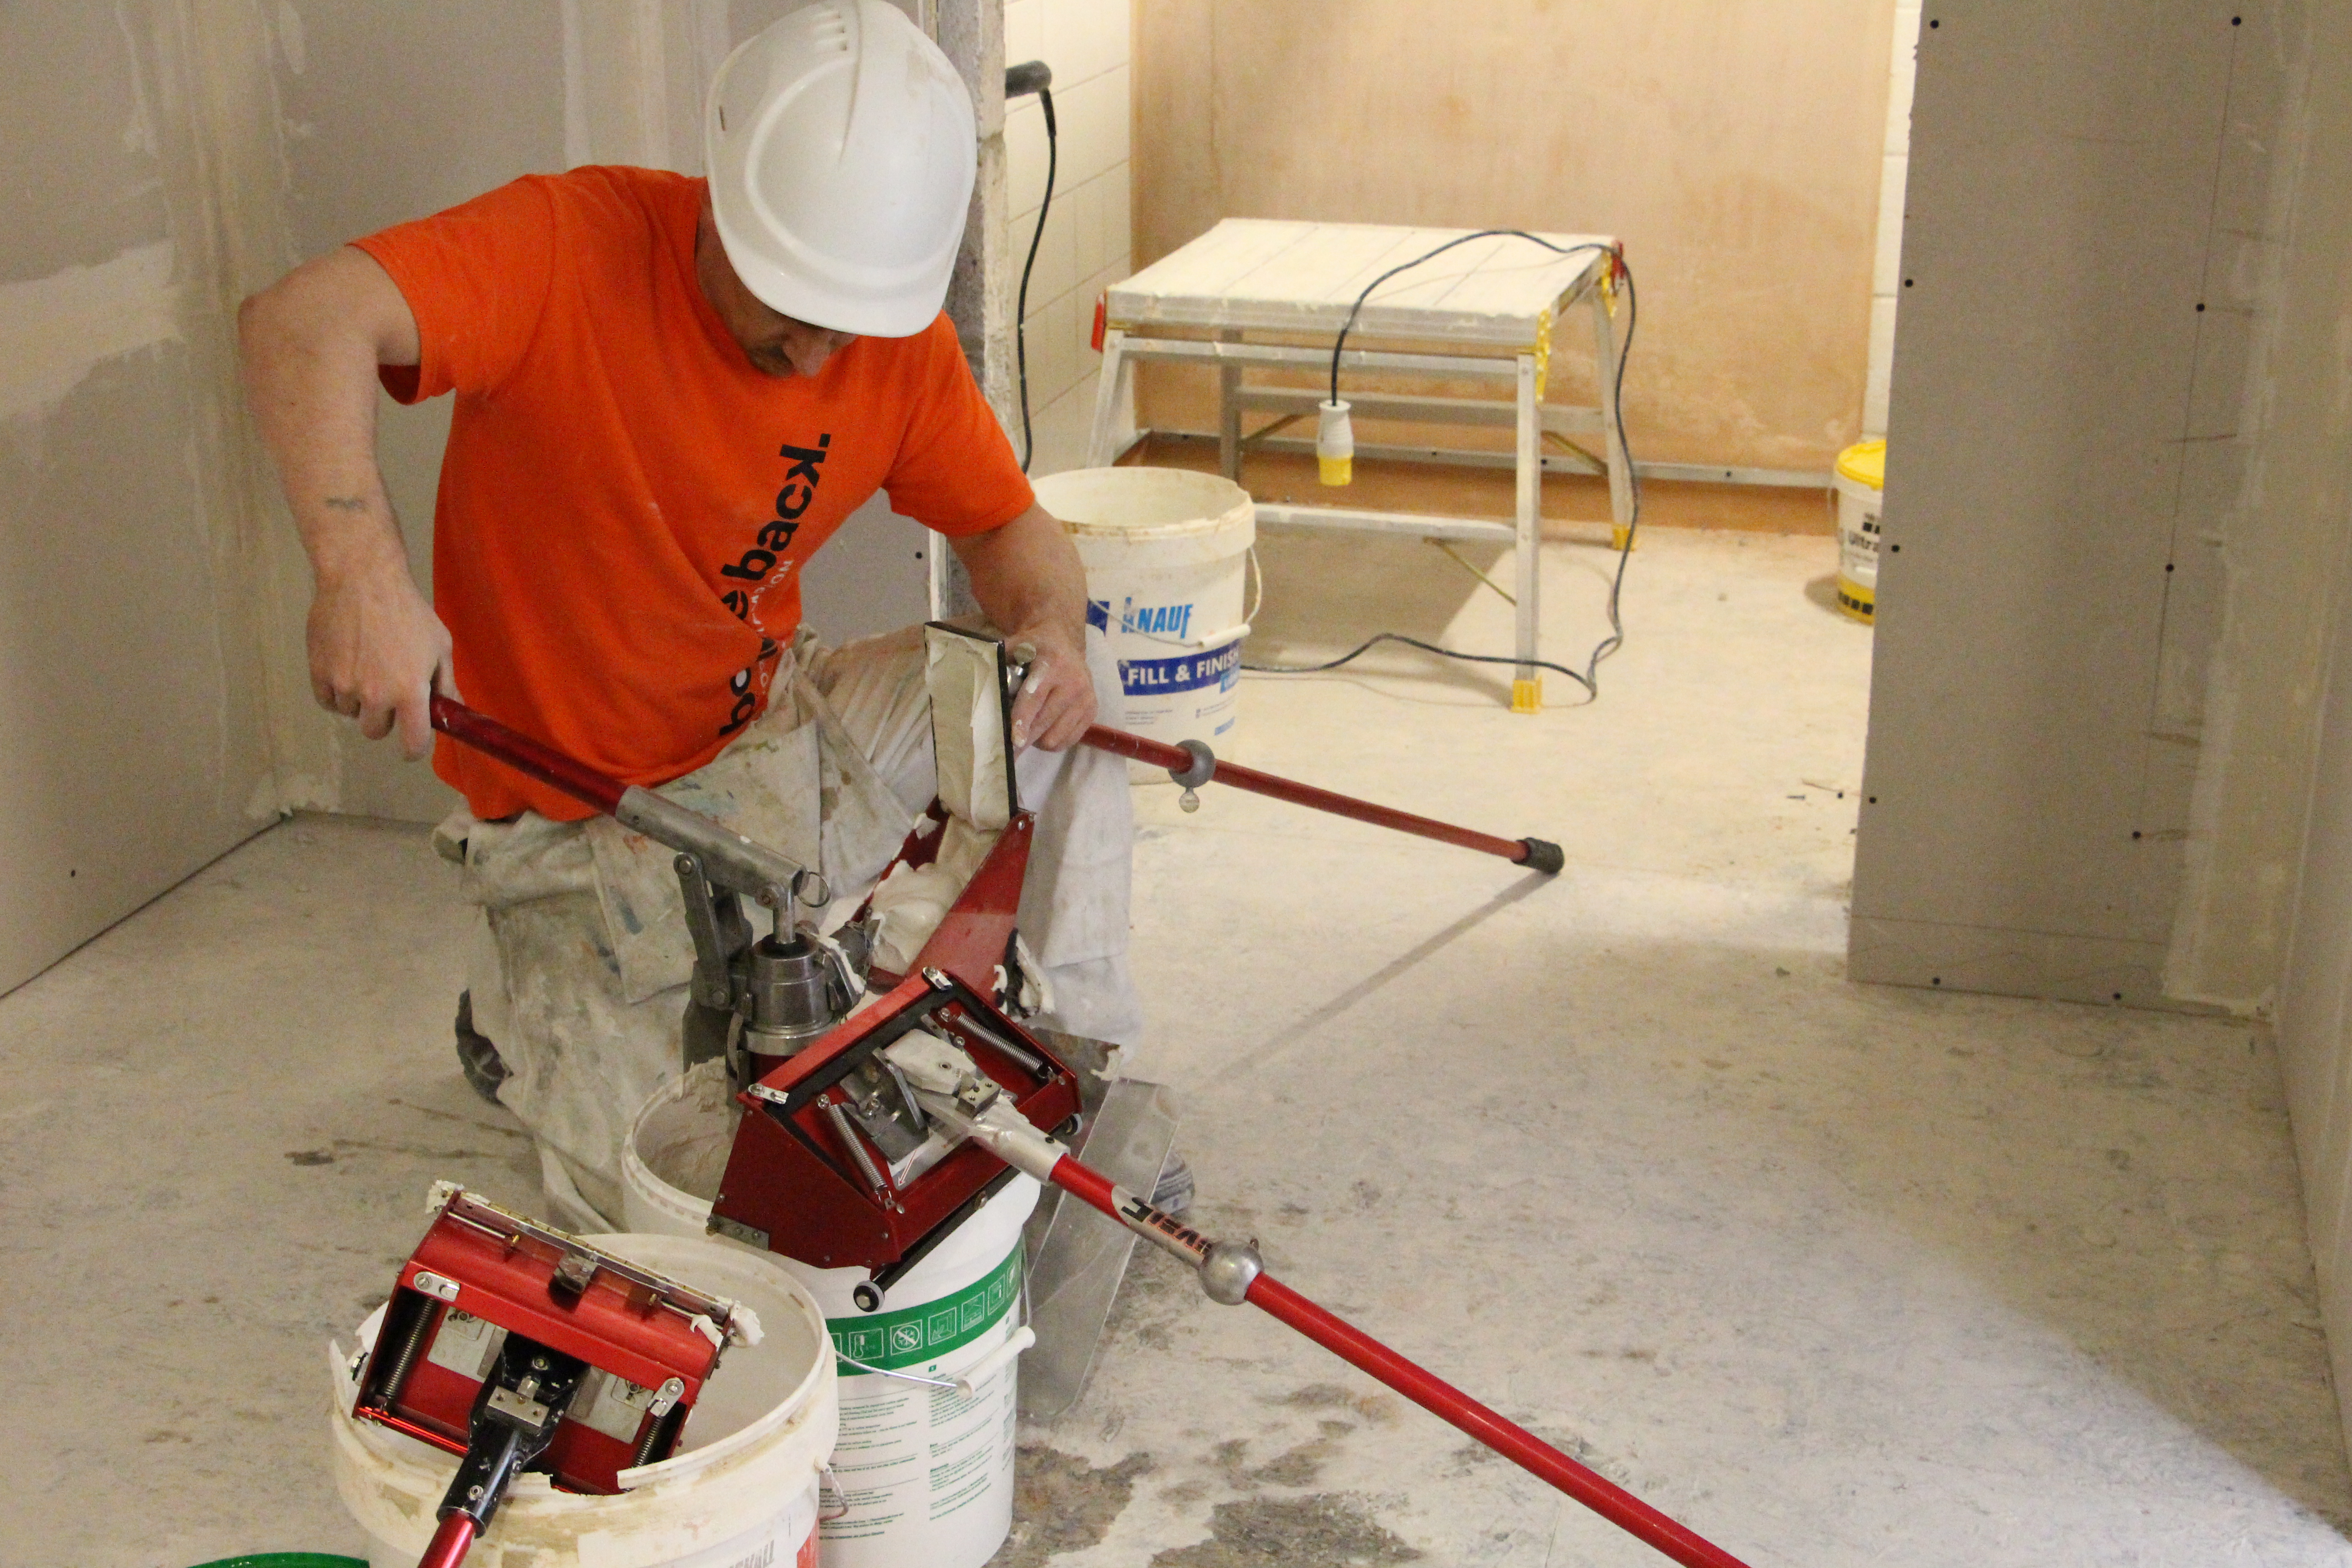
So, plaster has been made from all kinds of things over its long history; some of which are cheap and readily available, and others that were more expensive and refined. But let’s concentrate for now on the most popular modern day forms of building a wall… drylining.

These days, gypsum (also known as calcium sulfate dihydrate) has become the main component of drywall compound. It has a crystalline structure that makes it perfect for the job. No fibrous binding material is needed because when gypsum get wet, they bind automatically and naturally. We all love a smooth mix!

Check Out Our Range Of Plastering Materials & Tools

For ease of use, why not try 4T plaster compound that’s ready to use straight out of the box and doesn’t necessarily even need mixing. Something like Wondertex Prem, which is great for filling and finishing. To save even more effort and energy, how about getting a cordless mixer that will do the hard work for you? And you could invest in a DeWalt mixing paddle, which will even save you for bending down – excellent news for your back!

We have all the drywall and plastering supplies you need for any project. Just have a look through our entire range to find the materials and equipment you need for the finish you’re after. If for any reason you can’t find what you need, be sure to give us a call and we’ll try our best to get you exactly what you need!

The Ultimate Sanding Guide For Beginners

Full Circle Air Radius 360 Dust-free Sanding System

Let’s make it easy for you to start sanding if you’ve never really learned how.

To start with, choose the right sandpaper – coarse or fine. Coarse has larger aluminium oxide particles, which means you’ll be sanding faster and with more aggression. When you’re ready for the finishing touches, you’ll want to go for a fine grit paper. Be patient with it, and you’ll be polishing the surface to a lovely smooth end product.

You can use paper on its own of course, or wrapped around a block for more stability. If you have a larger area to sand, it’s worth using a tool, such as an orbital sander, which also have a dustless system keeping you safe.

Sanding tools can be fitted with all kinds of accessories, depending on the surface you’re sanding. A sanding disc, for example, isn’t as heavy duty than a sanding band. An abrasive brush will work on a surface layer without causing harm below that surface. Perfect for sanding down drywall after yoru taping and jointing.

Take care, because sanding inevitably creates dust in the air, which isn’t nice to breathe in anyway, but especially when you know some of those particles could be toxic. A face mask is a great way to keep the dust inhalation to a minimum, and plastic goggles are a good idea to protect your eyes, safety first!

This is also applicable when cutting drywall to the size you require. When using a drywall jab saws and rasps to smooth off your edges, remember to wear the relevant PPE to protect yourself. Also make sure you’re wearing gloves to keep your hands safe.

A vacuum cleaner is going to be vital, to avoid particles make their way into your paintwork or accumulating in the area you’re trying to clean. Give it a vacuum to remove most of the sanding dust, and then with a damp cloth give it a bit of a wipe to finish it off.

Everything you need is available from the Gypsum Tools site. We stock a range of sanding tools and accessories, including heavy duty kit such as the Giraffe Wall & Ceiling Sander, which has full safety features, as well as speed selection controls.If you’re working on some drywall sanding and you want a more manual approach, the Full Circle Flex Edge Multi-Layered Drywall Sanding Tool is going to be perfect. Or if you’re simply DIY’ing we have loads of sanding blocks and more.

We sell foam replacement pads for this type of project, as well a range of sandpaper sheets. But even if you’re planning a small scale sanding project, we can help you with hand sanders, and sanding tools and supplies to fit the job. Just let us know exactly what you need and we’ll be happy to help!

How To Repair A Damaged Plaster Wall

Plaster Wall Repair

Keeping your home looking great can be a constant challenge as you fight against cracks and holes appearing all over the place. Repairing damaged plaster can often be high on your list, but thankfully it’s a task that can be completed successfully by a skilled DIYer.

As homes age, it’s only natural for things to become a lot more susceptible to deterioration. This is particularly common in older buildings that still have walls or ceilings made from plaster rather than the now standard drywall or wallboard.

When you come across damage to a wall in your home or patches of loose plaster, you’ll need to repair the area before you can start painting or wallpapering – keep reading to learn how!

First things first, make sure you’ve got all the necessary tools to get the job done: check out our comprehensive plastering tools checklist.

To repair a crack…

Before getting started, make sure the floor under the crack has been covered with a protective dust sheet and this has been secured with painter’s tape. This will ensure the floor isn’t damaged by any spilt plaster or joint compound, as well as making the clean-up a lot simpler.

Once you’re prepared and ready to go, start by inspecting the crack and removing any loose pieces of plaster if there are any. You can also use a damp rag or cloth to wipe away dust or small debris to ensure the crack is clean for repair. The next task is to dampen the immediate area around the crack with a spray bottle of water to ensure the surface is ready to be repaired.

Then following the manufacturer’s instructions, mix up your plaster or you could used (ready mixed jointing compound) in a large bucket and pour this into a mud pan. From here, apply a thin layer of plaster/jointing compound directly over the crack with a plastering knife or jointing knife as they are commonly known and make sure the finish sits level with the rest of the wall.

Thankfully, repairs to cracks generally only require one layer of plaster or joint compound, so just allow this to dry over the next 24 hours and check when the plaster has set. If you’re short on time, why not add our plaster accelerator to the mix.

Safety note – whenever you are dealing with plaster, make sure you wear the appropriate safety equipment including clothing, footwear, goggles and also a mask to prevent dust inhalation.

The last step once the plaster or joint compound has dried successfully is to sand and smooth the area down ready for decorating. Take a piece of fine-grit sandpaper and simply sand the jointing compound down until the finish is smooth and level with the existing wall.

Once you’re happy, wipe the area with a damp cloth to remove any dust and allow this to dry fully before painting.

If you prefer, you can also use a joint compound to patch a crack if the damage isn’t too severe. Just smooth a small amount directly onto the crack, allow it to dry and then sand down before painting or wallpapering.

To repair a hole…

In most cases, when you come across a hole in your wall, you’ll need to start by removing any damaged plaster using a hammer and chisel to chip away and smooth out the area.

Take care here not to chip away too much plaster or hit too hard as you may damage the plaster even further. As a final step, smooth the edges of the hole as required with a utility knife.

When the plaster is prepared and dry, use a paintbrush to apply a layer of bonding agent to the exposed plaster. This will allow the plaster or jointing compound you’re about to apply to bond correctly with the rest of the wall.

After mixing up your plaster in a bucket, the first coat should be applied using a putty knife. For the second coat, you’ll need to cross-satch the first coat of plaster as it begins to set – this means scratching or scoring the plaster with a putty knife to create shallow grooves which help the two coats of plaster bond together more effectively.

Once this first layer has dried for 24 hours, dampen the area with a spray bottle of water and repeat the process. Again, let this new layer dry for a further 24 hours.

To complete the repair, you’ll need to apply joint compound on the newly dry plaster layer. Smooth this out to reach around 3” wider than the hole to create a thin veil across the wall, blending the old plaster in with the new. Once this is dry, grab your fine-grit sandpaper and smooth the entire area down.

It’s at this point you can prime the area and prepare it for painting or wallpapering.

So there you have it, two step-by-step methods to repair the most common types of plaster damage in your home. Follow our guides and you can’t go wrong, but if you do need more guidance, here’s a video version of the process.

Why Buy When You Can Borrow! Reasons To Hire Your Taping Tools

With years of experience in the plastering and drylining industry, we understand that buying the specific tools you need for a project isn’t always the most cost-effective solution. Having to find the cash for tools can be challenging, especially if you’re struggling to secure work on a consistent regular basis and we all know that even a small set of taping tools is expensive.

The other potential pitfall is that you might only need one or two tools for a short stint of work, so it can often feel like buying a whole set of tools isn’t worth your while – what are you going to do with them after the job is finished? If it is your first time using the tools will you ever use them again?

This is where looking into taping tool hire can be a smart move. Here at Gypsumtools, we are proud to offer a fantastic tool hire service that can be fully customised to suit your unique requirements. Hire taping tools with us for 90 days, 6 months, 9 months or even an entire year – just choose the length of time that suits your work schedule, we’ll do the rest.

Unsure about hiring? We understand, but there are plenty of reasons why you should hire specific drylining tools you need instead of investing in them.

For example, automatic taping tools are fantastic in speeding up the taping process and ensuring the final finish of your project is consistent and of a high quality. Buying brand new taping tools can be expensive, so hiring the ones you need for a short term work can make a lot more sense from a financial perspective – especially if planned jobs fall through at the last minute, allowing you to speedily get through the one job and move onto another.

Here are some further reasons why hiring taping tools could suit you better than purchasing them outright:

  • Whatever tool you hire from us, it will always be the latest model – meaning you’ll have the best piece of equipment for that task in your toolkit and therefore a better chance of delivering a higher quality finish.
  • You’ll make significant savings on the upfront cost of purchasing taping tools as you’ll only have to pay a one off upfront cost and a refundable deposit.
  • There’s no ongoing cost to you as the user of the tools; any problems give us a shout and we’ll do our best to advise or fix your tools if anything were to go wrong.
  • You can save time on the job by having the exact taping tools you need delivered to your site by our UK-wide delivery service.
  • Hiring the specific taping tools you need can allow you to customise your toolkit on a project-by-project basis.
  • If you’re unsure whether a specific tool could be the one for you, hiring it first gives you a fantastic chance to try it before you choose to buy it outright.
  • As part of the tool hire service we provide to our customers, we’re more than happy to offer advice on best use practises as well as a demonstration of any tools if needed.
  • You can also purchase a service when taking out a hire package with us, ensuring that if any any damage is caused to the tools, we’ll sort you out with replacements until your original tools are fixed and returned to you.

If you need even more persuading that hiring can be just as efficient as buying, Gypsumtools stock one of the UK’s largest range of taping tools, meaning you’ll be able to choose from an extensive selection of the must-have industry products. All these tools are available for hire across a range of different time periods to provide maximum flexibility to our customers. And guess what… we have another brand that’s going to available for hire VERY soon!

We work with some of the biggest brands in the drylining industry too, including the likes of Level 5 and Northstar so you can be assured of each and every tools’ quality and reliability – all available at highly competitive prices, for a minimum of 90 days and a refundable deposit which is payable before your lease period begins, simple.

Our hire team pride themselves on stocking the best kit at the best prices and we’re here to help everyone get hold of the tools they need to get the job done. In-house experts are always on hand via our Leicester trade counter to offer their advice on the most suitable taping tools for your project, as well as the most cost-effective hire plan for your needs.

To find out more or enquire about hiring any of our taping tools, give us a call on 08456 254 321 and speak to a member of the team. Or you can visit our ‘Equipment Hire’ page and download a brochure that suits you.

Find out how you can make huge savings on our taping tools with our Taping Tool Kit Builder, featuring DeWalt and Level 5 taping tools.

The Ultimate Drylining Guide

Dry lining is a great way to give a smooth finish to surfaces enabling you to decorate them right away.

However, there’s a bunch of skills you need to learn, tricks & tips to master and tools to consider before approaching your first project.

That’s why we here at Gypsumtools have created this Ultimate Drylining Guide to help you through every step of the way!

Think you have an article that we should be referencing? Get in touch

Bounce Back’s Trainees Get Hands On With Gypsumtools

In recent months Gypsumtools teamed up with Bounce Back, a charity and social enterprise which focuses on training and employing ex-offenders in the construction industry. Gypsumtools sought an opportunity to aid the charity knowing that their most popular course is Drylining, as a result Gypsumtools provided a full Level 5 Automatic Taping Kit to the social enterprise.

Bounce Back’s main training hub is located within HMP Brixtonwhere there are a total of three state of the art training Centres including, painting and decorating, scaffolding and Drylining. There is also another Bounce Back Drylining training centre in HMP Wandsworth. Bounce Back firmly believe that everyone should be given a second chance, and by providing individuals with the opportunity to obtain knowledge, experience and a qualification whilst in custody, they will further their chances of employment on release and decrease the opportunity of reoffending.

IMG_2486

Gypsumtools firmly stands by Bounce Backs approach and ethos, by providing the training programme with a full Level 5 Kit it will enable trainees to gain additional experience as they are provided with the opportunity to learn dry lining via traditional methods but are then given the opportunity to learn what is becoming the more popular way to install drywall, automatic taping.

‘Bounce Back gives individuals the opportunity to gain a qualification but, they were missing the tools to further enhance the course and their practical experience. By using Level 5 tools it will help the prisoners to be more employable as gain experience in both methods of Dry Lining, allowing the training programme to be responsive to the industry’. Explained Nick Ralphs the Managing Director of Gypsumtools.

IMG_2459


The Drylining course is 8-10 weeks and will allow the trainee to gain a full Level 2 Diploma in Dry Lining, and have become the most popular course within HMP Brixton. Gypsumtools recently visited the Prison to see the tools in action.

‘Every trainee seems to have the same view of the fact that by using Level 5 tools, productivity increases and they are easy to use once you get the hang of it. Added Ralphs.

Being the number 1 distributor of Level 5 Tools in the UK, Gypsumtools knows the rapid industry increase of using Automatic Taping Tools of large commercial sites, along with housing sites. Knowing that by providing these tools will indefinite increase the number of people placed in employment upon release is the one of the main reasons that Gypsumtools decided to make this partnership.

‘This is by far the best course out of the ones available, it requires more skill and that’s why I enjoy it more. Having these tools as well makes it even more enjoyable, we’re learning something new and we know its required for when we get out.’ Explained oneof the trainees on the Drylining course.

Bounce Back have also partnered with some of the biggest construction contractors in the UK allowing the charity to go beyond the prison walls. This allows Bounce Back to provide aftercare support upon release, the individual becomes fully qualified and is awarded a CSCS Card allowing them to work on a construction site. A dedicated member of the Bounce back’s team works with the individual to get on site as soon as possible. As a result of their work, Bounce Back has a re-offending rate of only 12% against a government average of 60% which is a great achievement. A total of 85 people has been awarded a CSCS card and over 480 have gained a qualification this year.

‘With Bounce Back’s aftercare upon release to help people re-engage with the community, we hope together we will help to place ex-offenders into employment with the added experience the tools provide thus, lessen the chances of reoffending.’ Finalised Ralphs.

To read more about Bounce Back please click here: http://bouncebackproject.com

IMG_2441


Site Lights for Plasterers

Site Light for Plasterers
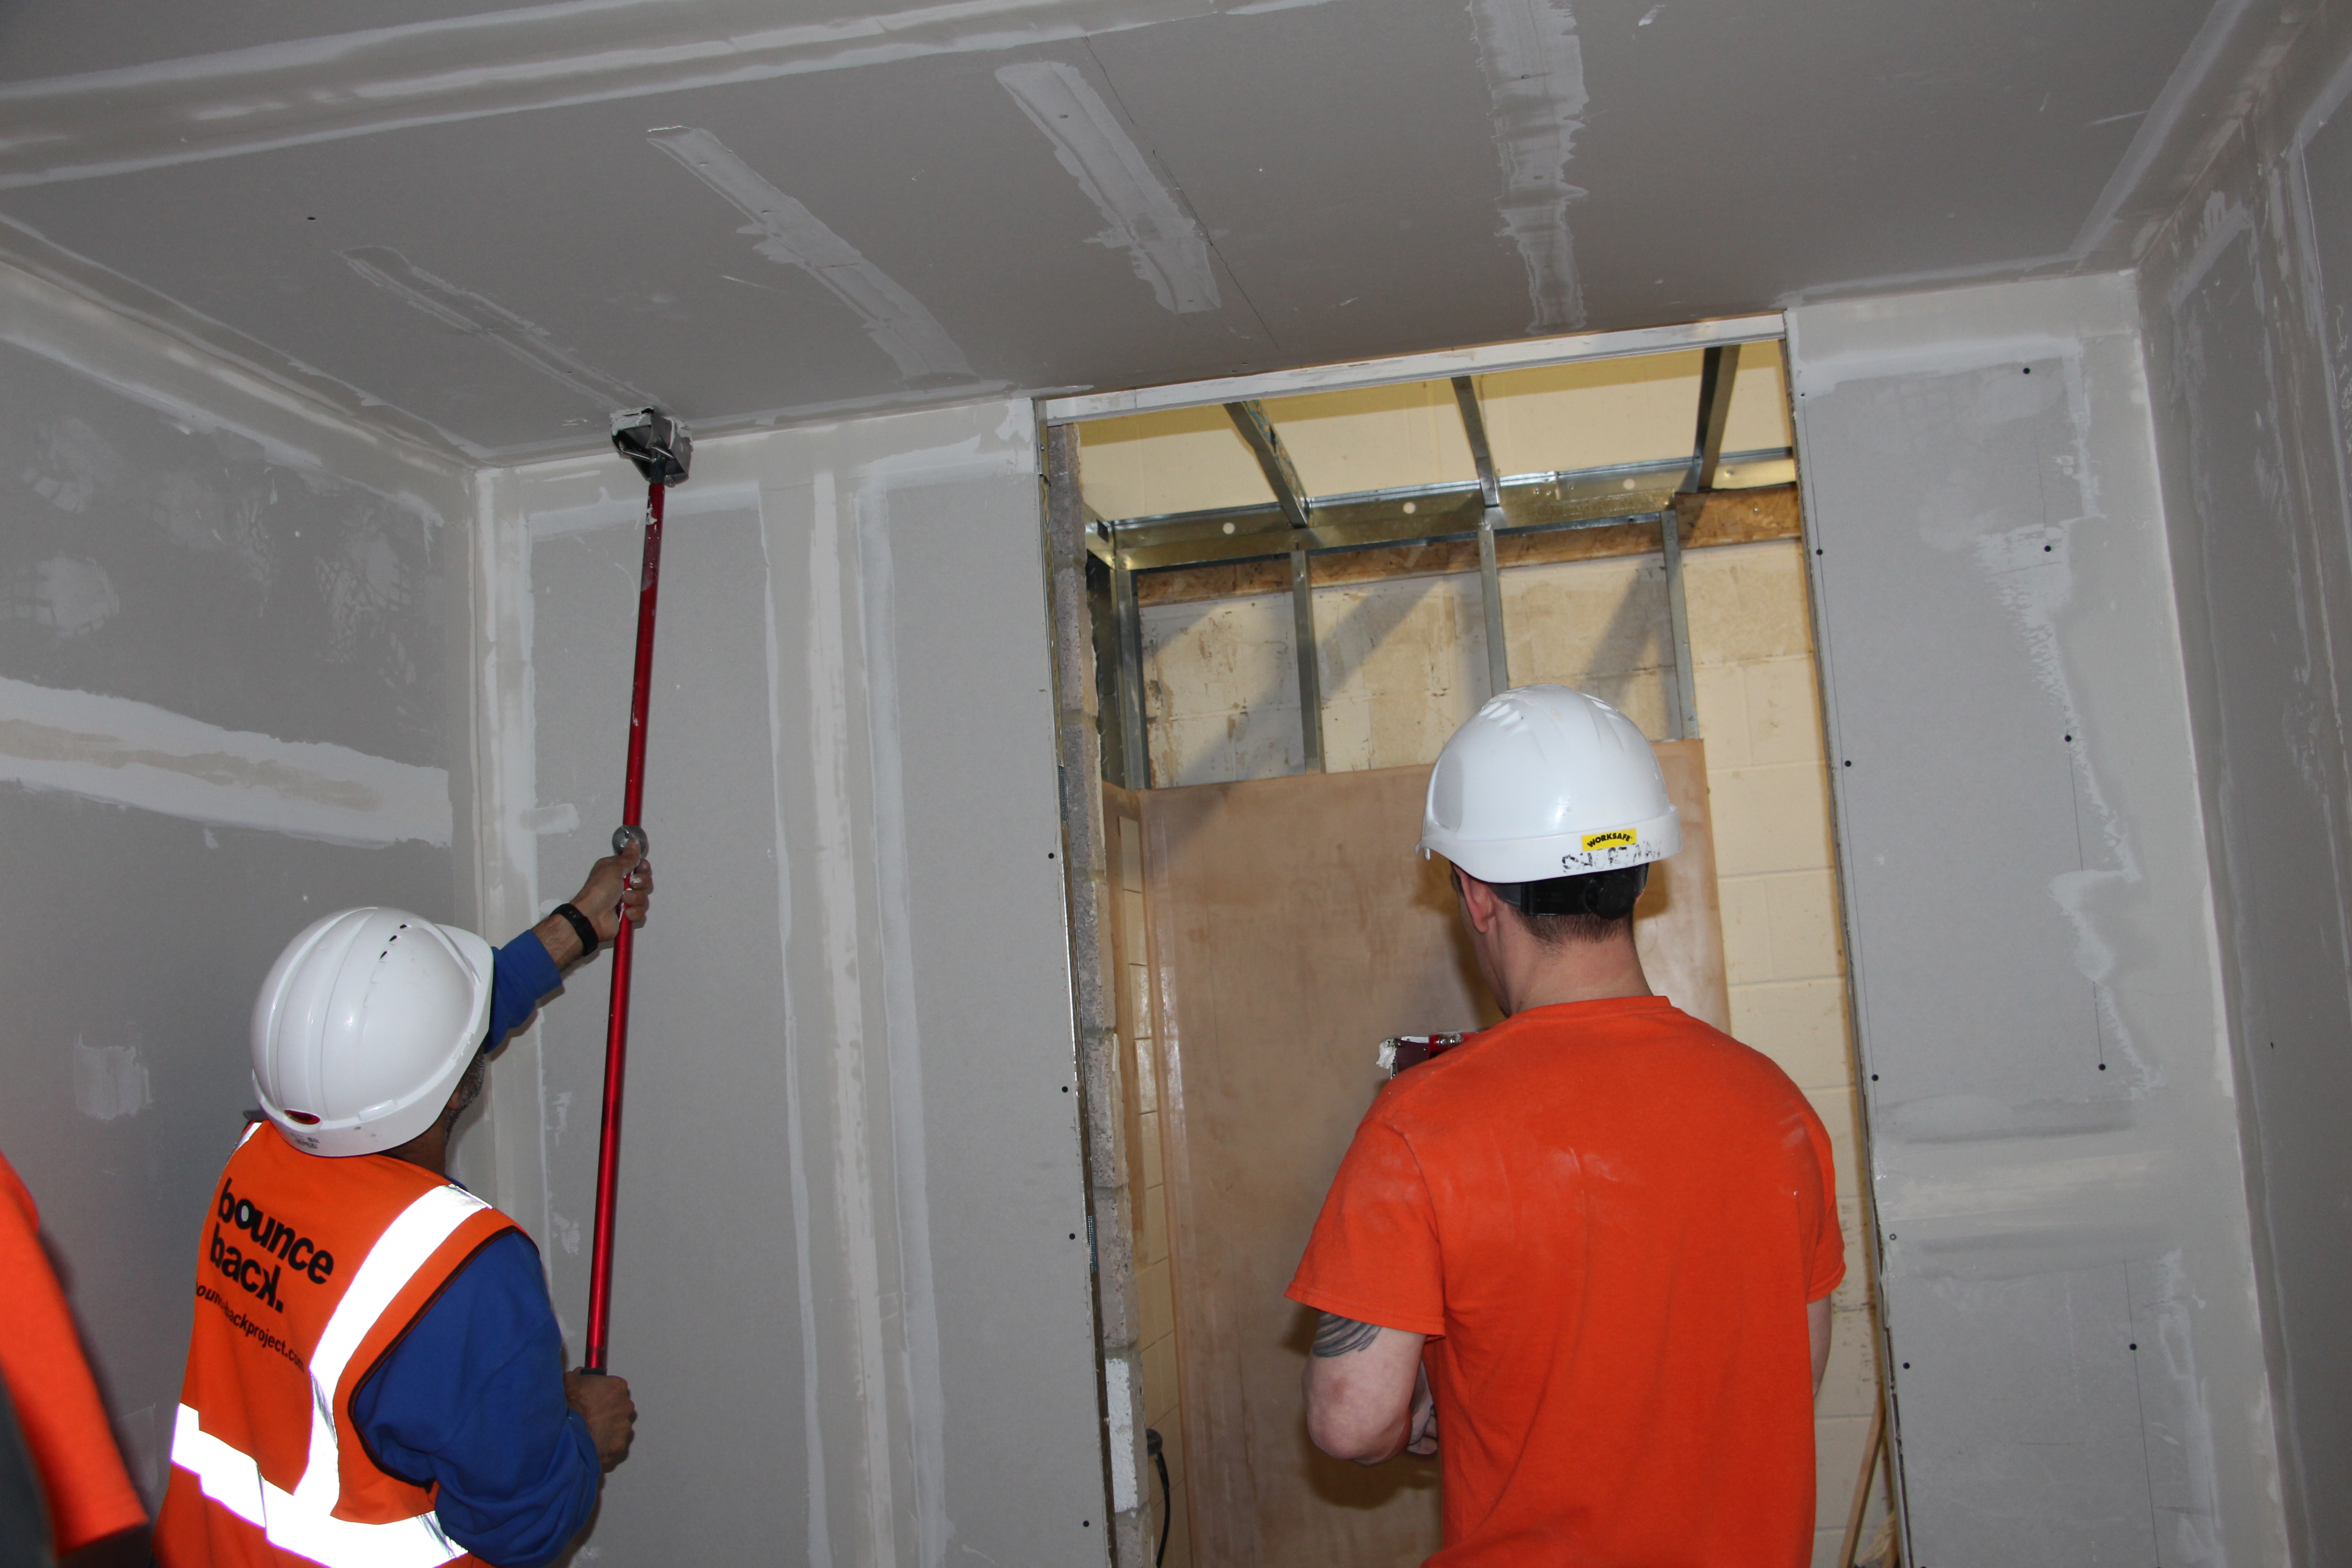
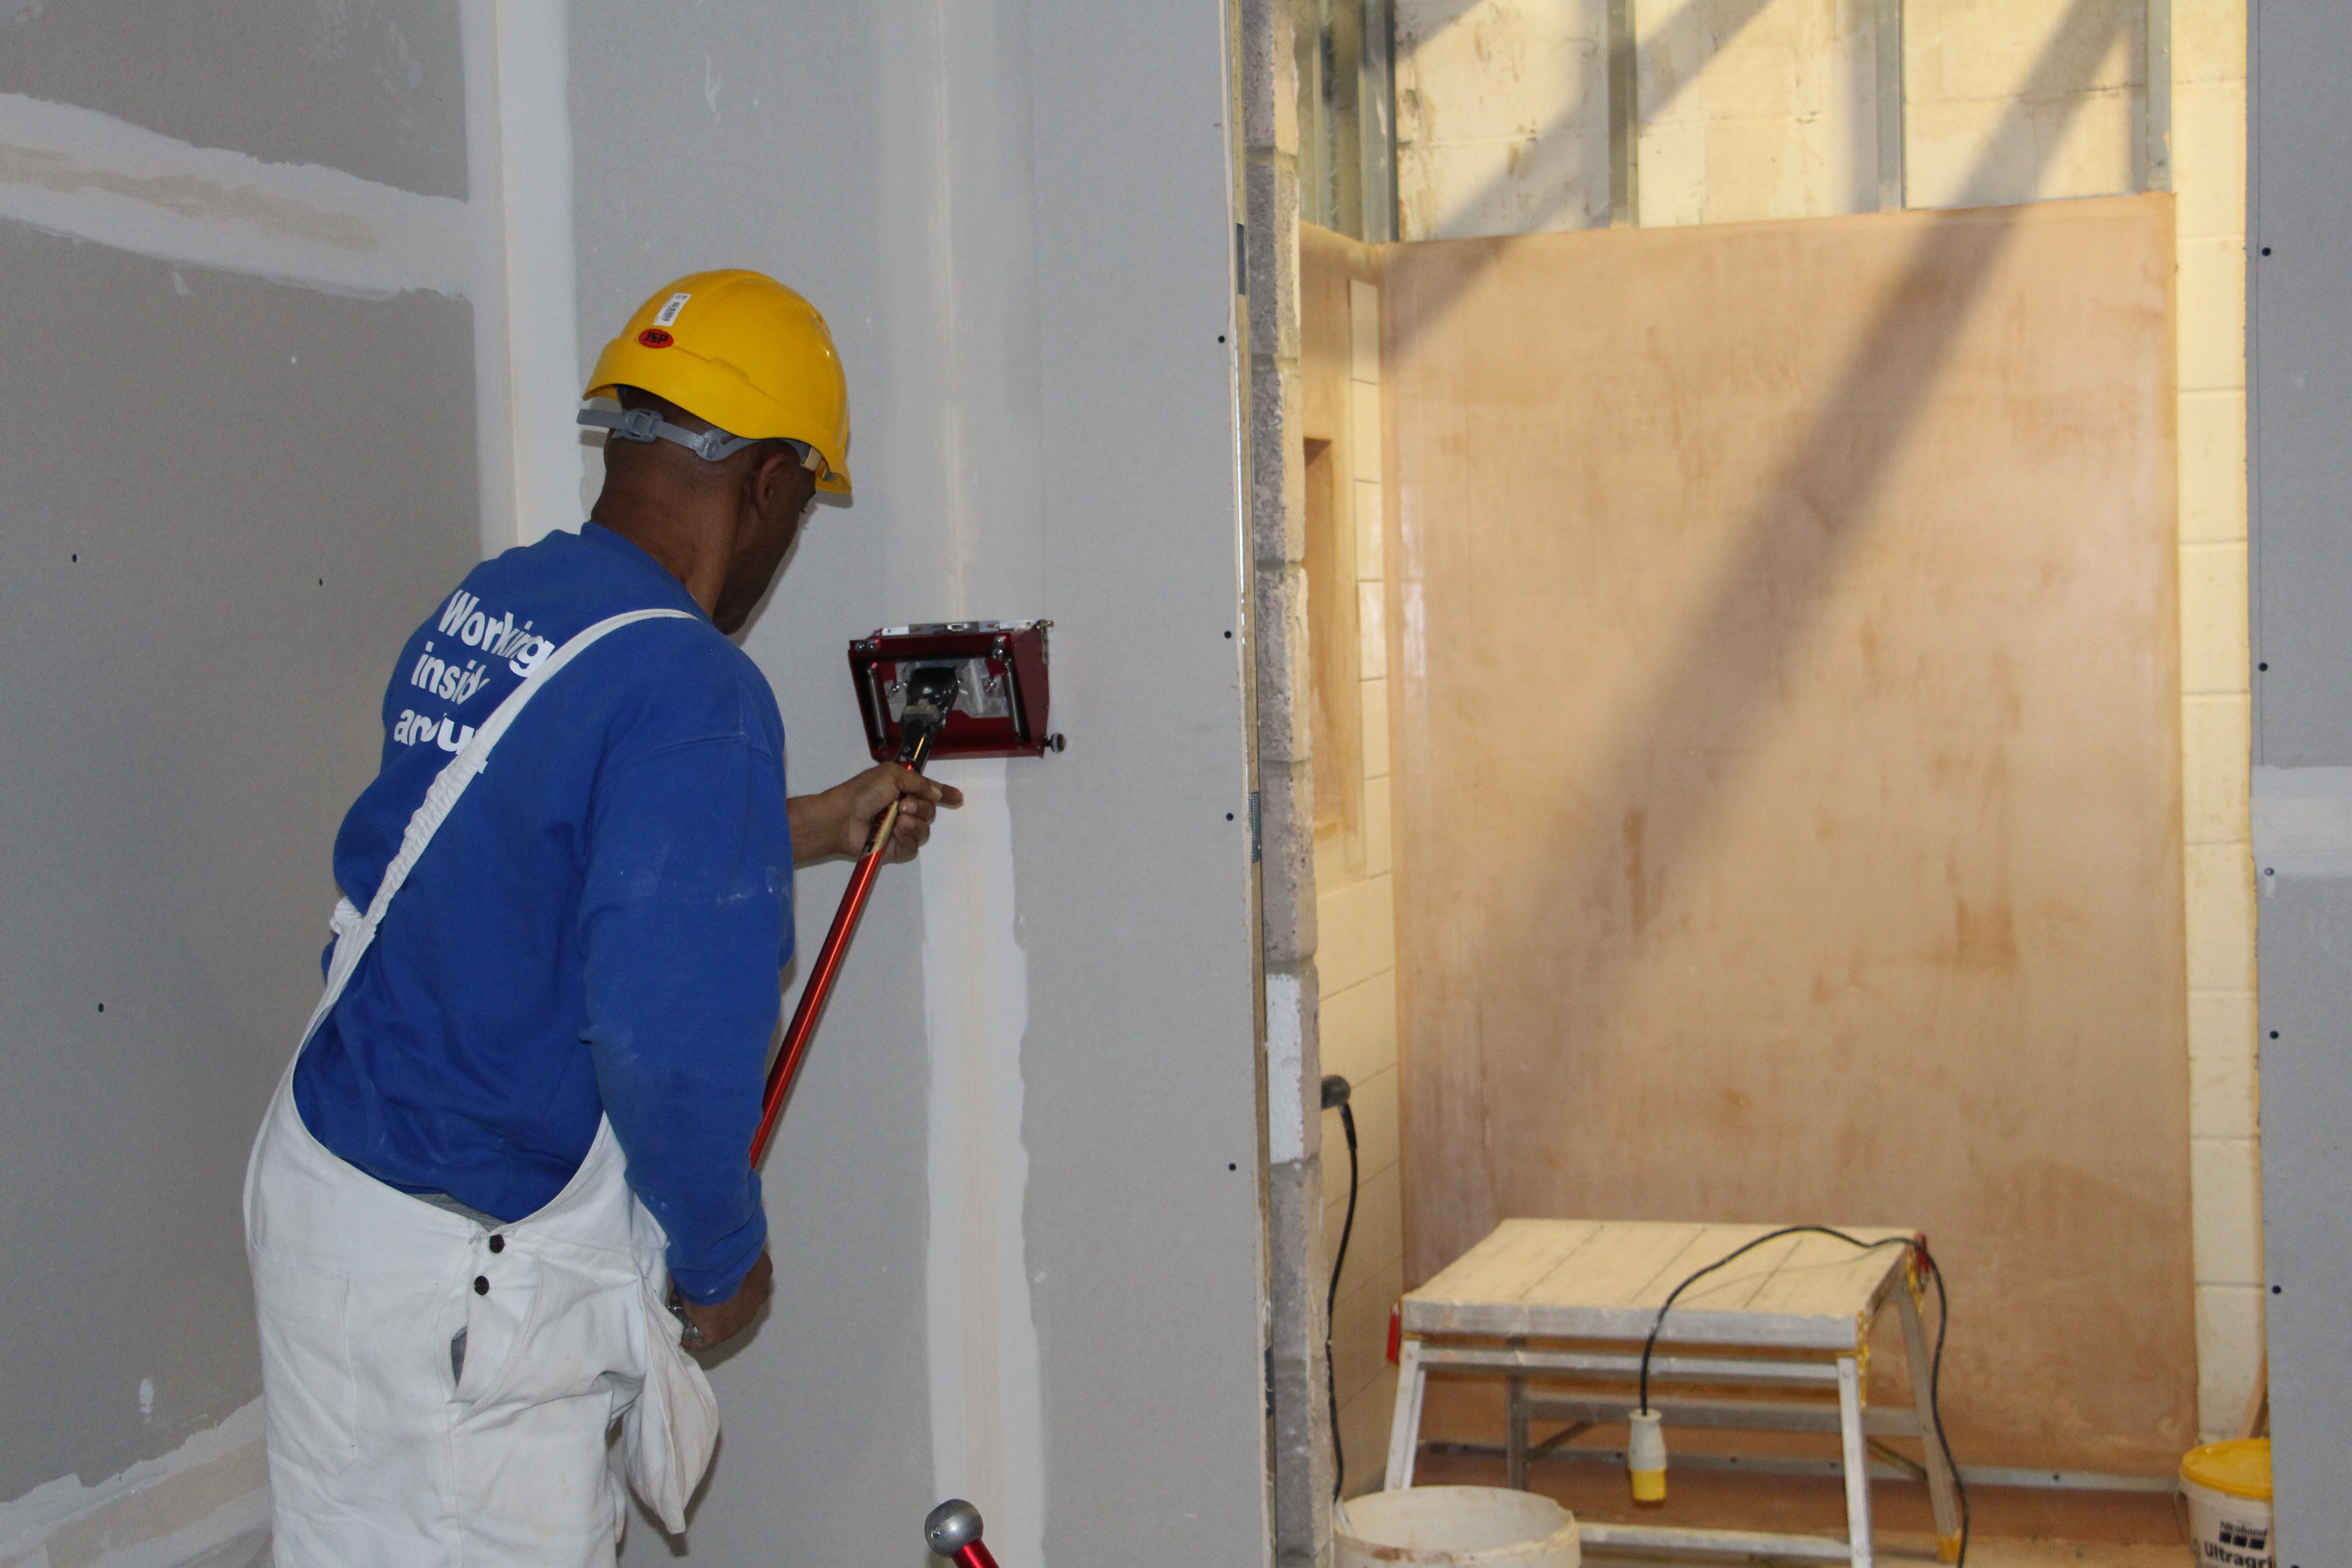
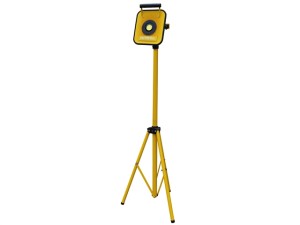
Site lights are an invaluable tool for anyone in the construction trade working on a building site where there’s cluttered or uneven ground and heavy equipment is used. As the days get shorter, the weather murkier and the nights pull in, often people will find themselves working in environments where added and effective lighting is a must. In the same way as they are used on a building site for other workers in the construction trade, site lights for plasterers come in really useful too. After all, when you’re looking for a level 5 finish that’s going to mean no call backs from dissatisfied customers, being able to see what you’re doing really well is a must.

The benefits of site lights

Site lights don’t only come in useful for workmen who need them to safely move around a building site, or ensure they can see a job they’re doing really well. The benefits of site lights also stretch to the safety of people working nearby and members of the public who might be passing and unaware of the dangers there are. It doesn’t matter whether you’re working indoors or outdoors, site lights are available for all manner of purposes and come in a whole range of shapes and sizes, so it’s important to get the right kind of lighting for the thing you need it for. Site lights can include standalone ones which will illuminate a larger space and smaller ones that can be placed nearer to the ground to put a strong focus on a certain area. Battery or mains operated ones are available and a variety of bulbs can be used depending on the purpose they’re needed for. If you need them to be long lasting and able to stand up to harsher weather conditions too, then it makes sense to invest in ones which are going to stand up to the elements, whether snow, ice, wind or rain is thrown at them, not to mention the kind of dusty and dirty conditions that are a given for most construction sites. An example of an excellent site light for plasterers that we have in stock includes the Faithfull Cordless Bluetooth Tripod site light, which offers a safer environment, thanks to the absence of a cord to trip over. And believe it or not, you can even listen to your favourite music on it via Bluetooth!!

Accessories also available

In stock we also have a 5ft plasterer’s tripod light which comes on a tubular steel tripod stand that folds away easily, which makes it handy to store when it’s not in use. As with any plastering tool, maintaining your site light is important too. Accessories available include extension leads, couplers, cables and plugs which should be completely reliable in supporting your light source. And to save money, you may wish to replace your stand more often than your light.

Order your site lights online

To find out more about our excellent range of site lighting for plasterers which can come in handy wherever on a job you’re based, you can take a look through our products and order your site lights online today. If you have a question about our products then get in touch! We are happy to help. Whilst you’re here why not check out our plaster to plaster tips to make sure you are on top of the competition!

Company Spotlight – Putz  

This week we will be focusing on one of the great German manufacturers of plastering and rendering tools and equipment – Putz.

This exclusive range of tools was created with quality and comfort in mind, something which the company believes is the most important aspect of plastering tool manufacture. And this is what makes it a popular choice for professional plasterers and DIY enthusiasts alike.

In previous posts we’ve talked about how German manufacturing has produced some excellent achievements and innovation in science, technology and engineering over the years and, while they might be most commonly renowned for their supercars, it’s in other areas that they shine too.

(We’ll give you one guess what our favourite aspect of German innovation is – yes, you guessed it, the contribution that it has made to the plastering industry!)

The history of Putz

So, putting the spotlight on Putz Tools, as, given that Gypsumtools is a stockist of many of their products, we thought it only fair to let you know a little bit more about them.

This is a German company which is as private about its origins as it is passionate about its standards, having no need to publicise itself, possibly because the tools are already recognised on a global scale for their quality and the high standards pretty much speak for themselves.

In effect, it’s almost as though the manufacturers would rather you focus on the tools and accessories that they provide rather than the history of Putz. One thing remains for certain though, with Putz tools you can feel safe in the knowledge that a great deal of time and effort has gone into creating them. And, when they say that comfort and quality are their biggest considerations when creating the range, then it’s easy to see why.

The tools are predominantly made in Germany by Putz, with a few of them produced next door in France and you can buy a whole variety of equipment in the Putz range, from corner trowels, margin trowels and bucket trowels, to plastic, sponge and rubber floats, buckets, spatulas and floor screeding.

Why choose Putz products 

When you choose to buy one of the Putz products in our range, there are many reasons why it will be a good choice, but here are some of the most outstanding ones:

  • Great value for money
  • Well made
  • Long lasting
  • Focus on excellent quality and comfort


Order online on desktop, mobile or tablet 

If you would like to find out more about the range of Putz tools and other German made plastering equipment that we have in stock, you can take a browse through our products and order online, either on desktop, mobile or tablet. If you have any trouble please get in touch so we can help you out as soon as possible!

Putting our customers’ needs at the very forefront, we’ve ensured that whenever they need to order plastering tools online, that it can be done quickly, conveniently and securely.

Orders made before 4pm can enjoy next working day delivery and orders over £89 come with no delivery charge. So, if you’re in need of new plastering tools, why not give Putz a go? It’s certainly a brand we’d recommend.

German Made Plastering Tools

The Germans have become pretty well renowned the world over for their awesome prowess in the manufacture of plastering tools. So much so, that we are pleased to say we have several of their leading brands in stock.

But, don’t just take it from us. If you’re looking for German made plastering tools, here are some of the best that that we have available online and at our Leicester plastering supplies trade counter for you to choose from:

Nela / Refina / Putz tools 

Nela – Manufactured in Germany to the highest possible standards, NELA tools were launched in 2014 and their trowels and other plastering equipment has rapidly become among the most popular there are around. 

Refina – these guys are specialists in rust free and durable trowels, as well as a whole range of other plastering tools and equipment which are perfect for use in the plastering industry. The stainless steel and plastic trowels are all made in Germany and are available in a range of sizes. There’s also a large variety of tools for finishing, which include the plaziflex trowels and super flexible skimming spatulas.

Putz – with Putz tools you can rest assured that quality and comfort are the biggest considerations that have gone into creating them. The tools are predominantly German made and you can buy a whole range of tools in the Putz range, from corner trowels and bucket trowels, to floats, buckets and floor screeding.

Why choose German made plastering tools

The Germans have traditionally been world leaders in feats of engineering, technology and design. And when it comes to plastering tools and equipment, the standards which they set themselves and regularly achieve are again, often second to none.

This is a good reason to choose a German made brand – because of the high standards that are put into making the products they perform and last very well. It’s also the reason why customers come back to us time and time again to discover the latest innovative German plastering tools to hit the market.

Order your German made drywall and plastering tools online


If you would like to find out more about the excellent range that we have available, you can order your German made drywall and plastering tools online through our handy website.


We offer next day delivery and can deliver to most destinations throughout the UK. And, if you have any questions about our products, why not give one of our highly experienced members of staff a call, or contact us via email!

Differences between Gypsum and Sheetrock

Gypsum vs Sheetrock

When you’re looking to plaster a surface, whether it’s in a newly built home or a renovation to an existing wall or ceiling, there’s plenty of choice in the materials to use.

Traditionalists may opt for gypsum plaster, something which has been used in the trade for centuries and requires great skill and practice, while anyone looking for speed without the many stages of plastering and an arguably cheaper option, may opt for drywall.

Both have their plus points and depending on the look and feel of the area you’re plastering can really compliment the overall effect of a room.

Sometimes you might hear the odd phrase or two bandied about when it comes to materials to use, but if you’re wondering about the differences between gypsum and sheetrock in particular, then here is your answer.

What is gypsum and drywall?

Gypsum is a mineral which occurs naturally and the longer term for it is hydrous calcium sulphate. It’s mined in countries such as the USA and looks like beds of white sand. While it contains water it is easy to manipulate and use as plaster to coat walls and ceilings, but when it dries out it becomes more solid.

This is where you get the hardness of plastered walls once they’re dry (and also is the reason for only coating small areas of a wall at a time with plaster, to avoid it drying out before you’ve finished flattening!)  In fact, when heated all the way up to 300 degrees Fahrenheit, gypsum turns into the unbreakable material that is Plaster of Paris.

Gypsum is fire resistant by nature, which makes it a popular choice for plasterers as it reduces the chance of fire damage to the structure of a building.

And a stage on from this is drywall – a material which uses gypsum at its core. In drywall, the gypsum is sandwiched between sheets of heavy paper and dried to give it the hard surface. It can come in large sheets, is incredibly easy to fix to a wall and is easy to paint.

So where does Sheetrock fit in?

Sheetrock was the term given to one of the first forms of drywall which was created in America around 100 years ago. So effectively you start out with the gypsum, use the gypsum to make up the core of the drywall, and then Sheetrock was a brand name for a version of drywall.

Order your drywall and plastering tools online

If you would like to discover more about the different plaster and drywall options that we have available, as well as the range of tools and equipment that can be used with them, take a look through our products and order online today. If you have any questions please contact us, we will be happy to help!

The History of Drywall

The history of drywall

This year drywall celebrates its 100th birthday. Not much in comparison to plaster which was used as far back as ancient Egypt, but still, it’s been around for quite some time and as technology progresses people are certainly continuing to see the benefits of its use.

The use of drywall is the opposite to traditional plastering methods as it refers to a wall covering that is made without the use of water (unlike plaster, which needs to be given time to dry). It is made mainly of gypsum which is found in huge beds that look like sandy beaches and is mined predominantly in the USA.

So what’s the history of drywall?

Invented back in 1916 by the United States Gypsum Corporation, an early version of drywall called Sheetrock was created to be a cheaper fireproof alternative to plaster that could be put up in much quicker time. Back then, it consisted of several layers of gypsum and paper pressed together, now it’s more like one sheet of gypsum covered by layers of heavy paper.

Today, some of the benefits of drywall still remain the fact that it’s cheaper and quicker to use, thanks to there being no need to wait around for it to dry.

And, in the middle of the last century, the popularity of drywall really gathered pace, because the post war baby boom meant that new houses were needed at a rate of knots, while the cash strapped era left people looking for the cheapest materials as possible to use – and what better for speed and cost effectiveness than drywall?

In our modern day, many still prefer the use of drywall, thanks to its flexibility, speed of use and great insulation, not to mention how much easier it is to use than traditional plastering methods.

And in the US, the drywall industry is still booming, with plenty of gypsum still mined and made into drywall. Traditionally it wasn’t the most environmentally friendly process and it was recommended that workers inhale as little gypsum dust as possible, but from the start it brought thousands of jobs to the areas where it was mined.

So why did it take so long for the use of drywall to take off? Mainly because it was originally thought of as a cheap alternative to the fine art of plastering and who wanted cheap alternatives in their homes?

But during and after the war, having a cheap alternative, while being thrifty and sensible with money was in fashion and with a shortage of people to do the jobs and the need for more houses to be built processes had to be quicker and less labour intensive.  Years after the war ended, drywall still remains massively popular and thanks to technological advances it’s much friendlier for the environment too.

Order your drywall tools online

If you have a spot of drywall work coming up and you need a helping hand, then you can order your drywall tools online today with us. Take a browse through the products we have in stock and look forward to making your life easier with the help that they can provide.

Plaster to Plaster Tips

plaster-to-plaster

plaster-to-plaster

We asked 100 plasterers for their top tips…

We love the plastering industry and with over 50 years’ experience under our belts, we’re fairly sure we’ve got some good ideas on the best plastering equipment and techniques to use. But don’t just take it from us. We asked 100 plasterers for their top tips and below are some of the things they came out with:

  • Make sure your surface is well prepared before you start, as it doesn’t matter how good a plasterer you are if your surface isn’t prepped.
  • Don’t mess about too much with your plaster, it’ll end up looking worse than when you started.
  • Use a sponge on multi when doing one coat as it gets the same results as two.
  • Give windows and skirting boards a quick wipe and dry after the first flattening.
  • Or spend a few minutes at the start running masking tape around them.
  • Get your PVA mix right and only skim PVA when dry.
  • Fill your beads first and go in the direction they’re going in to avoid sloping.
  • When your walls are turning, go over them with a hard dry trowel.
  • In between trowel stages make sure you bead up.
  • Blend, blend, blend – the more flawless your blending becomes the better the job and practice makes perfect.
  • Include fuel costs and waste materials in your pricing, as well as tools and van maintenance.
  • Give yourself a good early start.
  • Word of mouth recommendations from happy customers are great. Keep it professional.
  • Never rush through a job. Be your own worst critic and ensure the work you do is up to scratch.
  • Don’t give a specific start date for a job until you’re sure you can make it nearer the time as you risk looking unprofessional if the job before runs on.
  • Don’t make promises you can’t keep and always go above and beyond what you say you’ll do.
  • Allow a day extra when saying how long a job will take, just in case something unforeseen happens.
  • Save what money you can when the going’s good to cover the slow periods.
  • Get rid of dirty water before you mix up.
  • Wear gloves where you can to protect hands that are in and out of water all day.
  • Mix up cement and sand with your drill for spotless results.
  • Get your van/tools/equipment tidied up at the end of a job as there’s nothing worse than having to do it at the beginning of a new one.
  • Don’t leave your buckets full for the next day as they might leak overnight and never leave the mixer in the dirty water bucket – you’ll hate the mess if it tips over.
  • Scrim round the edges of switches and sockets once the fronts are off.
  • Price your job based on the most awkward bits and how difficult they’ll be to do, such as pipes and fittings that can’t be removed.
  • Keep all screws together in a sealed tub or old drinks bottle and avoid losing them.
  • Don’t let your plaster get too dry before you’ve finished with it.
  • Always use clean water.
  • Health and safety is important – when you take risks and hurt yourself you can say goodbye to your earnings.
  • Take responsibility for your own safety.
  • Realise your true worth and don’t undersell yourself.
  • Keep your tools clean as you go along.

Don’t forget you can order your tools online

And finally, we saved the best until last, which is – save yourself time by ordering your tools online with Gypsumtools and have them delivered to wherever you are in the UK!