Improve Your Taping With this Guide  

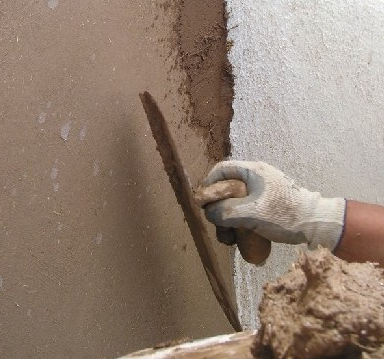
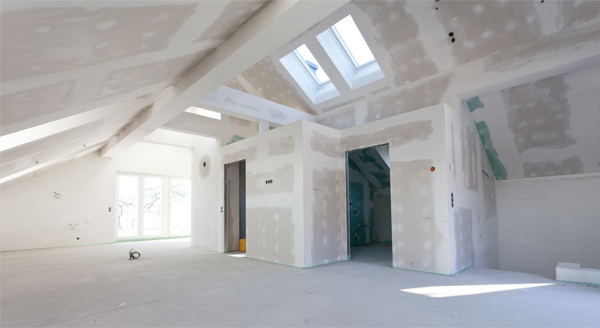
There’s certainly an art to plastering and when the job is done well, it can look absolutely stunning. In the same way, when you’re putting up drywall, it’s important to take care to use the proper procedures at every step of the way to achieve an awesome end result.

So, for instance, once the drywall is up, you’ll need to inspect it and check the joints are nice and flat before you begin the taping process. And this is where improving your taping begins.

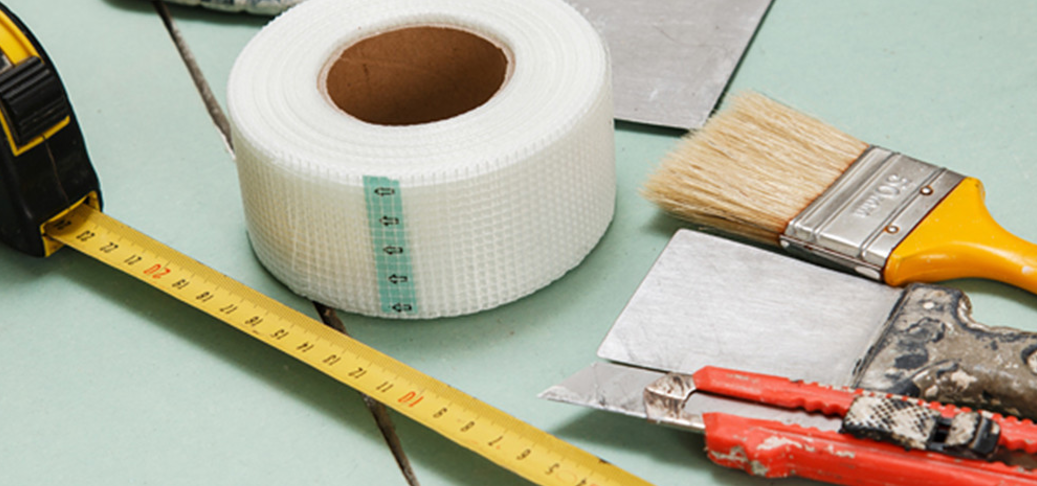
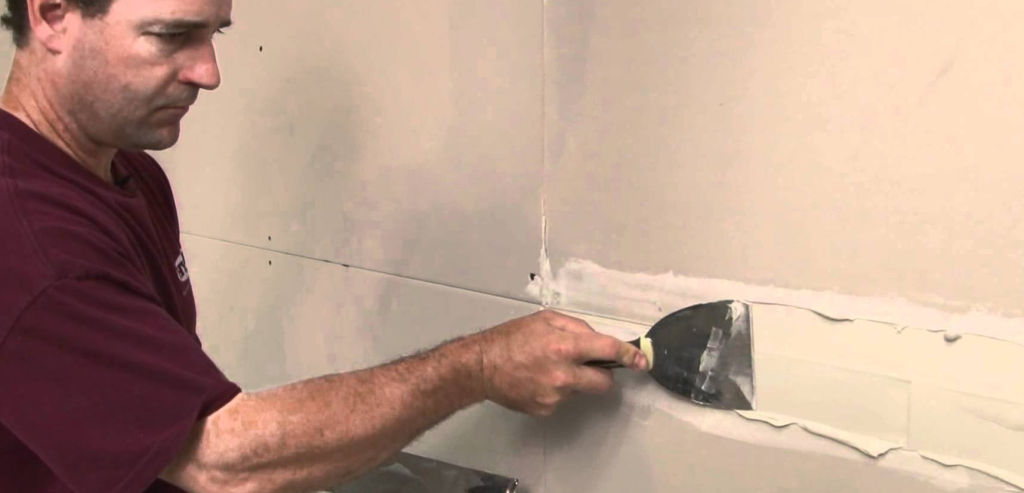
It’s important to know that your drywall is even first. If there are any problems with your fasteners and trim for example, this should be sorted out. Also you should check you have the right kit before you start, such as the right taping knives and compound pan and ensure that they’re completely clean from the job before. Avoid putting fresh compound on top of dried on stuff!

If you’re looking to get the best results when you’re doing a drylining project, then you can improve your taping with this guide.

GET YOUR COMPOUND RIGHT

Mix up your joint compound to the correct creamy consistency, as per the manufacturer’s instructions and conditions where you’re working. Depending on the layer you’re doing, you can either use ready mixed or the setting type which comes in a powder. (This will need to be mixed with a paddle or mixer, using clean water on a surface which can be cleaned easily or thrown away).

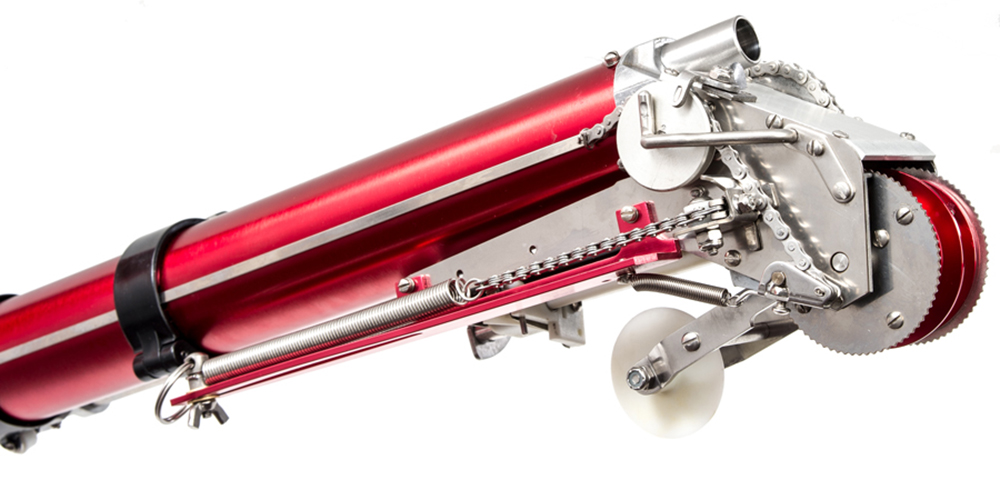
USING YOUR AUTOMATIC TAPER

Every time before you use your taper, make sure all the parts are oiled and working well, also ensure that the gooseneck is attached. If it could do with a service, get it done before you start.

BUTT JOINTS

These are joints with a short or cut edge that are not tapered and more difficult to finish. They are taped and wiped in first (wipe from the centre of the joint in an outwards motion to avoid wrinkling).

As you roll along the joint, remember to lead with the head of the taper. If you’re new to using the taper, remember to stop 2 ½ inches from the end of the joint, and cut the tape by pulling down on the control tube. Then you can roll out the end of the tape, pull the taper away from the wall, and advance the tape for the next joint by pushing up on the control tube. This is a method that can be used throughout.

DO FLAT JOINTS/SIDEWALLS THEN CEILINGS

Follow the details on application, as per butt joints above, and remember to wipe in.

Use both drive wheels on the joint for the first few inches when taping ceilings.  Then engage the creaser wheel and tilt the bottom of the taper slightly towards you with only one drive wheel on the drywall surface.

When not in use, the taper head should be put into a bucket of water to prevent the compound from drying.

ANGLE JOINTS

Angle tape can be applied in conjunction with the corner roller and corner finisher, which should have compound applied to the corner wheels and filling the cavities of the corner finisher.

Both wheels must run along the wall surfaces in a straight line with the creaser wheel extended.  Again, use the stopping method above.

For vertical angles, roll out a 6-inch tab of tape and put it at the bottom of the angle, then roll the drive wheels along for the first couple of feet to avoid pulling the tape away from the end of the joint. Ease off the pressure on the creaser wheel as you go, to keep things even.

Using the corner roller with compound on the wheels, start from the middle of the angle joint, and use light pressure to roll toward both ends. Do this a second time with firm pressure, so that any excess compound comes out from under the tape ready for the corner finisher.

Smooth the compound over the tape using the corner finisher at the end of the joint then, using light pressure move the tool along the joint to the other end.  Lead with the centre nose clip and the blades wiping behind.  After angles, detail the bottom corners and ceiling angle intersections with a drywall knife. also ensure that the gooseneck is attached FIRST COAT NAILS/SCREWS

Use a nail spotter to fill fastener depressions. Apply moderate pressure to start the compound flow and draw the tool along the row of fasteners, coming away from the wall in a sweeping motion.  Excess compound should be skimmed off while leaving a slight crown over each fastener.

  • Give all tools a thorough clean afterwards and inspect the work you’ve done, ensuring all compound is removed from your equipment and flats and angles, fasteners, bead and trim are all done properly.

To find out more about the right tools for your drywall job, take a look at our range online or get in touch with us today.

Find out how you can make huge savings on our taping tools with our Taping Tool Kit Builder, featuring DeWalt and Level 5 taping tools.

What Is Drywall Taping? 

drywall without taping

If you have a spot of DIY or home improvement on the cards and haven’t come across the art of putting up drywall before, then you might be wondering what is drywall taping.

Essentially, it’s a really useful way of covering the joints and seams between drywall panels to leave a smooth and flawless finish on your wall.

Looking to learn how to tape drywall corners? Unsure how to tape drywall ceiling or simply how to use tape for drywall? Then read on…

When putting up drywall panels, you would fill in the seams or gaps with a small amount of joint compound, spreading and smoothing it evenly with a putty knife to the level of the wall surface. Then you can gently smooth the paper tape over the top until it sticks to the wall. If some of the mud comes out from under the tape, it can be feathered away to give a smooth surface.

Drywall taping is the way you create a strong bond between the sheets of drywall. Then a thin layer of joint compound is smoothed over the top to finish.

When drywall taping is done correctly, it’s impossible to detect where one-panel finishes and another begins, once the wall is painted, so it is the choice of many a drywall professional, especially when time and quality of finish are important.

Why Do We Use Tape On Drywalls?

Drywall tape is made from plain paper, which is a similar texture to the drywall panels. It comes in a roll which can be applied along the joints by hand or by using an automatic taping tool.

As well as covering the basic joints between two adjacent panels, it can also be used to cover internally. At this point the tape would be folded in half before being pressed into the corner, thus creating a seal that hides the area where the panels join.

Some people in the drywall industry ask about the need for tape for drywall and whether it would be just as effective to fill the joints with mud and smooth it over.

drywall without mudding

Why You Should Use An Automatic Taping Tool For Speed 

As we mentioned earlier, it is possible to apply the tape by hand, but if you’re able to buy or rent an automatic taper which applies compound/mud at the same time, then you can save yourself an awful lot of time, effort and money. The difference in taping time between using a machine and doing it by hand is actually pretty impressive.

The automatic taping tools are not only quicker at getting your drywall job finished, but they are also safer to use, as you can reach areas such as ceilings without the need for ladders or stilts.

If you’re looking to invest in an automatic taper, then we have some great examples by Level 5 and Northstar which will work perfectly with your tape.

Order Your Tape Online

When you’re in need of some extra tape for your drywall job, or you’re looking for the kit you need to get started, you can order your drywall tape online with Gypsumtools today and benefit from safe and speedy delivery direct to your door.

If you have any issues with your ordering process or have a few questions then please get in touch and a member of the team will be in touch to help you out!

Find out how you can make huge savings on our taping tools with our Taping Tool Kit Builder, featuring DeWalt and Level 5 taping tools.

Drywall Tool Repair 

Drywall Tool Repair

Drywall Tool Repair

Whether you’re a professional dryliner, or have a spot of drywall DIY on the cards, it always pays to have the right tools for the job and to know that they’re in the best working order for when you need them.

That’s why, at Gypsumtools, as well as offering our customers a wide range of drywall tools and accessories to buy from new, we also provide drywall tool repair and servicing which is carried out by our highly experienced and qualified technicians.

When you want to know that your drywall kit is in tip-top working order, not only can they do any repairs that are needed, but they conduct a full inspection to identify any parts which might not be working the way they should. These can then be replaced if necessary.

These days people often go for the automatic taping tools to help them with finishing drywall, because they know that they can help save on time and effort, while getting a high quality finish at the same time.

Some of the benefits of using tools such as an automatic taper include the fact that it uses just the right amount of compound with less wastage, offers a safer job thanks to the greater reach, and a quicker completion time, saving you money and allowing you to move on to the next job faster.

Why You Should Service & Repair Your Auto Taper

When you’ve made the decision to buy an automatic taping tool, it goes without saying that you will want it to last for as long as possible and continue to give you great results for years to come. And, despite the fact that they’re built to last, this is the main reason why you should service and repair your auto taper.

Taking care of your drywall tools is the only way that you can ensure you get the maximum lifespan out of them and avoid paying for more costly repairs further down the line, if they are identified before they become worse.

So what sort of things can you expect from a taping tool service?

  • Skilled in house taping tool technicians
  • Staff with up to 10 year’s experience in the field
  • Full inspection of the tool to locate any problems
  • Repairs made if necessary
  • Clean and lubricate all repairs
  • Removal and replacement of worn parts
  • Full service of any types of taping tool
  • Factory adjustments made where needed
  • Genuine spare parts used

And we will keep you informed every step of the way, so you can rest assured that no hidden costs will pop up suddenly. If you need any parts replacing, we will call to let you know before we carry out the work.

We Will Collect, Repair And Deliver

There’s no taking time out of your busy work day to get your tools serviced and repaired either, because we will collect, repair and deliver them back to you, while you get on with other parts of the job.

So, not only will you save time and money by having a fully serviced and functional taping tool, but there’s no losing out on work while you get it repaired.

We provide a service and clean for a range of drywall tools, including automatic tapers, compound pumps, nail spotters, flat boxes and corner applicators and finishers.

Contact Us Today to Discuss Your Drywall Tool Repair

Save yourself a drywall nightmare by getting your taping tool repaired or serviced before it breaks completely without warning. Give us a call today to discuss your drywall tool repair and have it working the best it can.

What Is Joint Compound? 

When renovating, redecorating, or building somewhere new, chances are you’ll come across joint compound at some point in the taping process. And of course, if plastering is your profession, it will be something you’re already fully acquainted with.

For those wondering what is joint compound, then it’s a material that can be used as an alternative to traditional plastering to finish joints, corner bead, trim and fasteners, as well as for skim coating whole walls and ceilings. It’s not always referred to as joint compound either, often you might hear it described as mud or drywall taping mud too.

How Is It Used?

Joint compound is a creamy, toothpaste-like material, commonly used these days in hanging drywall in new builds and renovation projects, thanks to the speedy and simpler application than you might find with plaster.

It is spread across a surface to give it a smooth finish or cover up any blemishes or holes. And, in fact, many prefer it, because there is less level of skill needed and it is widely considered to be more forgiving than plaster, because of the greater possibility to smooth out and rectify mistakes.

What types of Joint Compound are there?

There are two main types of joint compound and here are the things to weigh up when you’re considering which joint compound to use:

Setting type joint compound

  • Like plaster, setting compound comes as a powder which needs to be mixed with water and sets to a very hard finish.
  • It is more moisture-resistant (which makes it great for damp areas, such as bathrooms).
  • It sets very fast (perfect if time isn’t on your side).
  • It comes with a variety of drying times, depending on the job you need it for and the area that you’re covering.
  • It hardens quickly and shrinks very little, which means less chance of cracks.

Ready-mixed joint compound

  • Considered to be the easiest option as it comes ready-made, which means no extra time spent mixing it up and less time clearing up afterwards.
  • Easier to spread then the setting type.
  • Water soluble (a plus point if you need to rectify mistakes, not so much of a good thing if you’re working in a damp area).
  • Sands very easily.
  • The fact that it hardens slowly over time through evaporation (or air drying) means it can be easily manipulated.
  • And there’s no racing against time before it dries, so it’s perfect for large areas.
  • The downside is that it takes a long time to dry (sometimes 24 hours), so you may only want to use it for a final coat or minor wall imperfections.

How is joint compound different from plaster

Plaster, as we know, is a material which has been used for centuries and there’s a good reason for that – it’s super tough. That’s why the walls of great castles and cathedrals have remained unblemished for hundreds of years. Plaster is pretty much impossible to damage with water and many kinds of impact, which is why these kind of walls have remained intact for so long.

Joint Compound Vs Plaster

But the thing about plaster is it takes a lot of skill to apply. And if you don’t know what you’re doing, then it’s a lot harder to fix your mistakes than it is with joint compound. So, while a highly experienced plasterer may take pride in the workmanship and levels of expertise needed to use plaster (not to mention, the durability of plastered walls), another plasterer, who is looking for speed and precision might favour joint compound instead.

Joint compound is also much easier to sand, which is why, when fixing plaster walls, people will often use this, instead of gypsum plaster to do it.

Order Your Joint Compound online

We have a range of joint compounds available at Gypsumtools. Order your joint compound online with us today.

The Benefits of Premixed Jointing Compound 

Drylining professionals and plasterers in general will all be aware of the greatness of things that help save time, money and effort in the workplace, while enabling them to achieve an excellent finish.

That’s why, when products hit the market that help you do just that, it’s a welcome sight all round. If you’re wondering about the benefits of premixed jointing compound and whether it really is as good as it says on the tin, then read on, because we have a perfect example of all the plus points above.

Our GT3 Midweight All-purpose Joint Cement is designed for the drywall finishing professional and made under strict quality and process controls exclusively for Gypsumtools.

Its aim is to save on effort and use of materials, not to mention offering the plastering industry the opportunity to finish drywall faster, with easy application and no dust or waste.

When finishing gypsum panel joints it can be used for everything from embedding tape to finishing joints, fasteners, corner beads and drywall trims to topping and texturing.

It is especially perfect for use with Level 5 automatic taping tools (which we also have in stock) and it also comes in handy when applying manually.

Coming straight from the box, premixed jointing compound is not only ideal when no water is available to mix it up, but it’s the fact that it’s ready to use virtually straight away, which makes it the choice of many professionals, water supply or no water supply.

It is also 30% lighter than traditional plaster and sands easier than other compounds, making your job easier and faster with excellent finishes.

Save Time & Money

Not only does the ready mixed compound give a super smooth, virtually pock free finish, but the ready mixed nature of it means you’ll save around an hour and a half in prep time per day, minimise the effort needed to do the mixing and reduce the amount of clearing up needed afterwards.

So, what you’re looking at is a big saving on the muscle fatigue that comes from lots of mixing time and an excellent finish in a fraction of the time. The fact that you’ll be able to get it finished quicker will also mean you can move onto the next job in less time and save money by doing so.

How to prepare your premixed compound

The creamy, smooth texture of the premixed compound is ready and waiting the minute you open the pail – all you need is two minutes of stirring with a Mixing Wheel.

You should ensure that it’s stored at room temperature for at least 24 hours prior to using it and contents should be poured into a mixing container, such as a clean, plastic bucket. After you’ve given it a light mix, also remember to do a small test to check it’s the consistency you need. If you find you need to add a bit of water, only use half a pint at a time, remix and test again. (Remember to not overmix as it’s this which might lead to pocking).

The compound should only be applied over dry surfaces and each coat should dry completely before applying another.

round up of the benefits of premixed compound

  • Save time
  • Save money
  • Less effort in preparation
  • Faster and easier to apply
  • No need for water
  • Reduce dust and mess
  • High quality finish
Order in Pallet Bulk Size or In Trial Size

Why not try out our premixed joint compound on your next drylining job and see how well it does? You can order online in pallet bulk size or if you’re simply looking to give it a go, try our trial size for starters.

Site Lights for Plasterers

Site Light for Plasterers
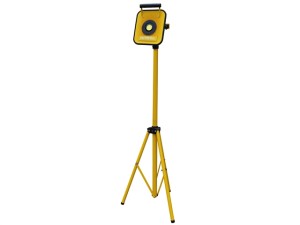
Site lights are an invaluable tool for anyone in the construction trade working on a building site where there’s cluttered or uneven ground and heavy equipment is used. As the days get shorter, the weather murkier and the nights pull in, often people will find themselves working in environments where added and effective lighting is a must. In the same way as they are used on a building site for other workers in the construction trade, site lights for plasterers come in really useful too. After all, when you’re looking for a level 5 finish that’s going to mean no call backs from dissatisfied customers, being able to see what you’re doing really well is a must.

The benefits of site lights

Site lights don’t only come in useful for workmen who need them to safely move around a building site, or ensure they can see a job they’re doing really well. The benefits of site lights also stretch to the safety of people working nearby and members of the public who might be passing and unaware of the dangers there are. It doesn’t matter whether you’re working indoors or outdoors, site lights are available for all manner of purposes and come in a whole range of shapes and sizes, so it’s important to get the right kind of lighting for the thing you need it for. Site lights can include standalone ones which will illuminate a larger space and smaller ones that can be placed nearer to the ground to put a strong focus on a certain area. Battery or mains operated ones are available and a variety of bulbs can be used depending on the purpose they’re needed for. If you need them to be long lasting and able to stand up to harsher weather conditions too, then it makes sense to invest in ones which are going to stand up to the elements, whether snow, ice, wind or rain is thrown at them, not to mention the kind of dusty and dirty conditions that are a given for most construction sites. An example of an excellent site light for plasterers that we have in stock includes the Faithfull Cordless Bluetooth Tripod site light, which offers a safer environment, thanks to the absence of a cord to trip over. And believe it or not, you can even listen to your favourite music on it via Bluetooth!!

Accessories also available

In stock we also have a 5ft plasterer’s tripod light which comes on a tubular steel tripod stand that folds away easily, which makes it handy to store when it’s not in use. As with any plastering tool, maintaining your site light is important too. Accessories available include extension leads, couplers, cables and plugs which should be completely reliable in supporting your light source. And to save money, you may wish to replace your stand more often than your light.

Order your site lights online

To find out more about our excellent range of site lighting for plasterers which can come in handy wherever on a job you’re based, you can take a look through our products and order your site lights online today. If you have a question about our products then get in touch! We are happy to help. Whilst you’re here why not check out our plaster to plaster tips to make sure you are on top of the competition!

Company Spotlight – Putz  

This week we will be focusing on one of the great German manufacturers of plastering and rendering tools and equipment – Putz.

This exclusive range of tools was created with quality and comfort in mind, something which the company believes is the most important aspect of plastering tool manufacture. And this is what makes it a popular choice for professional plasterers and DIY enthusiasts alike.

In previous posts we’ve talked about how German manufacturing has produced some excellent achievements and innovation in science, technology and engineering over the years and, while they might be most commonly renowned for their supercars, it’s in other areas that they shine too.

(We’ll give you one guess what our favourite aspect of German innovation is – yes, you guessed it, the contribution that it has made to the plastering industry!)

The history of Putz

So, putting the spotlight on Putz Tools, as, given that Gypsumtools is a stockist of many of their products, we thought it only fair to let you know a little bit more about them.

This is a German company which is as private about its origins as it is passionate about its standards, having no need to publicise itself, possibly because the tools are already recognised on a global scale for their quality and the high standards pretty much speak for themselves.

In effect, it’s almost as though the manufacturers would rather you focus on the tools and accessories that they provide rather than the history of Putz. One thing remains for certain though, with Putz tools you can feel safe in the knowledge that a great deal of time and effort has gone into creating them. And, when they say that comfort and quality are their biggest considerations when creating the range, then it’s easy to see why.

The tools are predominantly made in Germany by Putz, with a few of them produced next door in France and you can buy a whole variety of equipment in the Putz range, from corner trowels, margin trowels and bucket trowels, to plastic, sponge and rubber floats, buckets, spatulas and floor screeding.

Why choose Putz products 

When you choose to buy one of the Putz products in our range, there are many reasons why it will be a good choice, but here are some of the most outstanding ones:

  • Great value for money
  • Well made
  • Long lasting
  • Focus on excellent quality and comfort


Order online on desktop, mobile or tablet 

If you would like to find out more about the range of Putz tools and other German made plastering equipment that we have in stock, you can take a browse through our products and order online, either on desktop, mobile or tablet. If you have any trouble please get in touch so we can help you out as soon as possible!

Putting our customers’ needs at the very forefront, we’ve ensured that whenever they need to order plastering tools online, that it can be done quickly, conveniently and securely.

Orders made before 4pm can enjoy next working day delivery and orders over £89 come with no delivery charge. So, if you’re in need of new plastering tools, why not give Putz a go? It’s certainly a brand we’d recommend.

German Made Plastering Tools

The Germans have become pretty well renowned the world over for their awesome prowess in the manufacture of plastering tools. So much so, that we are pleased to say we have several of their leading brands in stock.

But, don’t just take it from us. If you’re looking for German made plastering tools, here are some of the best that that we have available online and at our Leicester plastering supplies trade counter for you to choose from:

Nela / Refina / Putz tools 

Nela – Manufactured in Germany to the highest possible standards, NELA tools were launched in 2014 and their trowels and other plastering equipment has rapidly become among the most popular there are around. 

Refina – these guys are specialists in rust free and durable trowels, as well as a whole range of other plastering tools and equipment which are perfect for use in the plastering industry. The stainless steel and plastic trowels are all made in Germany and are available in a range of sizes. There’s also a large variety of tools for finishing, which include the plaziflex trowels and super flexible skimming spatulas.

Putz – with Putz tools you can rest assured that quality and comfort are the biggest considerations that have gone into creating them. The tools are predominantly German made and you can buy a whole range of tools in the Putz range, from corner trowels and bucket trowels, to floats, buckets and floor screeding.

Why choose German made plastering tools

The Germans have traditionally been world leaders in feats of engineering, technology and design. And when it comes to plastering tools and equipment, the standards which they set themselves and regularly achieve are again, often second to none.

This is a good reason to choose a German made brand – because of the high standards that are put into making the products they perform and last very well. It’s also the reason why customers come back to us time and time again to discover the latest innovative German plastering tools to hit the market.

Order your German made drywall and plastering tools online


If you would like to find out more about the excellent range that we have available, you can order your German made drywall and plastering tools online through our handy website.


We offer next day delivery and can deliver to most destinations throughout the UK. And, if you have any questions about our products, why not give one of our highly experienced members of staff a call, or contact us via email!

Differences between Gypsum and Sheetrock

Gypsum vs Sheetrock

When you’re looking to plaster a surface, whether it’s in a newly built home or a renovation to an existing wall or ceiling, there’s plenty of choice in the materials to use.

Traditionalists may opt for gypsum plaster, something which has been used in the trade for centuries and requires great skill and practice, while anyone looking for speed without the many stages of plastering and an arguably cheaper option, may opt for drywall.

Both have their plus points and depending on the look and feel of the area you’re plastering can really compliment the overall effect of a room.

Sometimes you might hear the odd phrase or two bandied about when it comes to materials to use, but if you’re wondering about the differences between gypsum and sheetrock in particular, then here is your answer.

What is gypsum and drywall?

Gypsum is a mineral which occurs naturally and the longer term for it is hydrous calcium sulphate. It’s mined in countries such as the USA and looks like beds of white sand. While it contains water it is easy to manipulate and use as plaster to coat walls and ceilings, but when it dries out it becomes more solid.

This is where you get the hardness of plastered walls once they’re dry (and also is the reason for only coating small areas of a wall at a time with plaster, to avoid it drying out before you’ve finished flattening!)  In fact, when heated all the way up to 300 degrees Fahrenheit, gypsum turns into the unbreakable material that is Plaster of Paris.

Gypsum is fire resistant by nature, which makes it a popular choice for plasterers as it reduces the chance of fire damage to the structure of a building.

And a stage on from this is drywall – a material which uses gypsum at its core. In drywall, the gypsum is sandwiched between sheets of heavy paper and dried to give it the hard surface. It can come in large sheets, is incredibly easy to fix to a wall and is easy to paint.

So where does Sheetrock fit in?

Sheetrock was the term given to one of the first forms of drywall which was created in America around 100 years ago. So effectively you start out with the gypsum, use the gypsum to make up the core of the drywall, and then Sheetrock was a brand name for a version of drywall.

Order your drywall and plastering tools online

If you would like to discover more about the different plaster and drywall options that we have available, as well as the range of tools and equipment that can be used with them, take a look through our products and order online today. If you have any questions please contact us, we will be happy to help!

The History of Drywall

The history of drywall

This year drywall celebrates its 100th birthday. Not much in comparison to plaster which was used as far back as ancient Egypt, but still, it’s been around for quite some time and as technology progresses people are certainly continuing to see the benefits of its use.

The use of drywall is the opposite to traditional plastering methods as it refers to a wall covering that is made without the use of water (unlike plaster, which needs to be given time to dry). It is made mainly of gypsum which is found in huge beds that look like sandy beaches and is mined predominantly in the USA.

So what’s the history of drywall?

Invented back in 1916 by the United States Gypsum Corporation, an early version of drywall called Sheetrock was created to be a cheaper fireproof alternative to plaster that could be put up in much quicker time. Back then, it consisted of several layers of gypsum and paper pressed together, now it’s more like one sheet of gypsum covered by layers of heavy paper.

Today, some of the benefits of drywall still remain the fact that it’s cheaper and quicker to use, thanks to there being no need to wait around for it to dry.

And, in the middle of the last century, the popularity of drywall really gathered pace, because the post war baby boom meant that new houses were needed at a rate of knots, while the cash strapped era left people looking for the cheapest materials as possible to use – and what better for speed and cost effectiveness than drywall?

In our modern day, many still prefer the use of drywall, thanks to its flexibility, speed of use and great insulation, not to mention how much easier it is to use than traditional plastering methods.

And in the US, the drywall industry is still booming, with plenty of gypsum still mined and made into drywall. Traditionally it wasn’t the most environmentally friendly process and it was recommended that workers inhale as little gypsum dust as possible, but from the start it brought thousands of jobs to the areas where it was mined.

So why did it take so long for the use of drywall to take off? Mainly because it was originally thought of as a cheap alternative to the fine art of plastering and who wanted cheap alternatives in their homes?

But during and after the war, having a cheap alternative, while being thrifty and sensible with money was in fashion and with a shortage of people to do the jobs and the need for more houses to be built processes had to be quicker and less labour intensive.  Years after the war ended, drywall still remains massively popular and thanks to technological advances it’s much friendlier for the environment too.

Order your drywall tools online

If you have a spot of drywall work coming up and you need a helping hand, then you can order your drywall tools online today with us. Take a browse through the products we have in stock and look forward to making your life easier with the help that they can provide.

Plaster to Plaster Tips

plaster-to-plaster

plaster-to-plaster

We asked 100 plasterers for their top tips…

We love the plastering industry and with over 50 years’ experience under our belts, we’re fairly sure we’ve got some good ideas on the best plastering equipment and techniques to use. But don’t just take it from us. We asked 100 plasterers for their top tips and below are some of the things they came out with:

  • Make sure your surface is well prepared before you start, as it doesn’t matter how good a plasterer you are if your surface isn’t prepped.
  • Don’t mess about too much with your plaster, it’ll end up looking worse than when you started.
  • Use a sponge on multi when doing one coat as it gets the same results as two.
  • Give windows and skirting boards a quick wipe and dry after the first flattening.
  • Or spend a few minutes at the start running masking tape around them.
  • Get your PVA mix right and only skim PVA when dry.
  • Fill your beads first and go in the direction they’re going in to avoid sloping.
  • When your walls are turning, go over them with a hard dry trowel.
  • In between trowel stages make sure you bead up.
  • Blend, blend, blend – the more flawless your blending becomes the better the job and practice makes perfect.
  • Include fuel costs and waste materials in your pricing, as well as tools and van maintenance.
  • Give yourself a good early start.
  • Word of mouth recommendations from happy customers are great. Keep it professional.
  • Never rush through a job. Be your own worst critic and ensure the work you do is up to scratch.
  • Don’t give a specific start date for a job until you’re sure you can make it nearer the time as you risk looking unprofessional if the job before runs on.
  • Don’t make promises you can’t keep and always go above and beyond what you say you’ll do.
  • Allow a day extra when saying how long a job will take, just in case something unforeseen happens.
  • Save what money you can when the going’s good to cover the slow periods.
  • Get rid of dirty water before you mix up.
  • Wear gloves where you can to protect hands that are in and out of water all day.
  • Mix up cement and sand with your drill for spotless results.
  • Get your van/tools/equipment tidied up at the end of a job as there’s nothing worse than having to do it at the beginning of a new one.
  • Don’t leave your buckets full for the next day as they might leak overnight and never leave the mixer in the dirty water bucket – you’ll hate the mess if it tips over.
  • Scrim round the edges of switches and sockets once the fronts are off.
  • Price your job based on the most awkward bits and how difficult they’ll be to do, such as pipes and fittings that can’t be removed.
  • Keep all screws together in a sealed tub or old drinks bottle and avoid losing them.
  • Don’t let your plaster get too dry before you’ve finished with it.
  • Always use clean water.
  • Health and safety is important – when you take risks and hurt yourself you can say goodbye to your earnings.
  • Take responsibility for your own safety.
  • Realise your true worth and don’t undersell yourself.
  • Keep your tools clean as you go along.

Don’t forget you can order your tools online

And finally, we saved the best until last, which is – save yourself time by ordering your tools online with Gypsumtools and have them delivered to wherever you are in the UK!

Famous People Who Have Been in Plastering

Now, we all know that there are some shining stars in our industry. Those who can turn a basic job into a work of art. But, did you know that there are some mega famous faces who started out in our great profession?

When you take a look at the names of some of the famous people who have been in plastering, you might be surprised at just how well known they are. There are even a couple of knighthoods in there! So, can you imagine these iconic celebs with a hawk and trowel in hand?

Here’s our list!

  • Frank Sinatra – possibly the most famous face on the list and arguably one of the most famous Hollywood stars of all time. Before he did things his way, back in the 1930s he was a plasterer’s assistant and in fact his first wife Nancy (Sinatra), was the daughter of a plasterer too.
  • Sir Thomas Sean Connery – yet again another iconic celeb that you’re bound to recognise. These days we know him as possibly the best James Bond ever, but, back in his day, Sean and his younger brother Neil used to work as plastering contractors in Scotland’s fine capital Edinburgh. (Can imagine there were one or two happy housewives needing some plastering done around the time!)
  • Sir Henry Cooper – legend has it that this big time heavyweight boxer used to keep in shape for his fights by joining his twin brother on plastering jobs!
  • Alan Minter – Sir Henry wasn’t the only boxer keeping his physique honed through plastering – this former world middleweight champ was a plasterer too.
  • Brian Blessed – known more for his loud booming voice and tremendous acting talent than his ability to skim, but believe it or not, plastering is one of his many hidden talents.
  • Ricky Tomlinson – the Royle Family regular is quite well known for his political activism and the stint in prison that followed in his early life, but at the time he was also working as a plasterer on building sites.
  • Eddie ‘The Eagle’ Edwards – who could forget this Olympic gold medal winning ski jumper from the eighties? He was also a plasterer by trade.

Don’t forget you can order your tools online!

If you fancy joining such a star studded line up with a career in plastering, or, if you’re already one of the industry’s leading lights and need to update your tools to fit, don’t forget you can order your tools online with us!