What is Speedskim?

At Gypsumtools we’re always on the look out for the latest plastering products to hit the market that will make the job that little bit easier for professional plasterers and DIY fans alike.  The sort of tools and equipment that really save you time and effort when you’re working and ones that won’t cost the earth either.

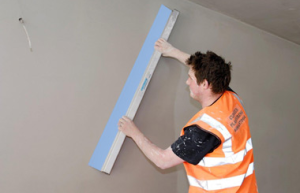
One of our latest finds is an innovative new system called Speedskim which has been designed to speed up the plastering process, help achieve a flatter surface and improve the overall results in the end. It’s a device which enables the plasterer to flatten and rule off with ease and can be used on all sorts of materials, including skim coat, one coat, backing and spray plaster, tape jointing and drywall compounds, as well as lime renders, sand and cement.

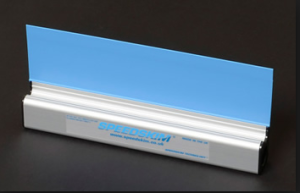
So what is Speedskim? Well, it’s pretty unassuming, but it gets some great results. Simply put it’s a flexible plastering rule which has been developed to increase output and improve the quality of finish.  It does this through the unique PVC blade which prevents moisture coming to the surface thereby accelerating the overall plastering process, and meaning you can get through the final stages with the steel trowel even quicker.


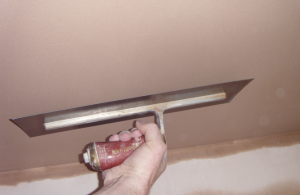
Speedskim


The benefits of using Speedskim

Not only will it help you get the job done in less time and achieve a flatter finish, but the benefits of using Speedskim also include its lightweight, ergonomic design which makes it more comfortable to use, even over extended periods of time.

Its flexibility sets it apart from other Featheredges and Darbys and allows for greater confidence, meaning that the plasterer can complete larger hits, distributing plaster over a wider area with a flatter and faster finish.

Specially formed ribs on the PVC blade also hold on to any excess plaster and the genius component design gives increased blade stability in a wide variety of temperatures and conditions. If it’s a ceiling that you’re plastering, then this is made much easier by the pole attachment that comes with it.

Speedskim Plastering Rule

Order your Speedskim Plastering Rule Online

It’s always great to hear of new innovations in the plastering equipment industry, which help minimise the physical strain of plastering and enable perfection in your finish. This is one example of a new tool that has well and truly brought plastering into the 21st century and we think it’s definitely worth a go.

The Speedskims that we have in stock come in a variety of sizes and are perfect for use on walls, ceilings and floors, although the button release robust end caps also provide an interchangeable blade feature, which brings an element of versatility to each one.

Take a look through our extensive range of equipment and order your Speedskim plastering rule online. Or, to find out more information about any of our plastering products and get some help and advice, get in touch with one of our team members today. You can drop us a line via email or telephone or call into our Midlands based trade counter, conveniently placed in the heart of the country and easy to get to wherever you are.

The 6 Stages Of Plastering

plastering stages

If you’re looking to try your hand at a spot of DIY plastering for the first time, then chances are you’ll also want the sort of smooth finish that the professionals get. After all, the last thing you want is to end up with an uneven wall that’s going to wind you up whenever you see it.

There is an art to plastering and a lot to be said for following the right steps to getting that perfect finish, so no cutting corners here!

In the 6 stages of plastering, each one plays an important part in getting good results at the end. So we’ve put together a handy guide which will talk you through them step by step.

Once you’ve prepped the wall for plastering, controlled your suction so that the plaster doesn’t dry too quickly and you’ve mixed your plaster, it’s time to get started on the six stages.

Stage 1

This is where you apply your first coat of plaster, which should be about 2mm thick. When you’ve loaded the plaster onto your trowel start at an angle with the leading edge of the trowel away from the wall, moving the trowel in a long motion, gradually flattening it to the wall as you go. On this first coat it’s more important to try and get a flat even coat with no bulges, don’t worry too much about any trowel marks or ridges because these will come out later.

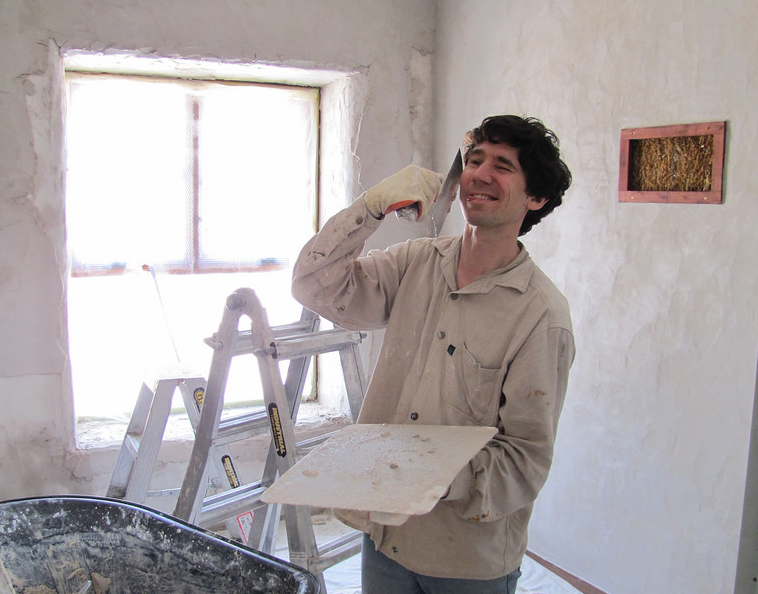
Man plastering

Stage 2

As the plaster begins to firm up this is when you can flatten off the first coat with a clean trowel, making sure that the bulges are pushed out. The secret to this (as with the majority of plastering) is to use firm pressure as you move your trowel across the wall in long movements, holding the leading edge of the trowel at about 10-15mm away.

Plasterer flattening plaster

Stage 3

Straight after you’ve finished stage two, the second coat of plaster is applied. It’s very similar to the first stage, but this time you’re only using half the plaster, applying half the thickness and even firmer pressure to try and reduce any holes in the plaster that might be caused. If you do create holes don’t worry too much, hopefully the next stage will get rid of them. The main reason for not spending too much time trying to fix the holes at this point is because you don’t want parts of your plaster to dry while you do.

6 stages of plastering

Stage 4

This is where you can trowel the plaster flat and remove any holes. Hopefully the plaster will be tacky and pliable enough to be pushed around into the holes, although make sure it isn’t too wet or this could create more. Again remember to run the trowel over the wall at the correct angle of around 10-15mm and reduce the risk of any dragging or scraping. Use firm pressure and don’t worry too much about any ridges that are caused as these can be removed in the next step. As you go over the wall look closely for holes and if some aren’t filling despite the pressure of your trowel, then more plaster can be applied to the hole and flattened. While it’s important to get the majority of holes filled at this stage, again don’t take too much time over it and let your plaster dry.

Holes in Plaster

Stage 5

This is where you remove any ridges in the plaster by using firm pressure with your trowel. If the plaster is quite firm and not easy to push around you can widen the angle of your trowel against the wall, but be careful not to scrape the plaster off.

Smoothing ridges

Stage 6

The final part of the six stages of plastering should leave you with a nice even slightly polished surface. It begins when the plaster starts to darken as it dries. This is where you can run the trowel with a firm pressure over the entire wall to finish. And you’re done!

Smooth plaster

Recommended Products

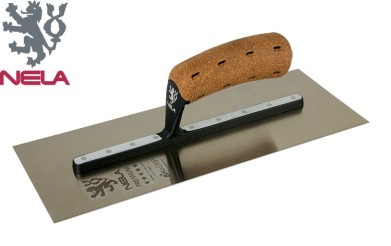
A NELA Mediflex Trowel 14 Inch for ONLY £30.66!

Nela-plastering-trowel

You’ll need a bucket to mix your plaster too – here’s one of our best selling Buckets, 38 Litres for ONLY £4.50!

Gorilla Mixing Bucket 38 Litres

And a Bucket Scoop to get the plaster onto your trowel, this Putz Bucket Scoop is great value for money at ONLY £8.04!

Putz Tools Bucket Scoop

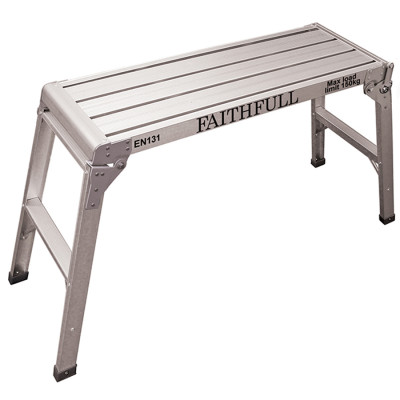
What about getting to the harder to reach places? Check out this Faithfull Step Up that folds away for storing too ONLY £41.99!

Faithful Fold Away Set Up


For more advice on plastering techniques and products, please do not hesitate to contact us!

The Benefits of Mixing Paddles

Mixing of a plaster

Here, at Gypsumtools, as the quickest growing online dry lining superstore for all your plastering needs we are committed to keeping plasterers informed of all our best deals on really useful bits of kit. We care about helping make plasterers’ lives that little bit easier so when we have essential equipment at bargain prices we have to let you know about it.

So, make sure you have a read below and get to know the benefits of mixing paddles of which there are loads. Don’t forget to have a look at some of our paddles too as they’re currently at great prices.

However, be quick! They’re not going to hang around for long especially with Black Friday right around the corner so make the most of it.

The Advantages of Paddle Mixers

Paddle Mixers are an ideal tool for rapidly mixing ingredients like gypsum plasters, jointing compounds, paints and fibrous materials.

Some of our more heavy duty mixers can also mix concrete and come with a Hex shaft for attaching to a heavy duty drill or a thread which allows them to be attached to power mixing tools massively increasing their effectiveness.

Our paddle mixers are also all made from steel components and come with a powder coated finish which proves a lot more durable than traditional methods.

Here’s a breakdown of the advantages of paddle mixers:

• Rapid Mixing of Materials
• Durable Mixing Paddles
• Steel Components
• Powder Coated Finish
• Attachable to Power Mixing Tools

Our Bargain Mixing Paddles

Collomix WK120mm Dia Mixing Paddle Hex Shaft

  • Rugged professional 120mm diameter versatile mixing paddle with two blades to lower drive loading when mixing sticky compounds such as tile cement and ready mixed plaster
  • Hex shaft for attachment to heavy duty drill with minimum chuck size 13mm
  • Length 590mm


Collimix MK100mm Dia Mixing Paddle Hex Shaft

  • Rugged professional 100mm diameter mixing paddle with three blades
  • Ideal for mixing heavy and viscous materials such as concrete, screed and mortars
  • Hex shaft for attachment to heavy duty drill with minimum chuck size 13mm
  • Length 590mm


Collomix M14 Mixing Paddles, Anti Clockwise M14 Threaded Shaft-120mm

  • Rugged professional 120mm diameter mixing paddle with three blades ideal for mixing gypsum plasters, jointing compounds, paints and fibrous materials
  • The blades are anticlockwise rotating forcing the material down from the top
  • M14 thread for attachment to power mixing tools
  • Length 590mm


conact us

Contact us for more info!

So, if any of these great deals have caught your eye make sure you head to our online store. These deals won’t hang around for long so make the most of them. Remember, there’s loads of other great deals on there all geared towards making your plastering life that bit easier.

We’re renowned for our rapid delivery service too, so any products you do choose to purchase will be with you ASAP.

Finally, if you have any questions about any of our products you can give us a call on 08456 2 54321. Our professional team of drylining experts are always on hand to answer any questions you may have.

How to Repair Plaster

plaster repair patch

Wondering how to patch large holes in plaster walls? Or simply how to repair cracks in plaster walls? Well fret no more. Our handy article will teach you everything you need to know and explain exactly how to repair plaster walls!

Here at Gypsumtools, we know how important it is that a job gets done well, and we understand how frustrating it is when you’re confronted with poorly plastered masonry and asked to patch it up. That’s why we thought we’d give you our guide to how to repair plaster. With these tips in mind, you should be able to fix a bad job and maintain that high standard clients have come to expect in no time at all.


Fix a bad plastering job


  • Preparation is key


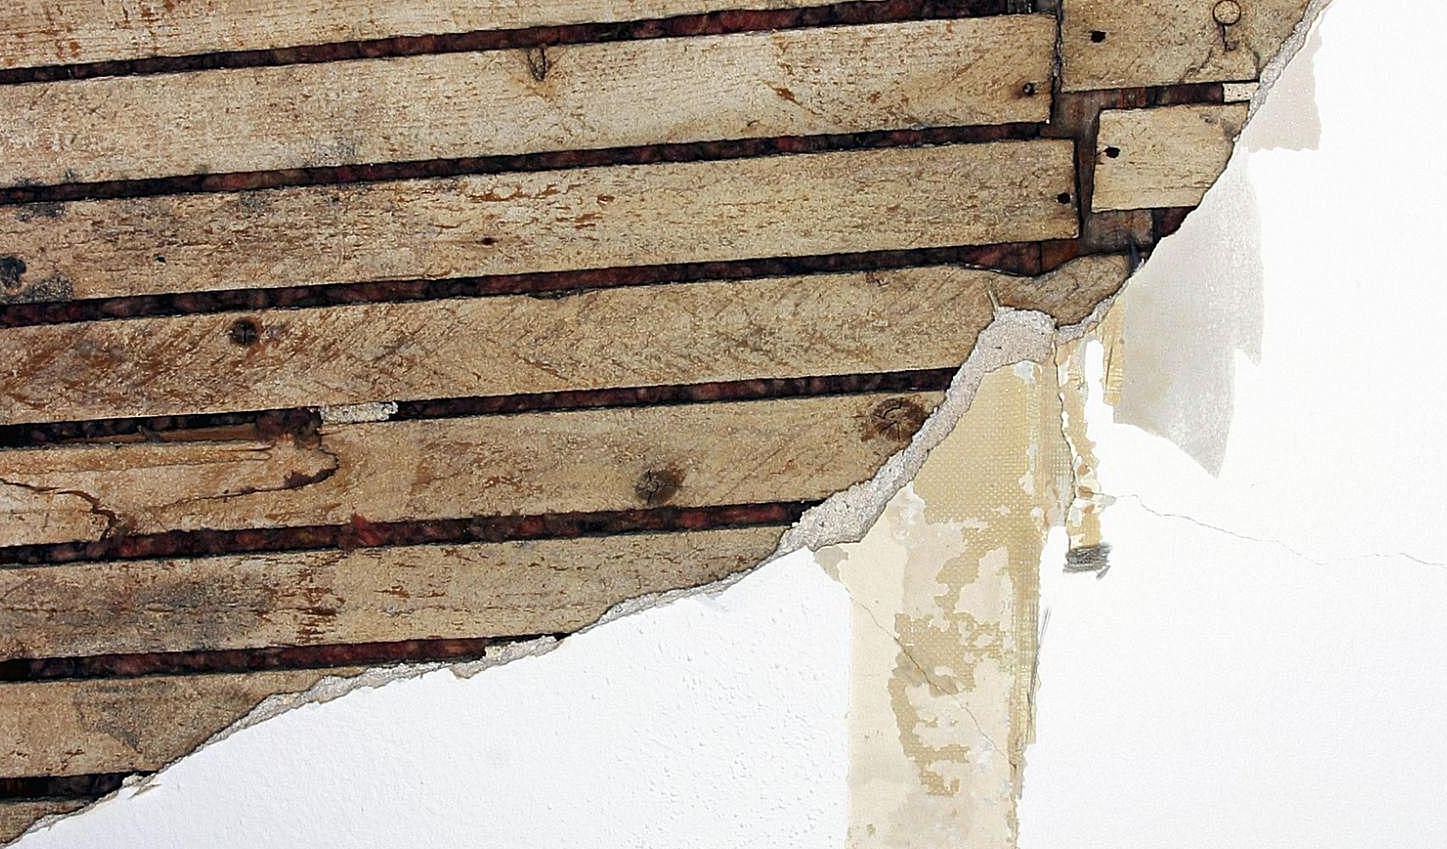
Start by using a hammer and chisel to remove all the loose material around the area needed to be patched up making sure you undercut the edges. A wirebrush can also be used to completely clear the area.


  • Get a Good Mix


Mix the plaster roughly to a 50/50 ratio. Start with a half bucket full of water and add the plaster to that according to the ratio. Mix thoroughly with a clean stick until the plaster is thick, relatively smooth and has no lumps. Then turn the mixture onto a hawk.

repair cracks in plaster walls


  • Filling the Patch with Plaster


Ensure the area needed to be patched is dampened. Next, use a plastering trowel to transfer a decent amount of mixture onto a hawk board.
Once you’ve got it onto your hawk board stand close to the patch and in one continuous motion scrape half the plaster onto the trowel. Then, hold the trowel with the angle slightly towards the wall and press the mixture onto the area you want to patch up. Press this mixture into the patch and gradually flatten it.

Bear in mind, you don’t want to have a trowel that’s completely flat against the wall. This will cause you to pull plaster off the wall rather than onto it.

Until the patch is filled to the point it overflows slightly you will want to keep repeating this procedure. It’s important not to overwork the plaster as that then weakens it and makes it fall off.


  • Skimming


After covering the surface, go over it again to smooth it to an even level. The trowel should be held at slight angle and so only one of the edges touches the plaster at one time.

After the plaster starts to set at around the 45 minute mark go over it again with a damp trowel for a more polished finish.


  • How to Patch Plaster Wall Holes – Deeper hole filling


You may have to put on two layers of plaster if the patch is deep. To do this, apply the first coat to half the depth of the patch and when it is only half set, scratch up the surface and leave it to set without it completely drying out. Apply a second coat to rule it off and when it is set, skim coat it to finish.


Contact us to find out more!

If you’re still struggling on how to repair a bad plastering job, or have any more questions, don’t hesitate to get in touch. Our staff are vastly experienced and will be more than happy to answer any queries. Also, if you’re looking for any of the tools listed above or want to upgrade your existing hardware make sure you have a browse of our products online; we’ve got some great products that can make your plastering life that little bit easier.

Dry lining and Rising Damp

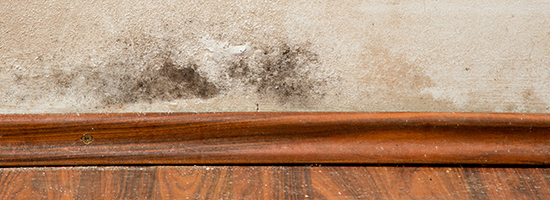
drywall mold

We often get asked about dry lining a wall where rising damp has previously been treated with a damp proof course. The relationship between dry lining and rising damp is one to be carefully considered, as salts dragged up from the ground become present in the masonry and plaster. These salts increase the ability of the wall to absorb water, which can be worsened by other effects such as condensation and humidity.

The below information may help answer some common questions around this:

drywall mold

THE ISSUE OF DAMPM

The issue of damp is a complex one. When completing dry lining, you may regularly find a damp proof course has been used to treat damp. Damp exists in buildings when moisture enters the structure; predominantly through humidity / condensation, rain penetration and rising damp, and can lead to masonry or plaster smelling.

HUMIDITY AND CONDENSATION

Humidity and condensation is borne out of a lack of ventilation within a property, resulting in water vapour becoming trapped within porous walls, known as interstitial condensation. This can usually be spotted through steamed up windows. If condensation and humidity is causing walls to look damp, a dehumidifier should be installed to combat the problem.

RAIN PENETRATION

Rain penetration occurs most often in single-skin walls. It can also happen in cavity walls, too, through the process of tracking across wall ties, so keep an eye out. Brickwork with cracked pointing, and any exposed porous stones and bricks can all lead to issues. A simple re-pointing of the external walls can fix this.

RISING DAMP

Indoor moisture commonly starts at the base of walls, potentially from defective ground and surface drainage, however this can also be caused by heightening ground levels and the failure of ground drainage systems. Leaks and flooding from defective drainage and plumbing are also sources of moisture occurring on the base of walls in buildings.

When confronted with the issue of having to dry line a previously damp wall, after a damp proof course has been used to treat damp, double check the masonry to make sure the damp proof course is doing its job. After this, you can use our Gyproc plasterboard along with our Thistle Multi Finish plaster to ensure a good finish.

contact us

Contact us to find out more

Need to know more about the hazards of dry lining a previously damp wall? Don’t hesitate to contact us to find out more, or ask any questions you might have. Our professional and courteous staff are always on hand to help out.

The Ultimate Guide to Plastering a Wall

book on the ultimate guide to plastering a wall

There’s a lot to be said for knowing how to plaster a wall properly, both in the amount of time and effort it can take you, not to mention your level of satisfaction with the finished result.

The last thing you want is imperfections on your wall that are going to bug you for years to come so first off, make sure when you plaster a wall that you follow the six stages of plastering in the correct order, that you keep your tools clean and have the right kit to hand.

We have put together the ultimate guide to plastering a wall which will take you through the stages you need to follow, show you what you need and explain exactly how to master the perfect layer of plaster – with some handy hints and tips added in along the way!


Click here to see our plastering tools and equipment – we stock everything you need!


Kit Needed

You may be wondering about the kit needed to get you started. After all, its always a good idea to be prepared well in advance, so you don’t have to down tools and leave the job halfway through to stock up. It therefore would be useful to make sure you have the following:

1.Plasterer’s trowel and bucket trowel

2.Plasterers Float

3.Corner trowel

4.Hawk

5.Bucket x2

6.Mixing stick or paddle

7.Plaster

8.Clean Water

9.Sandpaper

10.Stepladder or stilts

11.Flat Mask

How to plaster a wall step by step

Using a hawk and trowel correctly can be quite a challenge to start with if you’re not used to handling them, so before you put the layer of plaster on the wall, practise using them effectively so you don’t end up in a mess.

Before you start, make sure your wall is clean by removing bits of existing plaster, dust or wallpaper as you go and check the suction of your wall to make sure it isn’t too porous. If this is the case, it will suck the moisture out of the plaster so fast that it won’t have a chance to work before it dries. So, control the suction of your wall with water or PVA, which should satisfy the thirst of the wall, stopping it from stealing the moisture from your plaster too quick.
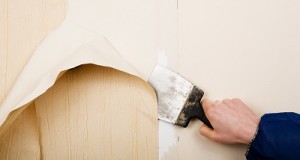
removal of old wallpapers with spatula
A handy tip when wetting your walls is to use a fine mist spray gun to avoid having to keep reaching down to re-wet your brush. Once the water starts running down the wall, you know you’ve controlled the suction.

Low suction backgrounds, such as painted surfaces will also need to be properly prepared, perhaps by using a mix of PVA glue and water to ensure the plaster sticks to the wall. You could also try adding a handful of sand to the PVA glue mixture to give it a rougher texture and better adhesion when you apply PVA. You’re then ready to start plastering your wall.


Click here to see out plastering tools and equipment – we stock everything you need!


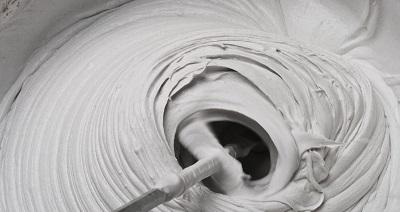
Plaster and water mix together roughly half and half – so half a (clean) bucket of water should make a full bucket of plaster. When mixing up your plaster it should have a thick, creamy consistency with no lumps. Try adding just enough to make a heap on top of the water to start with and the dry plaster must be added TO a bucket of clean water, NOT the other way around.
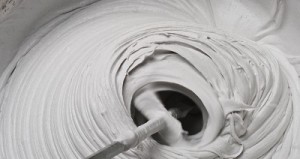
Mixing of a plaster
You can then mix your plaster slowly using a special paddle or mixing stick, but always have another bucket of water to hand to clean your tools. Trying to get hard plaster off your tools at the end is not much fun at all!

TIPWhen plastering a room, try not to do two walls that are touching each other as you risk damaging one wall while plastering the other. Turn all radiators off in the room too, to stop the plaster drying too quick. Beginners should start on a small area first to ensure they’re getting the technique right, so start with an area which only takes 30 mins or less for the first coat.

Tilting the hawk towards you, skim a small amount of the plaster from your hawk onto your trowel in one swift smooth movement (this can take some practice). Then run a horizontal top border line along the top section of the area you are looking to plaster and try to work from right to left. Work the plaster right into the edges creating a flat even layer of plaster. Don’t worry at this point about small holes and ridges, or smoothness, as long as that first coat is flat and even. It should be around 2mm thick (no more).
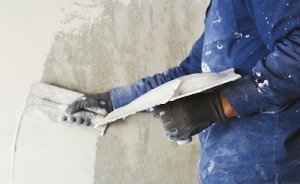
Man plastering
Once you’ve done the top border, carry on putting the plaster on the wall, this time in an upwards or vertical motion, which curves around as it reaches the border at the top. As you add the plaster to the wall, angle the leading edge of the trowel away from the wall and gradually flatten the trowel closer and closer to it as you move along and the plaster comes off the trowel. Remember to keep curving it around as you overlap the top border.

Every time you do a sweep upwards, go over it with a fairly flat trowel at an angle of 10-15mms to flatten everything you’ve just done. Remember you are looking for a flat and even surface here, with no bulges – don’t worry too much about trowel marks at this stage.

It could be the case (especially if it’s your first time) that you haven’t gradually decreased the angle of your trowel as you moved along the wall, perhaps you flattened the trowel to the wall too soon or overcompensated and things got quite messy. If this is the case and you have ended up with lots of levels of thickness you can go over it again with a fairly flat trowel angled at about 10mm to flatten out where you’ve been. Combine the flatness of the trowel with firm pressure all the way through to flatten and fill in any holes.

If you’re going too quick and not flattening the trowel quickly enough, you may get the scraping effect which means the top edge of the trowel is coming away from the wall, so it needs to come in a bit. The secret here is to go slowly and keep an eye on the gap between the trowel and the wall, using a firm pressure as you go.


Click here to see our plastering tools and equipment – we stock everything you need!


Also, when you plaster a wall, remember to try and remove annoying bits of grit straight away and make sure you keep everything clean. The next stage is to flatten the first coat off and give your trowel a quick clean. The sole purpose of this stage is to get your wall flat and knock the ridges back because if you don’t at this stage, you are just plastering over an already uneven wall once it has dried and this can only lead to an even more uneven, bumpy wall further down the line.

So, wait until the plaster is tacky and run your trowel over the wall. It’s important to wait until the wall has dried to a tacky consistency (and this can take between 5 and 15 minutes) because if not, you won’t notice the improvement.

Plasterer flattening plaster
Do, however, try and keep an eye on just how quickly the top coat of plaster hardens. As soon as the first coat is on, it is usually ready to be trowelled up and the second coat of plaster applied. This is why it makes sense to only plaster certain sections of the wall at a time to ensure it doesn’t dry out completely before you trowel up and apply your next coat.

Perhaps try putting a small amount of plaster on a piece of off cut and work out how quickly it dries before you attempt a large section of your wall – after all, it’s when the wall has gone tacky (firm, but not hard) that the imperfections can be removed using a trowel. If the plaster has dried completely, only sanding the wall will remove the holes and ridges and this can be a painful and laborious task.

Once you’ve flattened out your first coat of plaster, next is time for the second coat. This is similar to the first layer of plaster but it’s thinner, so use smaller amounts on your trowel. Aim for around 1mm of thickness and a flat even coat.

Also remember to push firmly with your trowel again, because if you don’t push hard enough when you run the trowel over the wall, you could end up with a series of holes. So push hard enough to push the plaster along the whole length of the trowel and into the holes using firm pressure. Move the flattish trowel along the wall with a leading edge of around 10-15mm and combine this with firm pressure.


Click here to view our entire range of plastering and drylining tools!


Don’t worry so much about trowel marks, you may even notice ridges caused by the trowel get worse when doing this, but these will be pushed out in the next stage when the plaster is a little firmer. Try and just focus on not leaving too many holes and make sure everything ends up nice and flat by the time you have finished the second coat of plaster.
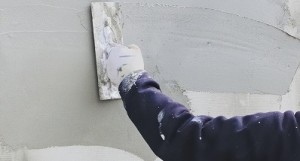
Plasterer adding second coat
Next, give your trowel a clean again, then using a trowel and brush when the wall is tacky it’s time to clean the borders and make sure that your corners are tidy.

Ensure all excess plaster is removed from the corner, then it can be formed with a brush. A paintbrush is useful here – just wet it with clean water then flick off the excess water. Point the paintbrush more at the wall you are skimming up to and run the brush in big strokes up and down the corner. Generally at this stage the plaster can be quite wet so use a little pressure.

Any brush marks left in the corner can be lightly trowelled out – but again if it is really wet it may be better to leave until the next stage. You can use water at this point to get a good clean, but don’t flick too much water on your walls unless you need it, or you can end up with a slurry effect on the plaster. Pass the trowel over sections of the wall and look for hollow areas or holes, then work the plaster into them. Moving from left to right, cover the whole area, working the plaster around the wall to keep it flat and fill hollow areas.

Again the trowel marks will come out later on. Leave the wall to get tacky once more and then it’s time to get the trowel marks out – this is called the trowelling up process. As the plaster sets it will darken in colour, which means it’s time for the final trowel.

Plaster-third-coat
Don’t over polish the plaster on the final dry trowel stage – it should be even and slightly polished, but feel like an eggshell – any smoother, it makes paint and wallpaper a nightmare to stick to. This final pass over the wall can be helped if your plaster is setting too hard, by applying clean water to the wall with a wide brush and following behind it with your float to give you a nice smooth finish.

Bear in mind that as you complete the finish, the float can pull plaster from high spots on the wall to the lower spots, but remember, you can always add more plaster where and when it is needed or wipe any surplus from your float onto your hawk. The main thing when plastering a wall is to remember to work through all of the different stages one at a time and bear in mind that it gets easier as the setting process begins to happen. If you have done this it should minimise the amount of sanding needed once the wall has dried and save you extra time, effort and frustration in the process. efina-adjustable-corner-trowel A quick guide to corners… If you make sure your corners are done well, then it gives you a greater chance of making sure that the rest of your wall will look good too, so it’s worth taking the time to get it right.
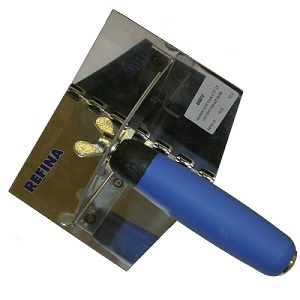
Try these following steps to help you along… Use a trowel or scraper to fill the corner gap between the plaster walls with the first coat, making sure to scrape off any excess. Once the first coat is dry, use the trowel or scraper blade to take off any small ridges. Then, cut a piece of paper tape to the height of your wall. Fold the tape in half so there is a crease running down the centre of it. You can then apply a thin coat of plaster base coat to both sides of the internal corner and press the tape over the top.

Once it is in place, use the trowel or scraper to flatten it onto the wall, squeezing out any excess plaster, then leave it to dry. Use your paint scraper or trowel to apply a top coat of plaster on both corner faces. Then run an internal corner plaster tool over the top coat to give it a flat and flawless finish.

Order your plastering tools from Gypsumtools

If you’re looking to plaster a wall for the first time and you are unsure of the kit you need, you can order your plastering tools from Gypsumtools, with members of our team readily on hand and available to answer any queries you might have. With over 50 years experience in the plastering industry, we are always looking for the best tools and techniques that there are in plastering, so give us a call, drop us a line or take a browse through our products online to find out more.
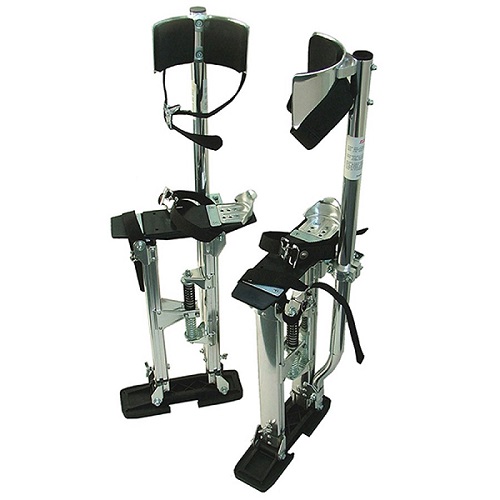
What are plasterers’ stilts?

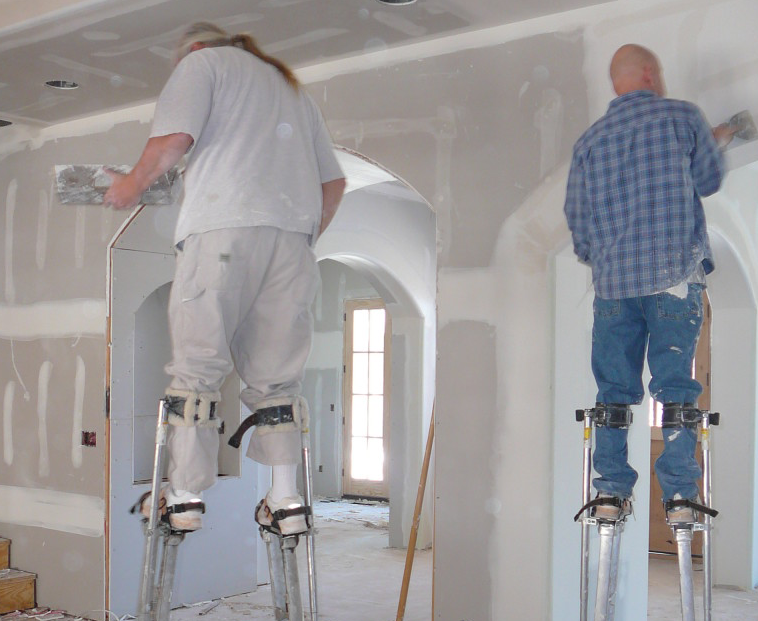
plastering stilts hire

Unless you are moonlighting as one of the Chicago Bulls or LA Lakers, chances are that during your plastering career you might have come across the issue of how to get your plaster in those hard to reach places, such as ceilings and the tops of walls.

Most ceilings are well over six foot high and in the past a milk crate, step ladder or plank balanced on two crates did the trick. But, with too many dangerous accidents occurring from unsafe working environments and many building sites and businesses clamping down on the health and safety pitfalls involved, it might be that over the years you’ve looked to an alternative solution.

One of the options you can try is plasterers’ stilts. And if you are wondering what are plasterers’ stilts and the image of clowns in a circus keeps popping into your head then don’t be disheartened.

Contrary to the sort of stilts that are used to wow the crowds under the big top, these are sturdy, easy to put on and take off, don’t take years of practice to perfect using them and if used in the right circumstances can be very safe.

Take a look at our stilt range for some of the industry leading stilts for plastering!

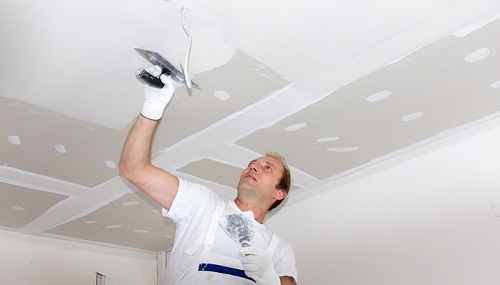
Plasterer plastering ceiling

How can Plasterers Stilts help?

Stilts for plasterers have been used in the drywall and suspended ceiling industries for years and can be an extremely useful tool to have in the workplace, saving you time, effort and labour.

Once you’ve got the hang of them, they make an excellent addition to your toolkit and, if you would like to know how else they can help, there are several benefits and a few things to bear in mind when thinking of investing in a pair.

  • Stilts will save you time on climbing up and down ladders and moving them from place to place – instead you can move easily across the area you are plastering.
  • Stilts will help reduce the risk of over reaching to get to those hard to reach areas, which can lead to muscle strain, fatigue and falls.
  • They are a safer option to balancing on ladders and other stands, offering you greater stability when both moving and standing still.
  • They are sturdy, act as an extension to your lower leg, have a solid large base and are easy to balance on.
  • They can be fitted in seconds using quick release straps and an adjustable working height.

But make sure…

  • The floor where you are plastering is clear of all debris and obstacles.
  • Remember to make sure that everything you need is within reach, a little higher up than you might usually be used to.
  • Have a practice on them while others are around and make sure if you’re going to be working on your own that you can take them off and put them on again easily in between coats.
  • Never try walking backwards. Chances are it’s not going to end up a pretty picture.
  • Don’t rush and take your time, especially if you’re just getting used to them.

a pair of plasterers stilts

Best Stilts For Plastering In The UK

If you’re looking for some cheap stilts for plastering but ones that are leaders in the industry, then look no further! We have an excellent set of plasterers’ stilts in stock from the popular and dependable quality budget brand Faithfull, which have been designed to save time in both the plastering and decorating industries.

For a Faithfull Plasterers Stilts overview, you might be pleased to know that, while they are extremely well made, using lightweight aluminium, they are sturdy, efficient and adjustable, coming in six two-inch increments which range from 18-30 inches.

The maximum load bearing amount is 114kg (so remember to take into account your hawk, trowel and plaster) and they won’t break the bank like other plasterers’ stilts.

Plasterers Stilts For Sale – Buy Online Today

If you’re a professional plasterer who is looking for an easy and effective solution to getting a job finished in even quicker time, then maybe stilts could be your best bet.

You can order your stilts online today from Gypsumtools and have them with you on site tomorrow, when you order before 12pm.

We also offer free delivery on orders over £99 to any location across the UK, so you can rest assured you will be only paying for the goods you receive.

Have a browse through our extensive range of products online, or give us a call today for more information.

What is Venetian Plaster?

marble plaster suppliers

If you have ever had the pleasure of taking in some of the magnificent sights of Venice, you will know that it is a city packed full of wondrous design and old world beauty.

Once you’re there, all it takes is a gondola ride down one of the city’s famous canals to experience the striking architecture that can be found on virtually every corner.

Because of this, it’s no surprise that even the special plaster which comes from this northern Italian city has the same awe inspiring passion, beauty, elegance and depth as the city itself.

So, what is venetian plaster? The answer lies in what it’s made of, how it’s applied and the finished effect.


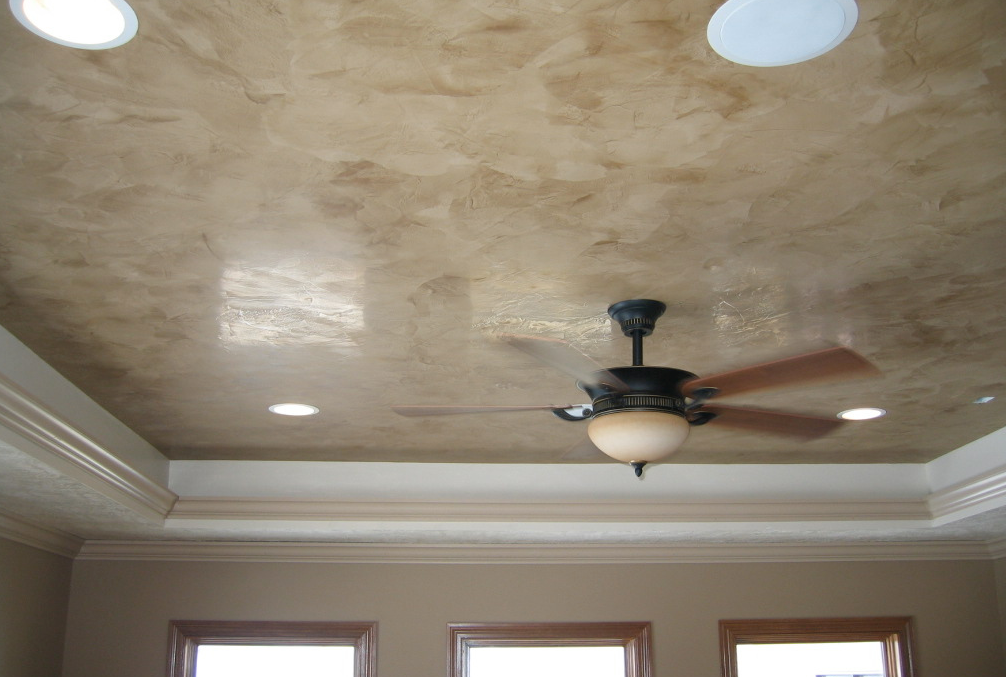
Traditional Venetian Plaster, otherwise known as marble plaster, Italian plaster or polished plaster is made of lime putty and marble dust and gives a highly polished finish to walls and ceilings, which can look like stunning marble itself. As a result it’s very often used successfully for decorative effect.

While it can be enhanced with acrylic resins, when it’s applied correctly, the plaster on its own can give a rock hard, deeply textured and smooth marble-like finish which displays a glossy, high sheen.

Venetian Plaster has been used for centuries and although it was originally used for building purposes its main use is now to compliment the interior design of a building, whether it’s old world traditional, contemporary design or even used in listed buildings for restoration.

It’s popular, not only for the striking and luxurious effect that it gives, but also because lime based venetian plaster is made with less harmful chemicals, which makes it hypoallergenic, as well as mould and algae resistant, not to mention the fact that venetian plaster can also regulate humidity.

polished plaster concrete

How to make Venetian Plaster & How to do Venetian Plastering

Venetian Plaster is usually applied over a primer and basecoat, as with regular plaster, but a change that has occurred in the application of it over time is the amount of coats needed. In the past the Romans used up to ten coats of plaster, whereas now, as technology has moved on, it only needs 1-4 coats thinly applied with a trowel to get the finish you need.

The glossy effect of the plaster gives a touch of prestige and elegance where it is used, because its crystalline beauty can look absolutely stunning. When applying the final layer of Venetian Plaster, there’s a special technique which is used to burnish the surface with a special steel trowel to give a glass like sheen that creates the impression of magnificent depth and texture.


Tools for venetian plastering include the use of a round edged plastering trowel. With this special kind of plastering tool, the technique that is used on the final coat of plaster is like a wet polishing that focuses heat and pressure to give deeply textured colours and a high shine.

It can be a pretty useful technique to use on surfaces where large slabs of marble cannot be easily installed, or in buildings with a tighter budget which means using real marble is simply too expensive.

Venetian Plaster has often be referred to as being a fake version of marble, but the fact is that the plaster in itself is made up of natural materials which, when combined, offer this striking effect. It can come in a variety of levels of sheen, textures and colours but it can also be tinted or coloured to achieve an affect that can’t be created naturally. When applied correctly, the finished effect is just as striking and aesthetically pleasing as marble itself and the finish will enrich the colour of the plaster giving warmth to the walls.

Order your Tools Online Today

If you would like to find out more about the tools for venetian plastering that we have in stock or simply venetian plastering cost, take a browse through the wide range of products we have available and order your tools online today, or, to find out more about the products used, give us a call or message us online.

Our friendly and experienced staff are always available to help and advise.

50 Plastering Tips

Plastering Health & Safety Tips

As industry specialists, we always try to help make your plastering life easier in any way we can. That’s why we’ve put together 50 plastering tips to help you out!

If you’re new to plastering, it can be quite a scary concept to begin with! However, with the right plastering tools, techniques and confidence, there’s no reason why you shouldn’t get the results you desire from the start.


Click here to see our plastering tools and equipment – we stock everything you need!


So, have a read below and let us know what you think – and as always, get in touch with our team if you need further assistance.

Our Top Tips!

Here are a few pointers to help you along.

1. Plaster won’t stick to just any surface and you don’t want it to start falling away, so ensure your surface is ready to be plastered.

2. Make sure it is clean – remove bits of existing plaster, dust or wallpaper.

3. Check the suction of your wall.

4. High suction porous backgrounds can suck the moisture from the plaster meaning it dries too quick – so you may need to wet the wall before you start.

5. When wetting your walls use a fine mist spray gun to avoid having to keep reaching down to re-wet your brush.

6. Once the water starts running down the wall, you know you’ve controlled the suction.

7. Low suction backgrounds, such as painted surfaces will also need to be properly prepared.

8. While plasterboard or backing coat can be skimmed over without preparation – existing plaster or previously painted surfaces will need treating with a bonding agent, such as a mix of PVA glue and water to ensure the plaster sticks to the wall.

9. You could also try adding a handful of sand to the PVA mixture to give it a rougher texture and better adhesion.

10. Clean as you go along – it may sound over the top but it’s vital to have clean buckets, tools and equipment to ensure your plaster doesn’t go off and you get a better finish that lasts.

11. Also, dry plaster is a nightmare to remove from your tools and can cause drags in the plaster finish on your next job!

12. Always use clean water, again to avoid contaminating your plaster and make it go off or set too quick.

13. Always mix plaster by adding plaster to the water and not the other way around.

14. Add just enough plaster first to make a heap on the top of the water and mix it so that it’s lump free, then slowly add the plaster to get the correct consistency either with a wooden stick or mixer drill.

15. Plaster and water mix together roughly half and half – so half a (clean) bucket of water should make a full bucket of plaster.


Click here to see our plastering tools and equipment – we stock everything you need!


16. The plaster should be the consistency of melted ice cream – try standing a stick in it – if it can stand up, the plaster is mixed right.

17. Plaster must be applied when a surface feels tacky, but not too wet, to help it bond to the surface well.

18. When plastering a room, try not to do two walls that are touching each other as you risk damaging one wall while plastering the other.

19. Keep it cool in the room you are plastering – radiators should be turned off or the plaster will dry out too quickly, making it difficult to apply and crack.

20. Beginners should start on a small area first to ensure they’re getting the technique right.

21. Start with an area which only takes 30 mins or less for the first coat.

22. Ensure you follow the six stages of plastering correctly and confidently – from the first coat to the final finish.

23. A good plaster finish can be achieved with a combination of confident firm pressure and the correct angle of your trowel.

24. Don’t try and get your surface perfect in the first coat – it takes too much time and the plaster may dry too soon – imperfections can be ironed out in later stages.

25. When you first apply your trowel to the ceiling or wall, start with one edge of the trowel angled away from it.

26. As the plaster on your trowel gets less and less with your movement, the angle between your trowel and the surface gets smaller.

27. Watch for spillage when reducing the angle of your trowel!

28. If you’re doing a ceiling, don’t stand directly under your trowel, just in case you get plaster in your eye!

29. Artex ceilings can be plastered by just using a thicker coat of plaster.

30. Don’t go into the edges between the ceiling and wall straight away with your plaster – it can be worked into the edges at a later date and avoid lumps of plaster clumping in the corners.


Click here to see our plastering tools and equipment – we stock everything you need!


31. But, when you do do your corners, make sure they’re flat – it makes the whole wall look good!

32. Ensure the thickness of the plaster is even on the first and second coat. Use firm pressure to ensure it is flat with no bulges.

33. You don’t need to worry too much about smoothness or trowel marks at this stage, just that it’s flat and even.

34. Make sure the first thin coat is wet and pliable when you apply the second coat.

35. Don’t worry about filling every little hole at this stage – it’s better to avoid your plaster firming up too quick.

36. After the first two coats, the ‘trowelling up’ process begins. This is time to fill all those holes, remove your trowel marks and get it smooth.

37. Make sure before you start the plaster is tacky – pliable enough to push the plaster into the holes, but not so wet you make new holes.

38. As the plaster sets it will darken in colour, which means it’s time for the final trowel.

39. Don’t over polish the plaster on the final dry trowel stage – it should be even and slightly polished, but feel like eggshell – any smoother, it makes paint and wallpaper a nightmare to stick to.

40. Ensure you have the right plastering tools, equipment and know how before you start, so you don’t end up having to stop half way through.

41. Make sure you know you can comfortably get to hard to reach areas with stilts or scaffolding.

42. Love your trowel – it’s a vital piece of plastering kit. Make sure it’s clean, rust free and the correct type. Just any trowel will make the job harder.

43. For beginners, a good size to start with is 11 inches. While a larger trowels covers areas faster, it’s harder to control.

44. Wear your metal trowel in – it’s much easier to use this way – some can be bought pre worn.

45. Use tin snips to cut angle bead to make the job easier.


Click here to see our plastering tools and equipment – we stock everything you need!


46. Don’t sand down plaster – if you follow the six stages correctly there’s no reason why you would need to come back to sand it, causing more mess, imperfections and more hard work.

47. Remember! Flatten, Amend Holes, Smooth Trowel Marks

48. Always remember to keep your trowel flat on the wall.

49. Don’t forget to fill any holes in the plaster by applying firm pressure or getting more plaster in the hole and smoothing out.

50. Then when the plaster is quite firm, any trowel marks and ridges will be successfully smoothed out – providing you have kept it flat allowing your trowel to sit flat on the wall.

Order online today!

We believe plastering tools don’t have to break the bank. However, they must be good quality! Thankfully, we have a huge range in stock, from high quality budget buys to professional plastering tools.

If you do find yourself in need of a piece of equipment while you’re on a job, we offer a fast ordering service, free delivery on orders over £99 and next day delivery. If you have any questions at all, give a member of our team a call – they’re always on hand to offer help and advice.

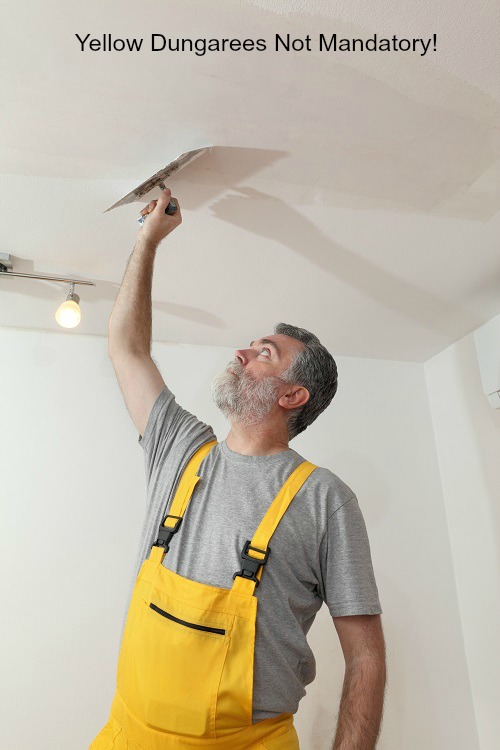
How To Plaster A Ceiling In Just 7 Steps

We all know that plastering can be a tricky job that takes time, effort and lots of practice – and plastering a ceiling can be one of the trickiest jobs to do.

However, with the right know-how and tools in place, plastering a ceiling can be completed by plasterers and DIY enthusiasts alike.

So, if you’re wondering how to plaster a ceiling, we’ve got some great tips from the trade! And remember, if you need to know more, our staff are always on hand to offer help and advice, just give us a call…

Once you’ve got the right tools and your plaster is mixed up correctly, you’re ready to go!

Step 1

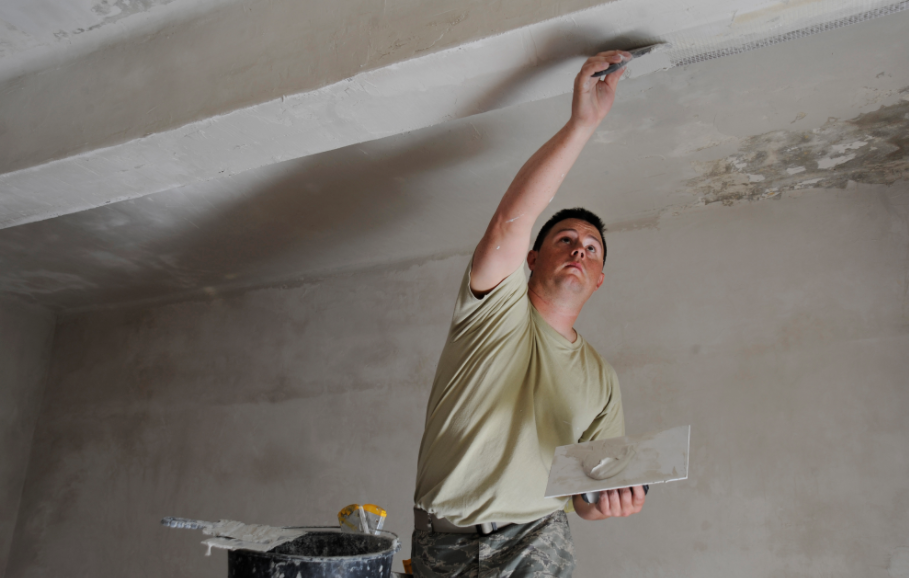
Keeping your hawk tilted towards you, confidently scoop some of the heap of plaster from your hawk onto your trowel with one swift and smooth movement. Starting a couple of inches away from the edge of the ceiling swoop the plaster across the ceiling as quickly and confidently as you can, keeping the thickness even.

Step 2

When you first apply your trowel to the ceiling, start with one edge of the trowel angled away from it, then as the plaster on your trowel gets less and less with your movement, the angle between your trowel and the ceiling gets smaller. As you move you push the trowel flatter and flatter, until it is flat against the ceiling once the plaster has been used up. Just make sure, as you go along, that the plaster doesn’t spill over the edge of the trowel!

Step 3

You can then come back over the area that you’ve just plastered to flatten it, using a firm pressure and working the surplus plaster into the edges between the wall and ceiling. By not starting at the edges straight away you will avoid lumps of plaster clumping in the corners.

Step 4

Then, once you’ve reloaded your trowel, apply the next sweeping movement which slightly overlaps where you have just been before. The important thing with the first and second coat of plaster (and it’s a good idea to apply a second coat) is to ensure the ceiling plaster thickness is even. You don’t need to worry too much about trowel marks at this stage.

Step 5

The ‘trowelling up’ process then begins – here is the time to get your surface nice and smooth. If the plaster has just started to set and go a bit tacky, it’s time to remove your trowel marks. Concentrate on the main areas of your ceiling, rather than spending too much time around the fiddly bits such as pipes and architrave. Just keep an eye on how long the plaster is taking to set, so you can ensure you fit in doing those bits as well, to achieve a good finish with a smaller tool.

Step 6

Using your float you can now move it along the ceiling and it should naturally move the plaster from the thicker spots to the thinner spots for a nice even finish. Any surplus plaster can also be wiped off onto your hawk.

Step 7

And for the final, beautiful finish, once the plaster is setting hard, apply clean water to your ceiling with a wide brush, following closely behind with your float.

Plaster Ceiling Material Needed

• Mixing bucket and paddle
• Plaster
• Plasterer’s trowel
• Plasterer’s float
• Bucket trowel
• Mask and goggles to protect the eyes and mouth
• Bucket of clean water
• A wide brush
• Smaller tool for smoothing plaster around pipes and architrave

Technique for plastering a ceiling

Not only does plastering a ceiling take confidence and practice, but you’ll also need to ensure you’ve got the right technique for plastering a ceiling. Here are a couple of tips, which may help:

1. Find the height that’s right for you, so you can comfortably and confidently apply the plaster to the ceiling with a firm even pressure. Aim to stand with about a splayed hand’s width between the top of your head and the ceiling, so, if you’re not tall enough, perhaps look into installing some form of scaffolding or stilts.
2. A great tip is not to stand directly under the trowel once you’ve started applying the plaster to the ceiling, to avoid getting plaster in your eye – not a pleasant experience.
3. It is also possible to plaster a ceiling over artex, you’ll just need to apply a thicker coat of plaster.

If you have any queries or concerns at all, whether it’s regarding the plastering kit you need or where to start, just give us a call and we’d be happy to offer help and support.