Used Drylining Tools: Gypsumtools’ Refurbished Marketplace

Used Drylining Tools: Gypsumtools' Refurbished Marketplace

Gypsumtools, with over 50 years of experience in the plastering and drylining industry, offers an impressive selection of used drylining tools. 

For both trade professionals and DIY enthusiasts, buying secondhand drylining tools ensures access to high-quality equipment at a fraction of the cost of new tools.

In this article, we’ll explore the benefits of purchasing refurbished tools, the variety available from Gypsumtools, and why our marketplace is the best choice for your plastering and drylining needs!

Contents

  1. Why Choose Used Drylining Tools?
  2. Explore Our Extensive Selection of Used Drylining Tools
  3. Assessing the Quality of Secondhand Drylining Tools
  4. Reliable Warranty and Exceptional Customer Support
  5. Trusted Brands in Our Secondhand Marketplace
  6. Choose Gypsumtools for Your Used Drylining Tools
  7. Gypsumtools’ Used Drylining Tools – FAQs
Why Choose Used Drylining Tools?

Why Choose Used Drylining Tools?

Buying used drylining tools can significantly reduce costs without compromising on quality. 

At Gypsumtools, our selection of secondhand drylining tools includes options from top brands, ensuring you get reliable and durable equipment.

Choosing secondhand tools is also an environmentally friendly choice, reducing waste and promoting sustainability.

With a wide selection of brands and tools, Gypsumtools makes it easy to find exactly what you need for any project.

Cost-Effectiveness

Purchasing used drylining tools can save you a significant amount of money compared to buying new.

This cost-effectiveness is especially beneficial for contractors and businesses that require a large number of tools or need to frequently replace equipment. These savings can then be redirected to other areas of your business, improving overall efficiency and profitability.

Environmental Impact

By choosing secondhand tools, you contribute to reducing waste and promoting a circular economy.

Refurbished drylining tools are a sustainable option, as they reduce the demand for new manufacturing and decrease the environmental footprint associated with producing new tools.

This eco-friendly choice helps to conserve resources and reduce landfill waste.

High-Quality Standards

Even though the tools are used, Gypsumtools ensures that all items meet high-quality standards. Every tool undergoes rigorous inspection and testing to ensure it is in good working condition.

This attention to detail means you can trust that the tools will perform reliably, providing you with peace of mind as you work on your projects.

Explore Our Extensive Selection of Used Drylining Tools

Explore Our Extensive Selection of Used Drylining Tools

Gypsumtools offers an extensive range of used drylining tools, catering to a variety of needs and preferences. Each tool in our marketplace is accompanied by a description and high-quality pictures, helping you make informed purchasing decisions.

If you need more information or additional images of a specific tool, our customer service team is ready to assist. Simply contact us with the details of the product you’re interested in.

Variety of Brands

Our marketplace features a diverse selection of brands, such as Columbia Tools, Level 5, and TapeTech, allowing you to find tools that match your specific requirements.

From well-known international brands to specialised niche manufacturers, Gypsumtools ensures that you have access to a wide range of high-quality used drylining tools. This variety ensures that you can find the right tool for any job, no matter how specialised.

Customer Reviews and Ratings

Customer reviews and ratings are a valuable resource when shopping for secondhand tools. At Gypsumtools, we encourage our customers to leave feedback on their purchases.

These reviews provide insights into the performance and reliability of the tools, helping you make more informed decisions. Positive reviews from satisfied customers can also give you confidence in the quality of our products.

Assessing the Quality of Secondhand Drylining Tools

Assessing the Quality of Secondhand Drylining Tools

At Gypsumtools, we take pride in ensuring the quality of our secondhand tools.

Each item undergoes a thorough inspection to determine its condition, and we provide clear descriptions and images to reflect this. Whether you’re looking for refurbished drylining tools or secondhand drylining tools, you can trust that we deliver reliable products.

It’s crucial to review all available information and pictures before making a purchase to ensure the tool meets your expectations.

Inspection Process

Every used tool that enters our marketplace goes through a rigorous inspection process.

Our team of experts examine each tool for wear and tear, functionality, and overall condition. Any necessary repairs or refurbishments are carried out to ensure that the tool meets our high standards.

This meticulous inspection process means that you receive tools that are functional and reliable.

Customer Feedback

We value feedback from our customers and use it to continually improve our offerings.

Reviews and ratings from previous buyers provide additional insights into the quality and performance of our secondhand tools. This customer feedback helps you make informed decisions and ensures that you can trust the tools you purchase from Gypsumtools.

Reliable Warranty and Exceptional Customer Support

Reliable Warranty and Exceptional Customer Support

Gypsumtools offers a standard 30-day warranty on all used and refurbished drylining tools.

This warranty provides peace of mind, knowing that you have support in case of any issues. Our customer service are ready to help with repairs, additional details, or any other queries.

Your satisfaction is our priority, and we strive to provide the best possible experience for our customers.

30-Day Warranty

Our 30-day warranty covers any functional issues that may arise with your purchased tool. If you encounter any problems within this period, our customer service team will assist you in resolving the issue.

This warranty ensures that you can buy with confidence, knowing that Gypsumtools stands behind the quality of our secondhand products.

Exceptional Customer Service

Gypsumtools prides itself on providing exceptional customer service.

Our knowledgeable team is always available to answer any questions you may have about our products, assist with technical issues, and provide recommendations based on your specific needs. We believe in building long-term relationships with our customers and are committed to ensuring your satisfaction with every purchase.

Trusted Brands in Our Secondhand Marketplace

Trusted Brands in Our Secondhand Marketplace

Our secondhand marketplace features tools from some of the most trusted brands in the industry. With over 50 years of experience, Gypsumtools knows which brands deliver the professional quality and reliability that our customers expect.

Each tool is carefully selected to ensure it meets our high standards, providing you with the best possible equipment for your plastering and drylining projects.

Professional Quality and Reliability

Professional quality and reliability are the hallmarks of the tools we offer. Whether you are a seasoned contractor or a DIY enthusiast, you can trust that our tools will perform reliably under demanding conditions.

Our selection includes tools that have been tested in real-world applications, ensuring they meet the rigorous standards required for professional use.

Industry Expertise

With over five decades in the industry, Gypsumtools has the expertise to select the best tools for your needs.

Our team’s deep understanding of plastering and drylining ensures that we only offer tools that meet our high standards of quality and performance. This industry expertise allows us to provide valuable advice and recommendations, helping you choose the right tools for your projects.

Choose Gypsumtools for Your Used Plastering and Drylining Needs

Choose Gypsumtools for Your Used Drylining Tools

Gypsumtools offers a comprehensive selection of used drylining tools that combine quality, affordability, and sustainability. Our closely inspected tools, high-quality images, and exceptional customer support makes us the go-to marketplace for secondhand drylining tools.

Browse our extensive range today and discover the benefits of choosing Gypsumtools for your next project!

Take the Next Step

Ready to find the perfect used drylining tools for your needs? Visit our marketplace to explore our extensive selection of secondhand and refurbished tools.

Whether you’re looking for a specific brand, or need assistance choosing the right tool, our team is here to help. Contact us today to learn more about our refurbished drylining and plastering tools.

Gypsumtools' Used Drylining Tools - FAQs

Gypsumtools’ Used Drylining Tools – FAQs

Why buy used drylining tools from Gypsumtools?

Buying used tools from Gypsumtools saves you money without sacrificing quality. Our tools are inspected for reliability, and purchasing secondhand also supports sustainability by reducing waste.

Are used tools as reliable as new ones?

Yes, all tools go through a thorough inspection and testing process to ensure they meet our high standards, so you can trust their performance.

What warranty comes with secondhand tools?

We provide a 30-day warranty on all used and refurbished tools, covering any functional issues that may arise to give you added peace of mind.

What brands are available in the used marketplace?

Our selection includes top international brands known for quality and durability, ensuring you find the right tool for any job.

How do I know a tool’s condition before buying?

Each tool listing includes clear descriptions and high-quality images, along with customer reviews, to help you make an informed decision.

Tools for Plastering: Comparing the Essentials for Your Project

Tools for Plastering Comparing the Essentials for Your Project Main Banner

Every specialist craftsman was once a beginner, but turning a wall full of imperfections into a smooth finish requires not just skill and precision, but also the right tools for the plastering job.

From choosing the right trowel size to finding the perfect mixer, every decision can make a big difference in the quality of your plastering and the ease of the project.

So, let’s dive in and compare the variety of options you can choose from when selecting the right plastering equipment for you.

Contents

  1. Comparing Tools for Plastering
  2. Choosing Plastering Trowels
  3. Benefits of Different Hawks
  4. Comparing Floats
  5. Types of Mixers and Buckets
  6. Selecting the Right Sander
  7. Choosing Tools for Plastering – FAQs
Comparing Tools for Plastering

Comparing Tools for Plastering

Choosing the right tools for plastering is crucial because they can greatly affect the outcome of your project.

Using the wrong equipment can lead to subpar results, which means more time and money spent on fixing mistakes. Plus, each plastering job is unique, so you need tools that match the specific requirements of your project.

Investing in high-quality tools will not only make your job easier but also ensure a professional finish that you can be proud of.

Choosing Plastering Trowels

Choosing Plastering Trowels

The trowel is the plasterer’s best friend. It’s the tool you’ll be using the most, so it’s important to choose the right one.

Trowels come in different sizes and materials, each designed for specific stages of the plastering process. You can even go for a “pre-worn” trowel to skip the breaking-in process.

Choosing the Right Trowel Size

The size of your trowel should match the task at hand. A larger trowel covers more area quickly, while a smaller one gives you more control on intricate surfaces.

It’s important to find a size that you’re comfortable with, as using a trowel that’s too heavy or long can affect your technique and the quality of your work.

Stainless vs. Carbon Steel

When it comes to trowel materials, you have two main options: stainless steel and carbon steel.

Stainless steel trowels are resistant to corrosion and great for high-moisture environments. On the other hand, carbon steel trowels are known for their sharpness and rigidity, which helps achieve a smooth finish.

The choice between the two depends on your working conditions and the results you want to achieve.

Corner Trowels

There are certain situations where using a corner trowel can greatly benefit your plastering project.

For instance, if you’re working on a room with alcoves, bay windows, or any other architectural features that create multiple corners, a corner trowel allows you to apply plaster smoothly and evenly in those tight spots. It ensures that you can achieve a seamless finish, even in the most challenging areas.

Benefits of Different Hawks

Benefits of Different Hawks

The hawk board is an essential tool for plastering. It provides a stable platform for holding mortar and plaster while you work. Hawk boards come in different materials, each with its own benefits.

Balancing Size and Comfort

Choosing the right size of hawk board is important for your comfort and efficiency.

A larger hawk can hold more plaster, reducing the need for frequent refills. However, it can also be heavier and cause fatigue. A smaller hawk allows for greater control and is better for tight spaces or detailed work.

Consider the nature of your project and your physical comfort when choosing the size of your hawk board.

Aluminium Hawks vs. Plastic Hawks

Aluminium hawks are durable and provide a stable base for plaster. However, they can be heavy and cause fatigue over time.

Plastic hawks, on the other hand, are lightweight and reduce operator fatigue. They may not be as durable, but they are a good option for DIY enthusiasts or less demanding tasks.

Consider the work environment and your specific needs when choosing between aluminium and plastic hawks.

Comparing Floats

Comparing Floats

Floats are an essential tool in the plastering process, used to achieve a smooth and even finish on walls and ceilings.

They are available in various materials, including plastic and metal, each with its own advantages and considerations. The shape of the float also plays a crucial role in determining the final outcome of the plastering project.

Plastic vs Metal Floats

When it comes to choosing between plastic and metal floats, there are a few factors to consider.

Plastic floats are lightweight and easy to handle, making them ideal for smaller plastering projects. They are also less likely to leave marks or scratches on the plaster surface.

On the other hand, metal floats are more durable and can withstand heavy use. They are particularly suitable for larger projects or when working with rougher surfaces.

Shape of Float

The shape of the float is another important consideration.

Rectangular floats are commonly used for general plastering work, as they provide a larger surface area for smoothing and levelling the plaster. They are versatile and suitable for both walls and ceilings.

For more intricate or detailed work, such as corners or edges, a smaller and more pointed float, such as a corner float, may be more appropriate. This allows for greater precision and control in those hard-to-reach areas.

Types of Mixers & Buckets

Types of Mixers & Buckets

Mixing plaster requires the right tools to achieve the correct consistency. Consider power mixers, which are a great investment for saving time and effort.

Power Mixers for Efficiency

Power mixers are a game-changer when it comes to mixing plaster.

They have ergonomic handles, variable speed controls, and high-torque motors that ensure a lump-free mix. They are also portable, making them convenient for on-site use.

Investing in a quality power mixer will increase your productivity and improve the quality of your work.

Bucket Types and Their Best Uses

Choosing the right bucket is important for mixing plaster.

  • Heavy-duty plastic buckets: A reliable choice as they resist the alkalinity of plaster and can withstand repeated cleaning.
  • Metal mixing buckets: A sturdier choice, but they are prone to rust.
  • Rubber buckets: These offer flexibility and are easy to clean.

Consider the specific usage and volume of plaster you’ll be working with when choosing a bucket.

Selecting the Right Sander

Selecting the Right Sander

Sanding is the final step in achieving a flawless finish on plastered walls. There are different types of sanding tools to choose from, depending on the size of the area you’re working on.

Hand Sanders vs. Power Sanders

Hand sanders offer precision and control, perfect for delicate areas and corners. Power sanders, on the other hand, are great for larger surfaces as they save time and effort.

The choice between the two depends on the scale of your project and the desired finish. Many professionals use both types of sanders for different phases of their projects.

Selecting Sanding Grits

The grit of sandpaper is important for achieving the desired finish.

Coarse grits are for removing material and smoothing rough surfaces, while fine grits are for final touches and achieving a smooth texture. Start with lower grits and gradually move to higher ones to avoid surface scratches.

Summary

Summary

Choosing the right tools for plastering is essential for achieving a professional finish.

Trowels, hawk boards, floats, mixers, buckets, and sanding tools all play a crucial role in the plastering process. Consider the size, material, and comfort of each tool to find the perfect fit for your project.

With the right tools in hand, you’ll be well-equipped to transform any wall into a work of art.

Choosing Tools for Plastering - FAQs

Choosing Tools for Plastering – FAQs

What is the most essential tool for plastering?

The trowel is arguably the most essential plastering tool – it’s used throughout the entire process to apply and smooth the plaster. 

Should I use a stainless steel or carbon steel trowel?

Stainless steel trowels are resistant to rust and are a great choice for high-moisture environments.

Carbon steel trowels are sharp and rigid, offering precise application but require more maintenance to prevent rust. 

How do I choose the right size of trowel?

The size of your trowel should match the task. A larger trowel (11 to 14 inches) is best for covering larger areas quickly, while a smaller trowel (8 to 10 inches) offers more control for detailed work. 

What’s the purpose of a corner trowel?

A corner trowel is specifically designed for plastering inside and outside corners. It helps create clean, smooth corners in hard-to-reach spaces like alcoves and bay windows.

What are the benefits of using a hawk board?

A hawk board provides a stable surface to hold your plaster while you work. It improves efficiency by reducing the need to constantly dip into a bucket for plaster, allowing for a more fluid and consistent application.

Is an aluminium or plastic hawk better?

Aluminium hawks are sturdy and long-lasting, but they can be heavy. Plastic hawks are lighter and reduce strain, making them a good option for smaller or DIY projects.

How do I choose between plastic and metal floats?

Plastic floats are lightweight and less likely to leave marks on the plaster surface, making them ideal for smaller, detailed projects. Metal floats are more durable and suited for larger, rougher surfaces. Choose based on the scale and surface type of your project.

Do I need a power mixer for plastering?

While not always necessary for small DIY jobs, a power mixer is highly recommended for professional plastering projects. It saves time and effort by producing a smooth, lump-free mix quickly.

What type of bucket is best for mixing plaster?

Heavy-duty plastic buckets are the most common choice because they resist the alkalinity of plaster and are easy to clean. Rubber buckets are flexible and easy to empty, while metal buckets are more durable.

Should I use a hand sander or a power sander for plastered walls?

It depends on the size of the area you’re working on – hand sanders are ideal for detailed work in smaller areas, while power sanders are more efficient for larger surfaces. Many professionals use both for different phases of a project.

How do I choose the right grit of sandpaper?

Start with a coarse grit (60-80) for smoothing rough surfaces, then gradually move to finer grits (120-240) for a smooth finish. Using finer grits last helps avoid surface scratches and ensures a polished look.

Are pre-worn trowels worth it?

Pre-worn trowels can save you time, as they come with edges that are already broken in, making it easier to achieve smooth results from the start. They are especially useful for beginners or professionals who want to skip the breaking-in process.

The Top Ten Plastering Tools You’ll Need To Get the Job Done

The Top Ten Plastering Tools You’ll Need To Get the Job Done

Plastering and drylining are skilled trades that require precision, attention to detail, and the right tools for achieving a high-quality finish. 

Understanding the purpose and use of each plastering tool is essential for anyone looking to undertake a plastering project, whether you are a DIY enthusiast or a professional plasterer.

The team at Gypsumtools have compiled a list of the top 10 most important types of tools in plastering, ensuring you are well-equipped to handle any task that comes your way.

Top 10 Plastering Tools

Contents

  1. Mixing Tools
  2. Mortar Stand
  3. Trowels
  4. Hawk
  5. Snips
  6. Float
  7. Scarifier
  8. Straight and Feather Edges
  9. Plastering Stilts and Hop Ups
  10. Cleaning and Maintenance Tools
  11. Conclusion
  12. Plastering Tools FAQs
Mixing Tools

1. Mixing Tools

Before any plastering can begin, you need to mix your plaster to the right consistency. You’ll need:

  • Bucket
  • Drill
  • Paddle attachments

A large, durable bucket (at least 15 litres) is essential for holding your plaster mix. 

Combine that with a powerful mixing drill and paddle attachments ensures your plaster is smooth and free of lumps. 

These mixing tools make the process quicker and more efficient, giving you a perfectly blended plaster every time.

Tip: Make sure your bucket is clean and dry prior to mixing any plastering materials.

Mortar Stand

2. Mortar Stand

While you work, having a mortar stand is a huge convenience. 

This simple, foldable table keeps your plaster within easy reach at all times, ensuring you don’t need to bend or strain to access your materials. 

Don’t overlook the simpler tools as they can make a big difference!

Trowels

3. Trowels

Trowels are the heart of any plasterer’s toolkit. 

Here are the essential types:

  • Bucket trowel – used to transfer plaster from your mixing bucket to the hawk, a robust bucket trowel helps you handle the heavy weight of wet plaster.
  • Finishing trowel – this wide, flat blade is perfect for smoothing the plastered surface, giving it that professional, polished finish.
  • Window trowel – with a smaller blade, this trowel is ideal for working in tight spaces around windows, ensuring you can plaster precisely without missing any tricky spots.
  • Inside and outside corner trowels – these specialised tools make plastering corners much easier, allowing you to create sharp, clean lines in both internal and external corners.
  • Skimming trowels – designed for applying thin coats of finishing plaster, skimming trowels are great for achieving a smooth surface on top of a base layer.

By investing in high-quality trowels and taking care of them, you’ll ensure that your plastering jobs always meet a high standard of finish.

Hawk

4. Hawk

The plastering hawk is an essential tool for holding your plaster while you work. 

With one hand on the hawk and the other on your trowel, you can easily apply the plaster to walls and ceilings. 

Look for a hawk made from durable materials with a comfortable handle for those longer jobs.

Snips

5. Snips

Snips are key for trimming metal or plastic beading used around corners and windows. 

A durable pair of snips with a long handle will give you better leverage, making the job easier and ensuring clean cuts.

Float

6. Float

Once you’ve applied the final layer of plaster, a plasterer’s float is used to smooth out any imperfections and achieve a uniform, polished finish. 

This tool is key to ensuring the plaster surface is flawless before it dries. 

Choose a float that’s comfortable to hold, as you’ll need precision during the finishing stages.

Scarifier

7. Scarifier

Before applying the second coat of plaster, it’s crucial to use a scarifier

This tool scratches the surface of the first coat, creating grooves that help the next layer adhere better. 

Without it, you risk the second coat not bonding correctly, which could result in cracks or peeling later on.

Straight and Feather Edges

8. Straight and Feather Edges

After plastering, achieving a perfectly flat surface is essential. Straight edges allow you to check and correct the evenness of the surface.

Feather edges, with their thinner profile, are especially helpful in tighter spaces or on curved surfaces. 

These tools are vital for ensuring that your plasterwork has a professional, flawless finish.

Plastering Stitls and Hop Ups

9. Plastering Stilts and Hop Ups

For projects where you need to plaster high walls or ceilings, plastering stilts or hop-ups can be game-changers. 

Plastering stilts strap to your legs and allow you to work at height without constantly repositioning ladders.

Alternatively, hop-ups (sturdy platforms) can provide a stable base for reaching those higher areas. 

Both options help increase your efficiency and comfort while working on larger projects.

Cleaning and Maintenance Tools

10. Cleaning and Maintenance Tools

Proper care of your tools is essential for extending their lifespan and ensuring optimal performance on every project. 

These tools include:

  • Plasterers brush
  • Sponge
  • Water bucket

Keep a plasterer’s brush and a sponge handy to clean tools during and after use. 

A bucket of water will help keep everything free from plaster build-up, preventing damage or reduced effectiveness over time.

Tip: After every job, clean your tools thoroughly and store them in a dry, safe place to ensure they remain in top condition for the next project.

Conclusion

Conclusion

By having these essential tools in your plastering toolkit, you’ll be fully equipped to handle any plastering project, whether it’s a small home repair or a large-scale professional job. 

From mixing and applying plaster to achieving a smooth, professional finish, each tool plays a critical role in the process.

Take care of your tools, and they’ll help you deliver high-quality work time and time again.

If you’re looking to get all the tools you need, check out our comprehensive range of plastering tools, perfect for apprentices and seasoned pros alike!

On a budget? Consider renting taping tools.

Plastering Tools FAQs

Plastering Tools FAQs

What are the essential plastering tools for beginners?

For beginners, the must-have plastering tools include a mixing bucket, a drill with paddle attachments, a finishing trowel, a hawk, and a float. These basics will help you mix and apply plaster efficiently while achieving a smooth finish.

How do I use a mixing drill and paddle attachments for plastering?

To use a mixing drill and paddle attachments, place the dry plaster mix into a clean bucket, then slowly add water while using the paddle attachment to mix. Continue mixing until the plaster reaches a smooth consistency, free of lumps.

Why is a finishing trowel important in plastering?

A finishing trowel is essential because it allows you to smooth out the plastered surface, giving it a professional, polished finish. It’s one of the most frequently used tools in any plasterer’s kit.

What is the difference between a bucket trowel and a skimming trowel?

A bucket trowel is used to transfer plaster from the mixing bucket to your hawk, while a skimming trowel is used to apply thin layers of finishing plaster, creating a smooth surface on top of the base coat.

How do I achieve a smooth plaster finish?

To achieve a smooth plaster finish, use a float after applying the final coat of plaster. A float helps smooth out imperfections and ensure a uniform finish before the plaster dries.

What is a hawk used for in plastering?

A hawk is used to hold plaster while you apply it to walls or ceilings with a trowel. It helps plasterers work more efficiently by keeping the plaster readily available during the application process.

Why should I use a scarifier between plaster coats?

A scarifier is used to scratch the surface of the first coat of plaster, creating grooves that help the second coat adhere better. This ensures a strong bond between layers and prevents peeling or cracking.

How do I ensure a flat, even plastered surface?

Using straight edges and feather edges will help you check and correct the evenness of the plastered surface. Feather edges are particularly helpful for curved surfaces or tight spaces.

What are plastering stilts and how do they work?

Plastering stilts are tools that strap to your legs, allowing you to walk and work at elevated heights. They are particularly useful for plastering high walls or ceilings without constantly repositioning ladders.

How should I maintain my plastering tools?

To maintain your plastering tools, clean them with water and a plasterer’s brush after each use. Make sure to remove all plaster build-up, and store the tools in a dry place to prevent rust and wear.

Dry Lining Tools: The Essentials Every DIY Enthusiast Needs

Dry Lining Tools: The Essentials Every DIY Enthusiast Needs

With so many dry lining tools available, it’s easy to wonder which tools you truly need to get the job done right.

Whether you’re embarking on your first project, or refining your skills, having the correct tools at hand is key to streamlining the dry lining process, and achieving a smooth and professional finish.

Let’s break down the must-have tools that will help you achieve a polished finish every time.

Contents

  1. Starting with Dry Lining Tools – Basics
  2. Tools for Securing Drywall
  3. Mastery in Finishing Drywall
  4. Automatic Dry Lining Taping Tools
  5. Specialty Tools for Perfection
  6. Conclusion
  7. Dry Lining Tools FAQs
Starting with Dry Lining Tools - Basics

Starting with Dry Lining Tools – Basics

The foundation of any successful dry lining project lies in selecting the right tools. These essentials make the task easier and ensure precise results. 

Here are some tools you can’t do without:

  • Drywall T-Square: Essential for precise, straight cuts on large plasterboard sheets. Accurate markings and easy shaping ensures professional results.
  • Sharp Utility Knife: Paired with a straight edge, a sharp utility knife ensures clean, precise trimming, essential for a flush fit against studs and joists.
  • Tape Measure: Clear markings and a strong locking mechanism will help you avoid mistakes and save time, ensuring that each panel fits snugly in place.

Tip: keep your utility knife sharp and easily accessible for frequent use, as a dull blade can lead to uneven cuts and poor results.

Tools for Securing Drywall

Tools for Securing Drywall

Once your drywall is cut to size, securing it to the framework requires the right fasteners and tools – proper installation at this stage sets the foundation for a seamless finish.

  • Drywall Screws: Provide a tight grip, preventing movement and helping to maintain the stability of your wall over time. 
  • Screw Gun: Designed to drive screws to the exact depth needed without damaging the surface. Screw guns with auto-feed features can speed up the process and improve consistency.
  • Drywall Hammer: A specialised tool with a rounded face that helps you make minor adjustments without damaging the surface.

Tip: Use coarse thread screws for wood studs, fine for metal.

Mastery in Finishing Drywall

Mastery in Finishing Drywall

The difference between a good dry lining job and a great one often lies in the finishing. 

To achieve a flawless, smooth surface, you’ll need a few specialised tools:

Tip: Manual sanding blocks offer control for smaller areas, while a drywall sander with dust extraction is ideal for larger projects.

Automatic Dry Lining Taping Tools

Automatic Dry Lining Taping Tools

Automatic taping tools automate the application of joint tape and compound, ensuring consistent results with less manual effort. 

  • Automatic Tapers: Apply joint tape and compound simultaneously along drywall seams, significantly speeding up the taping process. 
  • Corner Finishers: Designed for applying joint compound to both internal and external corners, these tools help achieve clean, sharp edges. 
  • Flat Boxes: These are used to apply joint compound over taped seams and fastener holes. Flat boxes come in various sizes and are equipped with adjustable blades to control the thickness of the compound layer.
  • Loading Pumps: Used to fill automatic tapers, flat boxes, and other tools with joint compound quickly and cleanly, maintaining a steady workflow.
  • Nail Spotters: Designed to apply a consistent amount of joint compound to cover nail and screw heads, ensuring a smooth surface free from indentations and reducing the need for touch-ups.
  • Corner Applicators: Apply joint compound to corners before smoothing it out with a corner finisher. 

Investing in these tools can significantly reduce the time and effort required for dry lining projects, while also improving the overall quality and durability of the finished surface.

Specialty Dry Lining Tools for Perfection

Specialty Dry Lining Tools for Perfection

To help address tricky areas and ensure a flawless finish, consider adding these specialty tools to your collection. 

  • Circle Cutters: Makes clean and accurate circular cuts without waste (e.g. light fixtures or speakers).
  • Drywall Saw: Precise and controlled custom cuts in awkward areas, such as around pipes or electrical outlets.
  • Corner Tools: Achieve crisp, clean edges on internal and external corners, where two walls meet.
Conclusion

Conclusion

Dry lining may seem daunting at first, but with the right tools and a bit of know-how, it’s a task any DIY enthusiast can tackle. From measuring and cutting, to securing and finishing, having the correct tools makes all the difference.

By investing in quality tools you’ll save time, effort, and frustration, ensuring a smoother process and guaranteeing a professional-grade finish.

Discover the range of high-quality, professional dry lining tools available at Gypsumtools today!

Dry Lining Tools FAQs

Dry Lining Tools FAQs

What is dry lining, and why is it important?

Dry lining is a method of attaching plasterboard (drywall) to internal walls or ceilings, without the need for wet plaster.

This technique provides a smooth, even surface that’s ready for painting or wallpapering, making it a popular choice for home renovations and new builds.

Do I need professional experience to start dry lining?

No, dry lining is suitable for DIY enthusiasts of all levels. With the right tools and a bit of patience, anyone can achieve professional-looking results. Start with smaller projects to build your confidence before tackling larger walls or ceilings.

What are the most essential tools for a beginner in dry lining?

The must-have tools include a drywall T-square, sharp utility knife, tape measure, drywall screws, and a screw gun or drill. Sanding tools and a taping knife will also be essential for the finishing stages.

How do I ensure my drywall cuts are accurate?

Using a drywall T-square and utility knife ensures precise, straight cuts. Measure carefully, mark your cut lines clearly, and always double-check measurements before cutting.

Can I use regular screws for drywall installation?

No, it’s best to use drywall screws specifically designed for securing plasterboard. These screws have the right thread and length to provide a secure hold without damaging the drywall. Using improper screws may lead to problems like cracking or loosening over time.

What’s the difference between a screw gun and a regular drill?

A screw gun is specifically designed for drywall installation, offering consistent depth and speed when driving screws. A regular drill can be used with the correct attachments, but a screw gun provides greater control and efficiency.

How do I get a smooth finish on my drywall seams?

Apply thin, even layers of joint compound over the seams using a taping knife. Allow each coat to dry before adding the next. Using progressively finer sandpaper, sand between coats to smooth the surface.

What tools should I use to ensure sharp and clean corners?

Use corner trowels or specialty corner tools that help shape and smooth the joint compound. For internal corners, use a tool with a 90-degree angle to ensure accuracy. Automated taping tools can also make corner work faster and more precise.

What’s the best way to cut around fixtures like pipes or electrical outlets?

A drywall saw is perfect for cutting around obstacles like pipes or outlets. For circular cuts, use a circle cutter to create precise openings for fixtures such as lights or speakers.

While basic tools are sufficient for smaller projects, specialty tools like circle cutters, corner trowels, and drywall lifts can significantly improve the quality of your work, especially for larger or more complex jobs. 

Do I need specialty tools to complete my dry lining project?

While basic tools are sufficient for smaller projects, specialty tools like circle cutters, corner trowels, and drywall lifts can significantly improve the quality of your work, especially for larger or more complex jobs. 

Renting Taping Tools: Hiring Drywall Equipment with Gypsumtools

Renting taping tools is a great way to get quality equipment, without the upfront cost of purchasing your own.

When tackling a drywall project, having the right tools at your disposal is crucial for efficiency, effectiveness, and achieving professional-grade results.

This blog post explores the advantages of renting taping tools and drylining equipment, focusing on a leading provider in the industry, Gypsumtools.

Contents

  1. Drylining Equipment Hire
  2. Renting Taping Tools
  3. Renting Taping Tools with Gypsumtools
  4. Options for Renting Taping Tools
  5. Summary
  6. FAQs for Renting Taping Tools
Drylining Equipment Hire

Drylining Equipment Hire

Drylining is a critical phase in construction, used to prepare walls and ceilings for painting or wallpapering. However, achieving a smooth, professional finish requires precision, skill, and, most importantly, the right tools.

Through Gypsumtools equipment hire, both professionals and DIYers have access to the latest drylining tools and technology, without the full investment. This ensures every project benefits from the highest standards of efficiency and finish quality.

Renting Taping Tools

Renting Taping Tools

When installing and finishing drywall, taping tools play a pivotal role in achieving seamless joints and professional-grade surfaces.

Renting these tools provides a practical solution for both professionals and DIYers to execute their projects with finesse and efficiency.

Benefits of Renting Taping Tools

Renting taping tools offers several benefits, catering to various project needs and financial considerations:

  • Financial Flexibility: By renting, you can avoid the large upfront investment of purchasing expensive equipment. This flexibility allows for better money management – particularly beneficial for small businesses or individual contractors with tighter budget constraints.
  • Project-Specific Rentals: Each project has unique requirements. Renting allows you to select taping tools that are specifically suited to the task at hand, ensuring optimal results, without the need to compromise with a one-size-fits-all approach.
  • Trial Before Purchase: For those considering investing in their own set of taping tools, renting offers an excellent opportunity to trial different brands and models. This firsthand experience can help you decide what tools and brands you prefer, ensuring you only invest in equipment that truly meets your long-term needs.
  • Reduced Downtime: Tool rental providers such as Gypsumtools, ensure that the tools you receive are in top working condition. This reduces the likelihood of downtime due to equipment failure, ensuring your project stays on track.
  • Access to Latest Technology: The drywall industry continuously evolves, with new tools and technologies designed to improve efficiency and outcomes. Renting provides access to the latest advancements, without the need to constantly update your own tool inventory.
Renting Taping Tools with Gypsumtools

Renting Taping Tools with Gypsumtools

Choosing Gypsumtools for your taping tool rental needs offers a quality, convenience, and expertise that is unmatched in the industry.

With an extensive selection of tools and a focus on customer satisfaction, Gypsumtools ensures that every tool rental helps to successfully finish drywall projects at a professional standard.

Benefits of Gypsumtools

Gypsumtools stands out for its comprehensive selection of top-quality taping tools, coming with expert advice and excellent customer service.

When renting plastering equipment with Gypsumtools, you ensure you get the tools you need with convenience and ease.

Hiring Period

Flexibility is key in construction projects, and Gypsumtools offers rental periods that adapt to your specific needs, from shorter-term projects to extended periods.

Choose between hiring your taping tools for 90, 180 and 360 days – 3, 6 and 12 months, respectively.

Discounts

To further enhance value, Gypsumtools provides discounts for longer rentals. So, the longer you need your equipment, the larger the discount you’ll receive.

  • Sign up for 6 months hire and receive 5% off
  • 9 months hire and get 1 month free
  • 12 months hire and get 2 months free
Options for Renting Taping Tools

Options for Renting Taping Tools

When it comes to drywall taping, the choice of tools can significantly impact the efficiency and quality of your work.

Gypsumtools offers a selection of taping tools from leading brands – allowing both professionals and DIYers to have access to the best equipment for the project.

Understand the specific benefits of Columbia, Level 5, and DeWalt taping tools available for rent.

Columbia Taping Tools

Columbia Taping Tools are renowned for their engineering excellence and durability, making them a preferred choice for drywall professionals.

  • Precision Engineering: Columbia tools are designed for ease of use and precision, allowing for excellent tape application and joint smoothing.
  • Durability: Built to last, these tools are made from high-quality materials that are ideal for continuous use.
  • Versatility: The range includes automatic tapers, flat boxes, angle heads, and corner rollers, catering to all aspects of the taping and finishing process.

Level 5 Taping Tools

Level 5 Tools offer an excellent balance of performance and value, with features that cater to both novice and experienced drywallers.

  • Wide Range: From automatic tapers to compound tubes and extendable handles, Level 5 provides a comprehensive toolkit for every stage of the drywall finishing process.
  • Innovative Design: Level 5 tools are designed with the user in mind, focusing on ergonomics and ease of maintenance.
  • Cost-Effectiveness: With a focus on providing professional-grade tools at a competitive price point, Level 5 ensures quality doesn’t have to be expensive.

DeWalt Taping Tools

DeWalt is a brand focused on power and reliability – their taping tools are no exception.

  • Robust Construction: DeWalt tools are engineered for durability and performance, capable of handling the tasks of any job.
  • Ease of Use: Designed for comfort and efficiency, DeWalt taping tools reduce workload and improve productivity.
  • Innovation: Incorporating the latest in tool technology, DeWalt offers features that simplify the drywall taping process, saving time and effort.
Summary

Summary

Renting taping tools and drylining equipment from Gypsumtools is a smart choice for anyone involved in drywall projects.

With flexible rental terms, a wide selection of high-quality tools, and the convenience of expert advice, Gypsumtools ensures your project is equipped for success.

Whether you’re a professional contractor or a DIY enthusiast, consider the benefits of drylining equipment hire to save costs and enhance your project’s efficiency.

FAQs for Renting Taping Tools

FAQs for Renting Taping Tools

What are the benefits of renting taping tools?

Renting taping tools allows you to access high-quality equipment without the large upfront cost of purchasing. It also gives flexibility to select project-specific tools, access the latest technology, and try different brands before making a purchase decision.

Why should I consider renting taping tools from Gypsumtools?

Gypsumtools offers a wide selection of top-quality taping tools with flexible rental periods and discounts for longer rentals. Their expert customer service and maintenance ensure you get reliable tools in excellent condition.

What types of taping tools can I rent from Gypsumtools?

Gypsumtools provides a range of taping tools, including automatic tapers, corner finishers, and flat boxes from top brands like Columbia, Level 5, and DeWalt.

How long can I rent taping tools for?

Gypsumtools offers flexible rental periods of 90, 180, or 360 days (3, 6, or 12 months), with discounts available for longer rentals.

Are there discounts for renting taping tools long-term?

Yes, Gypsumtools offers discounts for extended rentals. For 6-month rentals, you receive 5% off. At 9 months, you get 1 month free, and at 12 months, you receive 2 months free.

Is renting taping tools a good option for first-time drywallers?

Yes, renting taping tools is ideal for first-time drywallers. It provides access to high-quality equipment without the full investment and allows you to try various tools to find what works best for your skill level and project.

Drylining Equipment Hire: Benefits of Hiring Equipment

Are you tired of seeing unsightly imperfections on your drywall? Maybe it’s time to consider using professional-grade tools with drylining equipment hire.

Contents

  1. Introduction to Drylining Equipment Hire
  2. Cost Efficiency of Drylining Equipment Hire
  3. Flexibility and Convenience
  4. Professional Advice on Hand
  5. Enhanced Productivity
  6. Compliance and Safety with Drylining Equipment Hire
  7. Summary
Introduction to Drylining Equipment Hire

Introduction to Drylining Equipment Hire

Drylining is a crucial step in finishing internal spaces, and it requires specialised tools that you won’t find in your everyday toolbox.

Instead of buying these tools outright, you can save money by hiring them. Drylining equipment hire gives you a taste of the professional world, without the hefty costs.

Hiring drylining equipment is also a practical choice for those who only have occasional drylining projects. Instead of investing in expensive tools that will sit unused for long periods, you can simply rent what you need when you need it. 

Plus, by renting, you’ll have access to the latest models with all the modern features you need for the job.

The convenience of drylining equipment hire is not only cost-effective, but also gives homeowners and small-scale contractors a professional edge. 

It allows you to bridge the gap between amateur attempts and professional results. With high-quality tools at your disposal, you can enhance the finish of your walls and ceilings, improving the overall look and value of your property.

Cost Efficiency of Drylining Equipment Hire

Cost Efficiency of Drylining Equipment Hire

Choosing to hire drylining equipment comes with a big cost advantage, especially for those who don’t have frequent projects. 

You don’t have to make a huge upfront investment in expensive drylining tools that you’ll only use occasionally. Plus, you won’t have to worry about the price depreciation of tools or the ongoing maintenance expenses, which can save you a lot of money.

Another benefit is that you don’t have to tie up your money in equipment that you rarely use. 

It’s a “pay-as-you-go” model, perfect for those who only need the equipment on a project-by-project basis. Instead of spending a lot of money upfront, you can allocate your funds more efficiently. 

Hiring allows you to spread out the costs over time, giving you a cash flow-friendly solution that aligns with your dynamic needs and financial situation.

Avoid Upfront Purchases

Buying tools for drylining projects can be expensive, especially for smaller contractors or DIY enthusiasts. Fortunately, hiring equipment allows you to access high-quality tools without draining your bank account.

Renting drylining tools is a smart financial move, especially if you only use them occasionally. It keeps your funds available and prevents you from investing in tools that might not get much use in the long run.

By choosing to hire instead of buying, you prioritise flexibility and liquidity over ownership. It’s a practical choice that allows you to allocate your resources wisely.

When your needs are project-specific and not ongoing, renting is a great alternative to buying. 

It saves you money upfront and eliminates the risk of owning outdated or broken tools. This way, you can focus your resources on the aspects of the project that truly matter for its success.

Reduce Maintenance Outlays with Drylining Equipment Hire

Keeping operational costs low is crucial for smart contractors and DIY enthusiasts.

  • Renting equipment eliminates the need for regular servicing of purchased tools.
  • You can avoid unexpected repair costs and have predictable expenses.
  • The rental company takes care of maintenance, so you don’t have to worry about it.
  • Say goodbye to the need for storage, which can be expensive in terms of space and climate control.
  • Renting ensures you have access to the latest and professionally serviced equipment.

By choosing to hire equipment, you can let go of the responsibilities that come with ownership.

Drylining equipment hire can lead to significant savings since maintaining drylining tools can be complex and costly.

No Depreciation Worries

Renting drylining equipment protects your finances from the decline in value that comes with owning tools.

  1. You don’t have to worry about the upfront cost of buying expensive drylining equipment.
  2. There’s no need to stress about the equipment losing value over time or due to wear and tear.
  3. Renting ensures that you have predictable expenses and don’t have to deal with the diminishing value of assets.
  4. You can maintain financial flexibility by preserving your capital for other projects.
  5. Renting can also be tax-efficient, as rental costs are often deductible as business expenses.

By choosing to hire drylining equipment, you don’t have to deal with the depreciation of equipment value. This is especially important for tools that are constantly evolving, like drylining equipment.

Flexibility and Convenience

Flexibility and Convenience

Drylining equipment hire gives you the flexibility to meet your project needs, without long-term commitments or extra expenses.

When you hire drylining equipment, you can quickly adapt to changes in project scope or unexpected demands. There’s no need to buy additional machinery, which helps you stay agile and keep your project on track.

The beauty of on-demand hiring is that you have access to the right tools exactly when you need them. This ensures that you have the specialised equipment required for the job at hand.

Project-Specific Solutions

When it comes to drylining projects, hiring equipment is the way to go. It allows residential property owners to choose the perfect tools for their specific needs, without the price tag of buying them.

By renting, you can access high-end and specialised equipment that might otherwise be too expensive to purchase. You can get exactly what you need, whether it’s for a day or a longer period, ensuring your project runs smoothly and efficiently without breaking the bank.

Renting equipment also eliminates the worry of your tools becoming outdated. You’ll always have access to the latest and most advanced equipment, keeping up with the ever-evolving industry.

For projects that require precision and efficiency, hiring offers tailored solutions that are cost-effective. It removes logistical constraints and provides cutting-edge technology at a fraction of the cost of ownership. Plus, it’s a sustainable choice that optimises resource use and reduces waste associated with equipment becoming obsolete.

Just-In-Time Availability

Hiring drylining equipment ensures that you can start your project right away and keep it going smoothly.

When the scope of your project changes, tool hire allows you to quickly adjust and meet the demand without any hassle. Having reliable access to the latest technology means you won’t have to worry about delays caused by equipment unavailability or inadequacy.

With a well-established network of hire services, you can count on the equipment to arrive exactly when and where you need it. This keeps your project efficient and on schedule, ultimately boosting productivity.

Professional Advice on Hand

Professional Advice on Hand

Getting professional advice is crucial when using hired drylining equipment. It helps you avoid project setbacks by ensuring that you use the tools and materials correctly.

Having experts available gives peace of mind, especially if you’re not familiar with drylining technology. They can guide you not only in selecting the right tools, but also in using innovative techniques, following best practices for efficiency and safety, and staying up to date with industry standards. Their advice is essential for completing a high-quality drylining project on time.

Experienced professionals can also help you optimise the performance of the equipment. They have a deep understanding of the machinery and can provide valuable tips to make the most of the tools, while maintaining craftsmanship and safety standards.

Ultimately, receiving professional advice during drylining equipment hire is a game-changer. It gives DIYers the confidence and expertise usually reserved for industry professionals. With expert guidance, you can avoid common pitfalls, streamline your workflow, and achieve outstanding results within your budget and timeline.

Enhanced Productivity

Enhanced Productivity

Using advanced drylining equipment can greatly speed up your project, making it easier to meet deadlines. Cutting-edge tools like automatic taping tools can increase application speed and create seamless finishes, saving you time and labour.

By renting state-of-the-art drylining gear, you can maximise your project’s efficiency and minimise downtime. This means less time spent on manual tasks and faster transitions between different construction stages, ultimately accelerating the overall completion process.

Access Latest Technology

For property owners who value staying up-to-date with the latest drylining technology, hiring equipment is a game-changer. It gives you access to cutting-edge innovations that can boost productivity and deliver top-notch quality.

What makes drylining equipment hire special is the range of modern devices available. These tools are designed to make drylining tasks easier and less labour-intensive. 

When you rent equipment, you get access to the most advanced tools on the market. Hire inventories are regularly updated, ensuring that you have industry-leading equipment at your disposal. These tools incorporate energy-efficient features, ergonomic designs, and even smart technology that can integrate with other digital systems.

Moreover, the range of available hire equipment evolves with market demands and technological advancements. This means you’re not just working with recent technology, but with tools that set the industry standard. 

In the world of drylining, this translates to equipment that offers unmatched precision and ease of use. State-of-the-art tools often come with safety features, compliance with regulations, and contribute to sustainability efforts by reducing waste and optimising material usage.

Eliminating Equipment Downtime

Maximise productivity and efficiency on-site.

When you hire drylining equipment, you eliminate the risk of downtime caused by equipment repairs or maintenance. The responsibility of keeping the equipment in top shape lies with the supplier, allowing you to focus on your work without any technical worries.

Minimise delays caused by equipment malfunctions.

Say goodbye to delays caused by equipment malfunctions. If a hired tool breaks down, suppliers are quick to provide replacements, ensuring that your work can continue with minimal interruption. This keeps your project on track and maintains momentum.

Guaranteed optimal performance of tools.

With equipment rental, you can count on optimal tool performance. Suppliers regularly maintain their inventory to high standards. You won’t have to deal with subpar tools or unexpected maintenance schedules that could hinder your productivity.

Streamlined Workflow

Boost efficiency with readily available equipment.

Having access to a wide range of well-maintained drylining tools and equipment ensures that delays are minimised or eliminated, keeping your workflow smooth and efficient. This means projects are completed within the designated timeframe, or even ahead of schedule, as there are no unnecessary delays caused by unavailable or faulty tools.

Achieve faster results without compromising quality or precision.

Drylining equipment hire allows for a more productive site. With the latest technology at your fingertips, such as automated taping tools and laser-guided levels, you can work quickly without sacrificing attention to detail.

These benefits culminate in remarkable project outcomes.

By opting for equipment hire, construction professionals experience a significant increase in productivity, positively impacting their project’s success. This efficient use of resources aligns with industry expectations, where adaptability and responsiveness to client demands are crucial. The result is not only faster project completion, but also the achievement of a superior finish, leading to enhanced client satisfaction and a strong professional reputation.

Compliance and Safety with Drylining Equipment Hire

Compliance and Safety with Drylining Equipment Hire

When it comes to safety in the construction industry, drylining equipment hire is a smart choice. It ensures compliance with the latest regulations and safety standards. By using current and well-maintained tools, you minimise the risk of accidents, injuries, and any violations of legal requirements. This is crucial for creating a safe construction environment.

Drylining tool suppliers are experts in promoting site safety. They offer guidance on the proper use of their equipment, ensuring that you follow the necessary safety protocols. These firms conduct thorough checks and maintenance on their equipment in line with health and safety regulations. This diligence guarantees that the tools you use are not only effective, but also meet the highest safety standards set by the industry. By renting from these firms, you mitigate risks and foster a strong on-site safety culture.

Meet Industry Standards with Drylining Equipment Hire

Making sure your equipment meets industry standards is crucial for project success.

  1. Quality Assurance: Renting from reputable sources ensures that you have access to equipment that meets or even exceeds industry quality standards.
  2. Regulatory Compliance: Hiring equipment provides peace of mind knowing that it complies with current construction regulations and standards.
  3. Updated Technology: Rental firms often offer the latest equipment innovations that align with modern industry practices.
  4. Maintenance and Servicing: Regularly serviced equipment reduces the chances of malfunctions that can lead to non-compliance.
  5. Certification and Training: Providers often offer certification and training options for their equipment, ensuring that you can use it safely and in accordance with industry standards.

By adopting these high standards, you strengthen your professional reputation. Using top-notch equipment puts you at the forefront of the industry, promoting excellence in execution and safety.

Provision of Safety-Checked Equipment

Using safety-checked equipment is absolutely essential in professional drylining.

  • Regular Inspections: Equipment is regularly checked to ensure it is in optimal working condition.
  • Compliance with Standards: The equipment meets strict health and safety regulations.
  • Quick Replacements: If any equipment is faulty, prompt replacements are available.
  • Documentation Provided: Safety certificates and inspection records are supplied to ensure diligence and compliance.

Every piece of equipment provided undergoes meticulous examination and certification.

This rigorous approach eliminates potential on-site hazards, keeping workers and projects safe.

Risk Reduction with Expert Setup

Putting your drylining project in the hands of experts reduces the chances of complications. Professionals who are skilled in drylining equipment are available to provide tailored advice that suits your project’s specific needs.

When you rent equipment, you’re not just getting tools; you’re gaining access to a wealth of expert knowledge on how to use those tools correctly. This is crucial for avoiding common mistakes in projects. Experts will guide you through efficient techniques, ensuring you follow best practices and significantly reducing the risk of project delays or extra costs due to errors.

Specialists who provide the rented tools often conduct thorough risk assessments. This helps identify potential issues before they become major problems. With these proactive measures, they ensure that the equipment you rent promotes a safe and uninterrupted workflow. This is especially important for keeping your project on track and meeting standards.

Lastly, improper equipment setup can have serious consequences. However, relying on expert installation and setup services mitigates this risk. These specialists understand the importance of balancing performance and safety, giving you peace of mind. They not only provide tools but also act as a strong safeguard against workplace accidents that can result from mishandling or improper setup of equipment. This protects both the well-being of workers and the integrity of your project.

Summary of Drylining Equipment Hire

Summary of Drylining Equipment Hire

Renting drylining equipment is a cost-effective alternative to buying, giving you flexibility and access to a wide range of top-quality tools. It’s a financially smart choice that eliminates the need for a large upfront investment, allowing you to prioritise your operational cash flow.

By renting drylining equipment, you avoid the challenges of tool depreciation and maintenance, ensuring that you always have access to up-to-date technology and can work efficiently without any interruptions.

Drylining equipment hire services also come with professional expertise and support, reducing the risk of project delays. With the help of knowledgeable specialists, you comply with the latest industry standards, resulting in a professional finish that sets your work apart. Additionally, risk assessments and proper equipment setup minimise safety hazards, creating a safer work environment and ensuring smooth project continuity.

Types of Plastering Materials: Comparing Options for Your Project

Types of Plastering Materials: Comparing Options for Your Project
  1. Plastering Basics: Understanding Your Choices
  2. Advanced Plastering Options
  3. Pre-Plastering Considerations
  4. Troubleshooting Common Issues
  5. Types of Plastering Materials FAQs

Have you ever thought about all the different types of plastering materials you can use? 

It can be a bit overwhelming!

Each type has its own special qualities that work well in different situations. Whether you want to make a room look nice, protect your walls from the weather, or create a peaceful and quiet space, there’s a plastering option that’s perfect for you. 

Knowing about these choices will help you get the exact finish you want.

Plastering Basics: Understanding Your Choices

Plastering Basics: Understanding Your Choices

Choosing the right plastering material can feel like solving a tricky puzzle. 

There are so many varieties, from old-school lime mixes to modern gypsum-based formulas. Each one has its own special qualities that work well in different situations. 

To make the best choice, you need to consider things like durability, setting time, and the type of surface you’re working with.

It’s important to think about the specific needs of your project. 

If you’re in a hurry, plasterboard adhesive with its quick setting time might be the way to go. On the other hand, if you’re working on an old building or a damp area, lime plaster’s breathability could be a big advantage.

The right plastering material is like a trusted partner, combining skillful application with the right formula to give you a finish that lasts.

Types of Plastering Materials

When it comes to plastering materials, it’s essential to understand the different types available to determine the best one for your specific project. Here are some common types of plastering materials:

Lime Plaster

Lime plaster is a traditional material that has been used for centuries. It is made by mixing lime, sand, and water.

Lime plaster offers excellent breathability, making it suitable for older buildings or areas where moisture control is important. It is also flexible and can withstand some movement without cracking.

Gypsum Plaster

Gypsum plaster, also known as plaster of Paris, is a popular choice for interior walls and ceilings. It is made by heating gypsum, a naturally occurring mineral, to remove the water content.

Gypsum plaster sets quickly and provides a smooth finish. It is fire-resistant and offers good sound insulation properties.

Cement Plaster

Cement plaster, also known as cement render, is a mixture of cement, sand, and water. It is commonly used for exterior walls and provides a strong, durable finish.

Cement plaster is weather-resistant and can withstand harsh conditions. It requires proper curing to prevent cracks and needs reinforcement on corners and junctions.

Clay Plaster

Clay plaster is an eco-friendly and breathable option for plastering. It is made from natural clay mixed with sand, fibres, and additives.

Clay plaster offers good thermal insulation and regulates humidity levels. It is particularly suitable for sustainable and energy-efficient buildings.

Synthetic Plaster

Synthetic plaster is a modern alternative that combines the benefits of different materials. It is a pre-mixed product that may contain a combination of cement, gypsum, or other additives.

Synthetic plaster offers faster application and drying times. It is often used for high-quality finishes and decorative purposes.

Selecting the Right Mix for Durability

When it comes to choosing a plaster mix, durability is important for long-lasting results.

If you have a high-moisture area, go for cement-based plasters. They’re water-resistant and can handle the dampness.

Gypsum plaster gives you a smooth finish and is often the go-to plaster material of choice, however it might not be the best choice for really wet conditions unless you add some extra stuff to it.

Lime plaster is great when it comes to durability. It works great for historical restorations as well as new buildings because it’s flexible and lets your walls breathe.

If you’re working on a project outside, or doing external rendering, acrylic plasters are the way to go. They’re tough and can handle the weather without cracking or wearing down.

Clay plaster is an eco-friendly option that is made from natural clay and sand. It is breathable, non-toxic, and has excellent thermal properties.

Make sure to find a balance between strength and flexibility. You don’t want to sacrifice one for the other and end up with expensive repairs later on.

Advanced Plastering Options

Advanced Plastering Options

If you’re looking for the ultimate plastering finish, venetian plaster is a great choice. It’s made from crushed marble and lime, giving your walls a shiny, 3D look. Applying it takes serious skill and craftsmanship, with layer upon layer creating a timeless polished finish that’s both durable and stunning.

For a modern twist, you might want to check out magnetic plaster. It’s just like regular gypsum plaster in texture, but it has special magnetic properties. That means you can stick magnets to it! It’s perfect for turning your wall into a cool gallery or an interactive space. Magnetic plaster brings together functionality and style in your home or workplace. The possibilities are endless!

Thermal and Acoustic Solutions

When comparing different types of plastering materials, don’t forget about the thermal and acoustic properties. Choosing the right materials can make a big difference in the comfort and peacefulness of your spaces.

Some plastering materials have the ability to insulate against heat loss and reduce noise. For example, gypsum plasters with insulating additives can help you save on heating costs. And if you want a quieter environment, there are also additives that absorb sound vibrations.

For thermal insulation, there are plasters with perlite or vermiculite mixed in. These lightweight materials not only keep the heat in, but they’re also easy to apply. They can really boost the energy efficiency of your project if you use them right.

These materials combine the best of traditional plaster with modern technology, giving you a smooth finish and a functional barrier that makes your living spaces even better. If you incorporate these solutions early on, you’ll have a perfect balance of looks, comfort, and energy efficiency.

Eco-Friendly and Sustainable Practices

Being eco-friendly and sustainable is really important when it comes to plastering materials. Not only does it help the planet, but it’s also good for your health and your wallet.

If you want to make sure your living spaces are breathable and non-toxic, go for natural plasters. They create a healthier home environment.

There are lots of sustainable practices in plastering. Using recycled materials and applying natural lime and clay plasters are just a couple of examples. These practices reduce waste and give your space a unique and environmentally responsible look.

To make buildings last longer, we can use modern advancements like UV-resistant and breathable plasters. It’s crucial to think about sustainability from start to finish, from choosing the right materials to using the best techniques. That way, our constructions are not only strong, but also have a smaller ecological footprint.

As we keep up with new innovations, the focus on “green” in plastering is changing the way we build responsibly.

Pre-Plastering Considerations

Pre-Plastering Considerations

Before you start plastering, it’s really important to carefully check the surface you’ll be working on.

 Make sure it’s clean, stable, and free from dust or grease. This will help the plaster stick better and last longer. 

If there are any structural problems, fix them before applying the plaster. Plastering over a damaged surface can cause issues down the line.

Also, think about the environment where you’re working. Humidity and temperature can affect how the plaster dries and the final result. So, choose the right plaster for the job to get the best outcome.

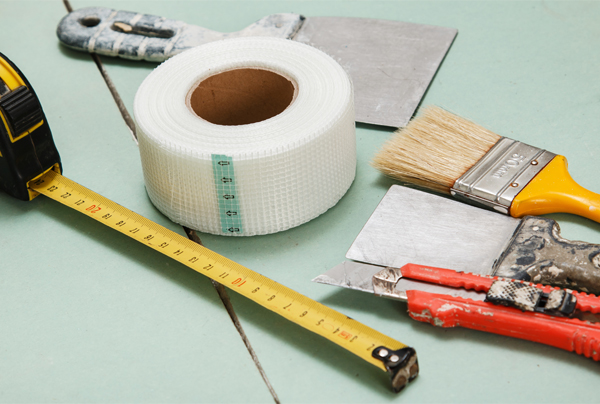
Surface Preparation Essentials

Properly preparing the surface is key to a successful plastering job. Here are some important steps to follow:

  1. Get it clean: Remove any dust, dirt, or debris. This helps the plaster stick better and gives you a smoother finish.
  2. Fix it up: Take care of any cracks, holes, or uneven spots. You want a solid surface for the plaster to adhere to.
  3. Prime time: If needed, apply a primer. This helps the plaster grip, especially on smooth or non-porous surfaces.
  4. Check for dryness: Make sure the surface is dry. Wet surfaces can cause the plaster to come loose or even grow mould.
  5. Tape it off: Use masking tape to protect any areas you don’t want to get plaster on. This keeps your work neat and precise.

Remember, taking the time to prepare the surface properly is crucial for a job well done. A clean and stable surface is like a blank canvas for your plastering skills.

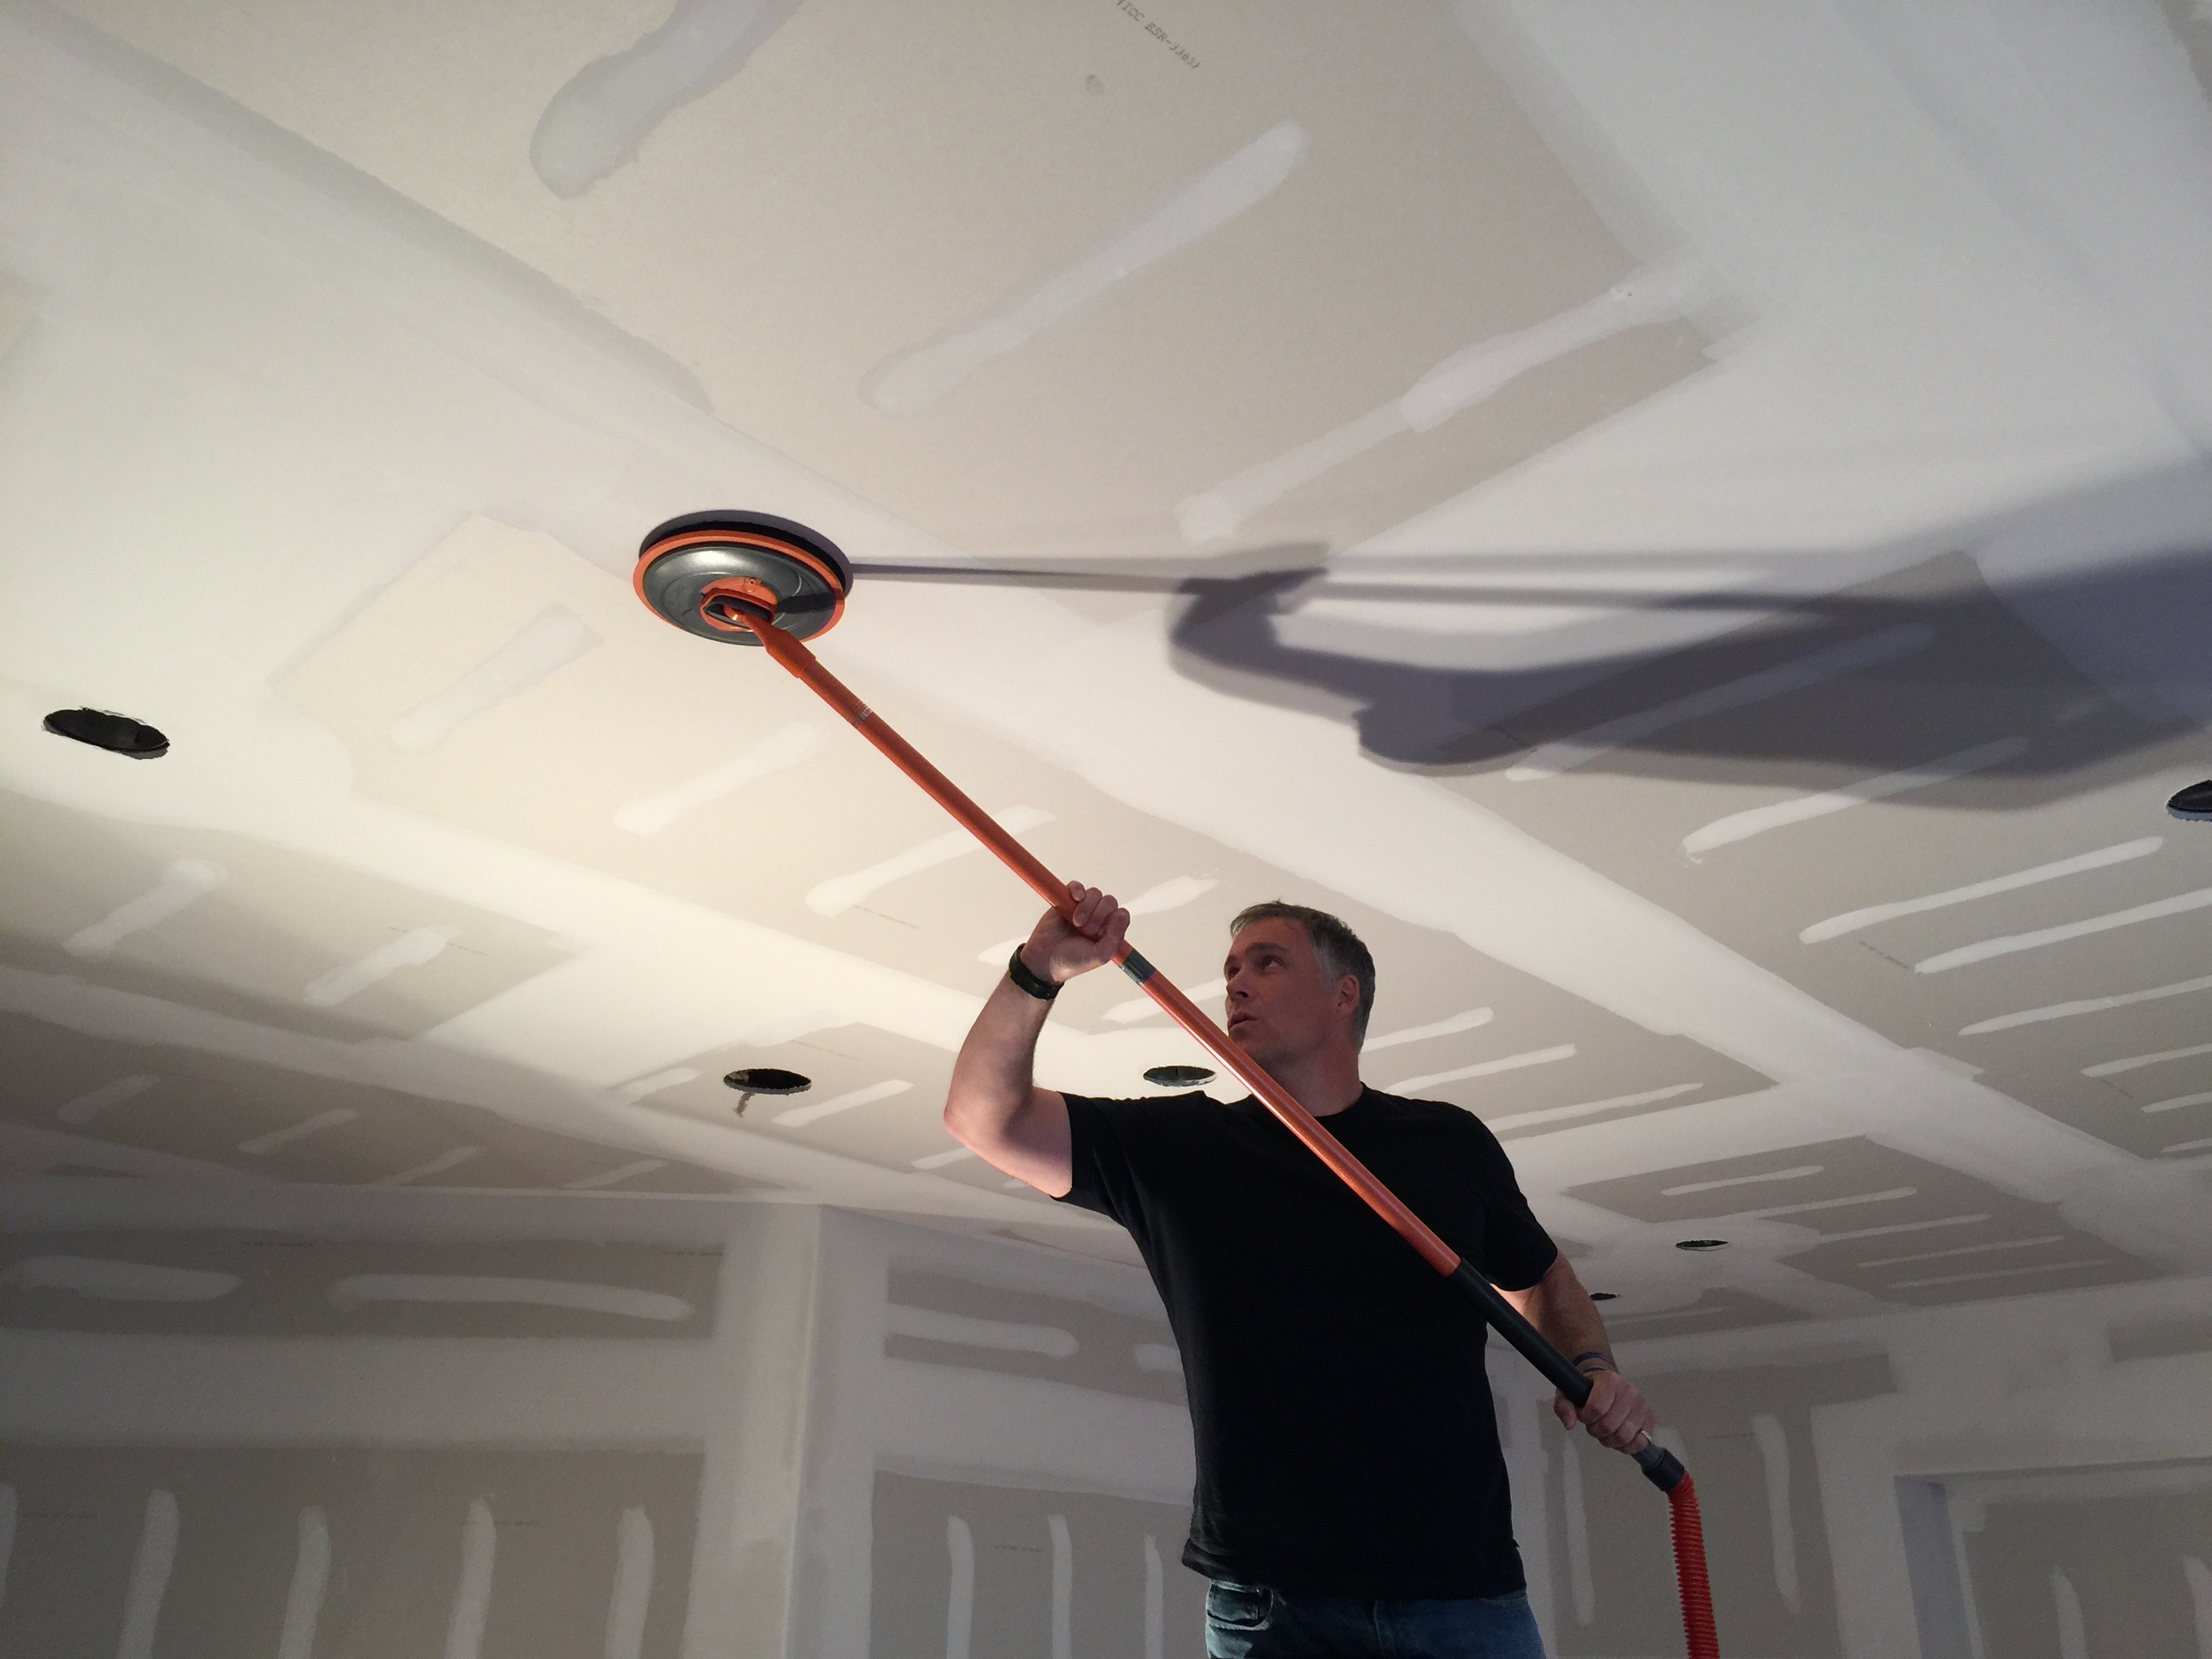
Tools and Equipment for Efficient Application

Having the right tools in your toolbox is super important for getting that perfect plaster finish. 

Here are some key essentials:

  1. Hawk and trowel: These are your go-to tools for applying plaster smoothly and evenly. They give you the support and control you need for a professional outcome.
  2. Mixing paddle or drill: You’ll need one of these to mix your plaster and get rid of any lumps. Make sure you choose a sturdy mixer for consistent results.
  3. Finishing trowels and feather edges: These tools help you apply the plaster with long, smooth strokes. They reduce the risk of leaving marks and help you achieve a flat and refined surface. Paying attention to detail here is what separates the amateurs from the pros.
  4. Corner trowels: These are great for creating perfect right angles and clean lines. They give your plastered edges a sharp and visually appealing look that shows off your expert craftsmanship.
  5. Variety of trowels: Pointing, gauging, and bucket trowels all have their own purposes in plastering. Having them in your toolkit ensures you can achieve a meticulous and high-quality finish.

Remember, in plastering having good quality tools is just as important as having the skills to use them.

Troubleshooting Common Issues

Troubleshooting Common Issues

When plaster doesn’t stick well or starts flaking off, it’s usually because the surface wasn’t clean or primed properly. 

It’s important to make sure the background is clean and prepped. Any dust, dirt, or grease can mess with the plaster’s ability to stick.

Moisture problems in the wall can also cause issues with adhesion. So, check for any dampness or residue from previous coverings before you start plastering.

If you see cracks or air bubbles after applying the plaster, it’s usually because you worked it too much or added too much air while mixing. 

To avoid these problems, follow the instructions on the plaster mix and apply it with confidence. 

Being hesitant can lead to these common issues that can be avoided. 

Addressing Cracks and Efflorescence

Dealing with cracks in plaster is important to keep your walls looking smooth. You’ve got to fix those cracks right away to prevent them from getting worse.

Cracks happen for different reasons, like shifts in the structure, or not applying the plaster properly. 

When you’re fixing cracks, you need to figure out what caused them first. If it’s a bigger problem with the structure, you might need to reinforce the wall before re-plastering. But if it’s just a small crack, you can fill it in and smooth it out to make it look nice again.

Efflorescence is a white powdery substance that shows up on your walls. It’s just salt coming out of the plaster.

 It doesn’t hurt anything, but it doesn’t look good. 

To get rid of it, you need to clean the wall really well and find out what’s causing the moisture that’s making it happen. Fixing the moisture problem will help keep the efflorescence from coming back.

Dealing with these issues is all about taking action at the right time and using the right materials and methods. Using the right fillers, treatments for efflorescence, and sealants can help a lot. 

Learning how to mix and apply plaster correctly, as well as paying attention to the environment, can help prevent these problems from happening in the first place. That way, homeowners and professionals can keep their walls looking good and strong.

Preventing Moisture and Mould Growth

To keep moisture and mould away, you need a solid moisture barrier. Good ventilation is also important, especially in places like bathrooms and kitchens where humidity can be high.

Using anti-mould paints or additives on internal walls and ceilings is a smart move. It helps prevent mould from growing and keeps your home healthy and clean.

If you spot any leaks, fix them right away. That way, you can stop the conditions that mould loves before it has a chance to take hold.

Pay attention to signs like condensation and damp patches. They could be a sign of a bigger problem. Take action early to prevent mould from making itself at home.

Lastly, regular maintenance is key. Keep an eye out for any issues and clean things up before they become a big problem for your plasterwork.

Types of Plastering Materials FAQs

What is gypsum plaster and how is it used in plastering?

Gypsum plaster, also known as plaster of Paris, is a versatile material used in construction for plastering. It is a white powder obtained by heating gypsum to remove water. It can be mixed with water to form a paste for application on walls and ceilings.

Gypsum plaster is easy to apply, sets quickly, and provides a smooth finish. It is fire-resistant and offers sound insulation. However, it is not suitable for areas with constant water exposure.

What are the advantages and disadvantages of using lime plaster?

Lime plaster has advantages such as breathability, flexibility, durability, and eco-friendliness.

However, it requires specific skills, is more expensive, has a longer curing time, and may not be readily available. Consider these factors when choosing plaster for your home.

How does cement plaster differ from other types of plastering materials?

Cement plaster is a strong and durable plastering material that offers excellent adhesion and resistance to water damage. It is ideal for high-performance applications and areas exposed to moisture. However, proper skill and technique are required for application.

Overall, cement plaster can provide a long-lasting and visually appealing finish for your walls.

What are the characteristics of clay plaster and when is it used?

Clay plaster is a natural and versatile wall finish made from clay, sand, and other natural materials.

It is breathable, providing a healthy indoor environment, and offers excellent thermal insulation. It is durable, resistant to mould, and can be applied in various textures and finishes.

Clay plaster is suitable for new construction and renovations, making it a popular choice for eco-friendly and sustainable homes.

Are there any specific considerations for using plastering materials in exterior applications?

When using plastering materials for exterior applications, consider the climate, prepare the surface properly, choose the right plastering material, use appropriate tools, and perform regular maintenance. These steps ensure durability and a long-lasting finish.

Sanding Tools: The Complete Guide to a Professional Finish

Sanding Tools: The Complete Guide to a Professional Finish

Sanding is a crucial step in preparing surfaces for painting, wallpapering, or staining. 

Whether you’re working on drywall, plaster, or wood, the right sanding tools can make all the difference in achieving a professional finish.

In this guide, we’ll explore the best sanding tools, essential techniques, and practical tips to make your sanding projects smooth, safe, and efficient.

Contents

  1. Essential Sanding Basics
  2. Manual Sanding Tools
  3. Power Sanding Solutions
  4. Safety and Dust Management
  5. Sanding Techniques for a Professional Finish
  6. Advanced Tools for Drywall Sanding
  7. Sanding Tools Summarised
  8. Sanding Tools FAQs
Essential Sanding Basics

Essential Sanding Basics

Understanding sandpaper grit is key to getting the best results.

The grit scale ranges from coarse to fine, and each level serves a specific purpose:

  • Coarse Grit (40–60): Ideal for heavy material removal, such as smoothing rough drywall joints or stripping paint.
  • Medium Grit (80–120): Best for general sanding and smoothing surfaces in preparation for finishing.
  • Fine Grit (150–220+): Used for final polishing to achieve a flawless surface.

Pro Tips for Consistency in Sanding

Before beginning, test a small area to determine the most suitable grit for your material. 

Then, begin with coarse sandpaper to remove imperfections, and gradually transition to finer grits for a smooth, even finish.

Progressing through the grit levels sequentially ensures the best results and prevents uneven surfaces.

Manual Sanding Tools

Manual Sanding Tools

For precision and control, manual sanding tools are indispensable, especially for small or intricate areas.

Key Manual Sanding Tools

  • Sanding Blocks: Affordable and versatile, perfect for flat surfaces and edges.
  • Contour Sanders: Designed for curved or irregular surfaces, such as moldings and decorative trims.
  • Drywall Sanding Sponges: Flexible tools that are excellent for smoothing seams and corners in drywall.

Why Choose Manual Sanding Tools?

Manual sanding tools are cost-effective, making them especially suitable for smaller projects. This also means they’re ideal for beginners, who are just starting out with small-scale tasks.

Another benefit of manual sanding tools is the excellent control they provide, essential for delicate or detailed work where power sanding tools are not appropriate. 

Power Sanding Solutions

Power Sanding Solutions

Power sanding tools are a must-have for larger projects or when speed is a priority. They can handle everything from rough sanding to finishing with ease.

Types of Power Sanders

  • Orbital Sanders: Provide smooth finishes and are great for flat surfaces.
  • Belt Sanders: Powerful for heavy-duty material removal on rough wood or plaster.
  • Electric Drywall Sanders: Specifically designed for drywall, with built-in dust collection features for cleaner operation.

Recommended Power Sanding Tools

Why Choose Power Sanding Tools?

Power sanders are highly efficient, saving time when working on large surfaces. Their user-friendly features, such as dust collection systems and variable speed settings, enhance both convenience and performance.

These tools are perfect for both professionals and ambitious DIYers when tackling big projects.

Cordless Power Sanders

The mobility of cordless sanders has transformed the sanding process, allowing you to work anywhere without being tied to outlets or cords.

Powered by advanced lithium-ion batteries, these tools deliver consistent performance and longer run times. Plus, with interchangeable batteries across multiple tools, you can keep working without interruptions.

Sanding Safety and Cleanup

Safety and Dust Management

Sanding generates a significant amount of dust, which can be hazardous, especially when considering some of those particles could be toxic.

Prioritise safety by using the right protective equipment and keeping your workspace clean.

Preparation to Minimise Dust

It’s crucial to properly prepare your workspace to minimise dust. For those using basic sanding tools, follow these steps to ensure safety and cleanliness:

  • Seal the Room: Use plastic sheeting to seal off doorways and prevent dust from spreading to the rest of the house.
  • Ventilation: Properly ventilate the room by opening select windows, but avoid creating a draft that circulates dust.
  • Protect Surfaces: Lay a drop cloth on the floor to catch dust and cover any furniture in the room with plastic.

Essential Safety Gear

Prioritise safety by using the right protective equipment and keeping your workspace clean.

  • Dust mask or respirator: Protects your lungs from fine particles.
  • Safety goggles: Shields your eyes from debris.
  • Gloves and long-sleeved clothing: Minimise skin exposure.

Dust Control Tips

  • Use tools with integrated dust collection systems, such as the Giraffe® Wall Sander.
  • Clean up with an industrial vacuum cleaner after each session.
Sanding Techniques for a Professional Finish

Sanding Techniques for a Professional Finish

Mastering the correct sanding techniques ensures better results with less effort.

Hand Sanding

  • Use flexible sanding blocks for flat surfaces and corners.
  • Sand with long, even strokes, applying consistent pressure.

Power Sanding

  • Keep the sander moving to prevent over-sanding.
  • Use gentle pressure, especially with electric sanders, to avoid damaging the surface.

Wet Sanding

  • Minimise dust by using a damp sanding sponge, especially on drywall seams.
  • Perfect for achieving ultra-smooth finishes in sensitive areas.
Advanced Tools for Drywall Sanding

Advanced Tools for Drywall Sanding

For larger drywall projects or professional-grade results, advanced tools are worth the investment.

Top Advanced Sanding Tools

  • Giraffe® Wall & Ceiling Sander: Designed for tackling tall surfaces with ease, featuring a dust collection system.
  • Flex Safety Vacuum Cleaner: A powerful companion for any drywall sander, ensuring a clean and safe workspace.

Specialised Techniques

Pole sanders are an excellent choice for reaching high areas without the need for ladders, making them both practical and efficient.

For the best results, always finish with a manual touch-up to ensure precision in corners and along edges.

Sanding Tools Summarised

Sanding Tools Summarised

Whether sanding drywall, plaster, or wood, the right tools make every project easier and more efficient.

From manual sanding blocks to advanced options like the Giraffe® Wall Sander, this guide equips you to achieve flawless results.

Invest in quality tools, follow safety precautions, and enjoy professional finishes every time.

Explore our full range of sanding tools to find the perfect equipment for your next project!

Sanding Tools FAQs

Sanding Tools FAQs

What is the best tool for sanding drywall?

An electric drywall sander is ideal for large surfaces, providing speed and smooth results with integrated dust collection.

What is the difference between manual and power sanding tools?

Manual sanding tools, like sanding blocks and sponges, offer precision and control. Power sanders, such as orbital and drywall sanders, are best for large surfaces and heavy-duty tasks.

Can I use the same sanding tools for drywall, plaster, and wood?

Certain tools work better for different materials:

  • Drywall: An electric drywall sander or sanding sponges.
  • Plaster: Plaster sanding tools or fine-grit sandpaper.
  • Wood: Detail sanders and orbital sanders work best.

Can you use an electric sander on drywall?

Yes, but choose tools specifically designed for drywall, such as the Giraffe® Wall Sander.

What’s the best sandpaper for drywall?

Use medium grit (120) for initial sanding and fine grit (220) for finishing.

How do I sand intricate details?

For corners and edges, use a detail sander or a sanding tool for tight spaces.

How do I manage dust while sanding?

Use dust-collecting tools, seal your workspace, and always wear appropriate PPE.

Ultimate Guide To Drylining For 2024

From planning and prep to maintenance and repairs, plus everything drylining in between!

Contents

  1. Introduction to Drylining
  2. Tools & Equipment for Drylining
  3. Planning & Preparation
  4. Installation Techniques
  5. Finishing & Decoration
  6. Maintenance & Repairs
  7. Drylining Misconceptions
  8. Drylining FAQs
  9. Conclusion
  10. A Step-by-Step Guide to Drylining

Introduction

Whether you’re a DIY enthusiast about to start your first drylining project, a professional looking to deepen your knowledge, or just curious about the drylining trade, this guide is for you.

We’ll walk you through everything: planning and preparation, installation techniques, finishing touches, maintenance and repairs. We’ll also clear up some common myths and answer frequently asked questions about drylining.

Chapter One – Introduction to Drylining

Introduction to drylining

Introduction to Drylining

Drylining is a construction method used to create smooth and level walls and ceilings. It’s commonly used in new builds, renovations, and remodelling projects to provide a smooth surface for decoration and improve insulation and soundproofing.

In this chapter, we’ll explore the history, benefits, and types of drylining systems and materials.

History of Drylining

Drylining has been around for over a century. It started with plaster, but new materials like gypsum board have made it more efficient and cost-effective.

Today, drylining is used in all kinds of construction projects around the world.

Benefits of Drylining

Drylining offers several benefits, including:

  • Improved insulation and soundproofing: It helps keep heat and sound in (or out) of a room.
  • Increased structural stability: It strengthens walls and ceilings.
  • Faster construction times: It’s quicker to install than traditional plastering.
  • Cost-effective: It uses less material and labour, making it cheaper.

Types of Dry Lining Systems and Materials

There are several materials you can use for drylining, each with its own perks:

  • Gypsum board: The most common material, easy to install, lightweight, and offers good insulation and soundproofing.
  • Fibre board: Made from recycled materials, it’s an eco-friendly option.
  • Cement board: Strong and durable, made from cement and fibres.
  • Plasterboard: Affordable and versatile, made from gypsum and paper.

Choosing the right material depends on your project’s needs. In conclusion, drylining is a versatile, cost-effective, and efficient way to create smooth and level walls and ceilings in any building. Whether you’re building a new home, renovating an old one, or just want to improve insulation and soundproofing, drylining is a great option.

Chapter Two – Tools & Equipment for Drylining

Tools & Equipment for Drylining

To complete a drylining project, you’ll need a range of tools and equipment. Here’s some of the essentials and optional items that can make the job easier.

Essential Tools

  • Measuring tape
  • Knife or cutting tool for drywall
  • Screw gun or drill with a drywall screw bit
  • Square or straight edge for making straight cuts
  • Level
  • Joint knife or taping knife
  • Drywall saw or utility knife
  • Sand block or drywall rasp

Optional Tools

  • Electric or manual drill
  • Hole saw or hole cutter
  • Screw gun holder or drill holder
  • Corner bead tool
  • Drywall lift or hoist

You can also replace joint and taping knives with automatic taping tools for larger jobs. Having the right tools makes the drylining process faster, easier, and more accurate. Investing in good tools can also help reduce the risk of injury and damage.

Safety Equipment

When working with drylining materials, it’s important to wear protective gear, including:

  • Dust mask
  • Safety goggles
  • Hard hat
  • Heavy-duty gloves
  • Safety boots

Always follow safe working practices and be aware of potential hazards, like sharp edges and dust.

Having the right tools and safety equipment is key to a successful drylining project. By investing in quality tools, wearing proper safety gear, and following safe practices, you can ensure your project is done efficiently and safely.

Chapter Three – Planning & Preparation

Planning and Preparation

Preparing the Surface for Drylining

Before you start your drylining project, it’s important to prepare the surface. This includes cleaning, repairing any damage, and making sure it’s level and debris-free.

Cleaning the Surface

Make sure the surface is free from dust, dirt, and debris. Use a vacuum cleaner or wipe it down with a damp cloth.

Repairing Any Damage

Fix any damage, like cracks or holes, before attaching the drywall. Fill small holes with filler and sand smooth. Larger cracks may need to be reinforced with mesh tape.

Ensuring the Surface is Level

The surface should be level. If it’s not, use shims or attach furring strips to correct it.

Removing Obstacles

Remove any obstacles, like electrical outlets or light switches, before attaching the drywall. This makes the process easier and reduces the risk of damaging electrical wiring. In conclusion, preparing the surface is crucial. By cleaning, repairing, levelling, and removing obstacles, you can ensure your project goes smoothly.

Chapter Four – Installation Techniques

Installation Techniques

Attaching the Drywall

Once the surface is prepped, the next step is attaching the drywall. This involves measuring and cutting the drywall to the right size and attaching it using screws or adhesive.

Measuring and Cutting the Drywall

Measure and cut the drywall to the correct size using a measuring tape, straight edge, and utility knife. Cut it slightly larger than the opening to allow for adjustments.

Attaching the Drywall with Screws

Screws are the most common method. Space them every 12-16 inches along the edges and every 8-12 inches in the field to ensure a secure attachment.

Attaching the Drywall with Adhesive

In some cases, adhesive is used instead of screws, especially for surfaces like masonry or concrete. Apply adhesive to the back of the drywall and press it firmly against the surface.

Hanging the Drywall

Carefully position the drywall against the surface and secure it in place.

Attaching the drywall is a critical step. By measuring, cutting, and attaching it correctly, you ensure a secure and ready-to-finish surface.

Chapter Five – Finishing & Decoration

Finishing & Decoration

Finishing the Drywall

The final step is finishing the drywall, which involves covering joints and screws with joint compound and sanding the surface smooth.

Joint Compound

Apply joint compound in thin, even layers over joints and screws. Let it dry completely before sanding.

Sanding the Surface

Once dry, sand the surface smooth with fine-grit sandpaper or a power sander. Be careful to avoid damaging the drywall.

Priming the Surface

After sanding, prime the surface to prepare it for painting or wallpapering. This seals the surface and prevents unwanted absorption.

Finishing Touches

Inspect the surface to ensure it’s smooth and blemish-free. Once complete, the drywall is ready for painting or wallpapering.

Finishing the drywall is crucial. By properly applying joint compound, sanding, and priming, you create a smooth, ready-to-finish surface.

Chapter Six – Maintenance & Repairs

Maintenance & Repairs

Regular maintenance involves inspecting for damage and making necessary repairs. Fill small holes with filler, and reinforce larger cracks if needed.

Proper maintenance keeps your drylined surfaces looking good and functioning well.

Chapter Seven –  Drylining Misconceptions

Drylining Misconceptions

Common Misconceptions

  • Not permanent: Drylining is durable and long-lasting.
  • Only for modern homes: It’s suitable for all types of buildings.
  • Difficult to install: It can be done with basic DIY skills.
  • Expensive: Often more affordable than traditional plastering.
  • Not fire-resistant: It offers good fire resistance.

Drylining is often misunderstood. It’s not just a temporary or modern solution. Instead, it’s a versatile, durable, and cost-effective method that can be used in various building types, offering good fire resistance and insulation properties.

Chapter Eight – Drylining FAQs

Drylining FAQs

What is drylining?

Drylining is a method of creating a smooth, level surface in a building by fixing plasterboard sheets to walls or ceilings.

What are the benefits of drylining?

Drylining improves insulation, fire resistance, soundproofing, and makes decoration easier.

What tools do I need for drylining?

Basic tools include a measuring tape, spirit level, screwdriver, drill, saw, cutter, and ladder.

How long does it take to dryline a room?

Drylining a room typically takes one to two days.

Is drylining expensive?

The cost ranges from £500 to £1,000 per room, depending on size and complexity.

Can I dryline my own home?

Yes, but it requires some skill and experience, so consider hiring a professional if unsure.

Is drylining safe?

Yes, if proper safety precautions and PPE are used, especially during sanding.

Can drylining be used to soundproof a room?

Yes, with plasterboard sheets and additional soundproofing materials and sealing gaps.

Conclusion

Conclusion

We’ve reached the end of our drylining guide. We hope it’s given you a solid understanding of this important trade.

From planning and preparation, to installation, finishing, and maintenance, we’ve covered it all. By clearing up common misconceptions and answering key questions, we aim to be a valuable resource for your drylining projects.

Whether you’re a seasoned pro or a newbie, knowing the ins and outs of drylining is crucial for success – good luck!

A Step-by-Step Guide to Drylining

Understand the process of drylining by following our simple step-by-step guide:

Step-by-Step Guide to Drylining

Benefits of Using the Level 5 MiniShot

Benefits of Using the Level 5 MiniShot

Understand how the Level 5 MiniShot can help improve the efficiency and ease of your drywall projects.

Traditional Drywall Finishing 

Drywall finishing can be challenging when you don’t have the best tool for the job.

Manually finishing drywall, while possible, comes with several potential issues. These include being labour-intensive, time-consuming, messy and inadequate for large jobs or hard to reach areas. 

There are some tools that try to overcome these limitations, such as corner application boxes.

Corner boxes are a popular choice for finishing drywall. However, they rely on manually applied pressure, which can lead to an inconsistent finish and unnecessary strain on the upper body.

Level 5 MiniShot

Level 5, the producers of premium automatic taping tools, created the MiniShot to combat the drawbacks of outdated drywall finishing methods. 

The Level 5 MiniShot is a drywall finishing tool comprising of an oversized, clear, polycarbonate chamber for the compound. With a gas cylinder to effortlessly push the compound out of your chosen finishing head. An extender can also be added to the tool to maximise reach. 

Read on to learn more about why the Level 5 MiniShot is the ideal tool for your drywall finishing projects.

Benefits of the Level 5 MiniShot

Simplicity

Using the Level 5 MiniShot for finishing plaster is second to none when it comes to simplicity.

Push your chosen finishing head against the wall with minimal pressure to begin the flow of compound, without the need for twisting.

Once you’ve finished application to that section, simply release pressure to halt the compound release.

Additional Reach

The Level 5 MiniShot is 45.5 inches long and compatible with an 18-inch extender. The additional reach provided by this tool means that you can finish high walls and ceilings with ease.

With the extender applied, you maximise your reach to 63.5 inches. Negating the need for hop ups or stilts and reducing the time spent working at height whilst out on a job.

Without the extender attached, this lightweight tool can be used to finish drywall in tight spaces, such as cupboards and pantries, making it perfect for every project.

Reduced Strain

The no twist application and additional reach provided by the Level 5 MiniShot minimises strain to the upper body of both left and right handed plasterers.

With this lightweight tool, your back, shoulders and wrists can be comfortable, even when working for extended periods of time.

Flow Adjustment

You can control release of the finishing compound directly on the Mini Shot using the flow adjustment nut.

This flow adjustment allows you to have complete control over the release of compound, no matter the consistency of compound mixture or the pressure applied to the wall.

Powerful Flow

The back pressure provided by the gas cylinder creates a powerful flow of compound. Applying a range of mixtures is light work for the MiniShot’s gas cylinders, no matter how thick the compound.

Consistent Flow

The gas cylinder works in tandem with the flow adjustment settings to provide a consistent flow of finishing compound.

This means that you can finish drywall with high precision and get the same optimal result for every aspect of your project.

High Capacity

The Level 5 MiniShot also saves you taking unnecessary trips back to the pump.

The high capacity composite chamber means you can spend more time working and less time filling up your equipment.

Additionally, the clear chamber means you always know how much compound you have remaining – so there are no surprises when it comes to needing to head back to the pump.

Easy Cleaning

Cleaning the MiniShot is exceptionally easy – no disassembly required.

Featured on the MiniShot is a cleaning nozzle, attachable to garden hoses. Allowing you to fill the compound tube with water and flush out any leftover compound.

In the event you do want to disassemble your equipment, there are easy-to-use latches around the chamber so you can take apart your tool with ease.

Speed

The Level 5 MiniShot allows you to finish large and complex jobs with outstanding speed.

The simple application, effortless flow adjustment, large capacity and easy cleaning chamber speeds up the finish process.

With less application, mistakes, mess and fill-ups, jobs can be completed quickly in comparison to traditional finishing methods.

Multiple Finishing Applications

The Level 5 MiniShot is a tool suited for every drywall finishing project. 

The ball end is made of stainless steel and finishing heads from all leading manufacturers can be attached.

No matter if you’re flat finishing, or looking to finish inside or outside corners, the Level 5 MiniShot can be adapted to fit the needs of any job.

Plus, if you’re upgrading from an older finishing tool, such as a corner box, there’s no need to purchase specific finishing heads – reducing the cost and complexity of getting the MiniShot onto your next project.

The Level 5 MiniShot Summarised

The Level 5 MiniShot Summarised

The Level 5 MiniShot is an essential tool for professional drywallers and astute DIYers alike.

Manually finishing drywall and traditional tools such as corner boxes can get the job done, but at a sacrifice compared to the automated, power-assisted MiniShot.

Its simple, lightweight nature and thoroughly considered design mean you can complete more jobs with speed and precision, without unnecessary physical strain. 

Browse our range of Level 5 Tools to find the best automatic tool for your next project.

Ready Mixed Jointing Compound vs Powder

Ready Mixed Jointing Compound vs Powder.
Benefits of Ready Mixed Jointing Compound vs Powder Infographic

1. Introduction

2. Ready Mixed Jointing Compound

3. Powder Jointing Compound

4. Should I use Ready Mixed or Powder Jointing Compound?

5. Advice for Using Ready Mixed Jointing Compound

6. Tips for Using Powder Jointing Compound

7. Summary

8. Jointing Compound FAQs

1. Introduction

Introduction

In the world of drywalling, achieving a smooth, seamless, and visually appealing finish is the ultimate goal.

To cover gaps and create a flawless surface, professionals and DIY enthusiasts alike rely on a versatile material known as jointing compound.

In this guide, we will explore the two main types of jointing compound: ready-mixed and powder.

But first, let’s explore what jointing compound is and how it’s used.

1.1. What is a Jointing Compound?

Jointing compound is a material used in the finishing of drywall or plasterboard.

Drywall consists of large panels of gypsum board or plasterboard. Jointing compound is a paste-like substance used on drywall, specifically formulated for filling gaps and finishing corner beads, trims and fasteners. 

The end result of applying jointing compound is to repair or improve the appearance of drywall, leaving a smooth, structurally sound surface ready for painting.

1.2. How is Jointing Compound Used?

The application of jointing compound begins with the installation of drywall panels, leaving gaps and joints between them. Once the drywall is installed, the process of application can begin.

First, a fibreglass or paper tape is applied over the joints to reinforce them and prevent any future cracking.

A layer of jointing compound is spread over the taped joints, embedding the tape and filling any depressions or gaps. This coat is typically wider than the tape itself.

Subsequent coats are then applied, each wider than the previous one, to feather the edges and create a smooth, seamless transition between the wall or ceiling and the joints. Each coat is allowed to dry and is sanded before applying the next.

After the compound has dried, it is sanded to achieve a smooth surface. The final coat may involve a thinner application, known as skim coating, to further finesse the finish.

2. Ready Mixed Jointing Compound

Ready Mixed Jointing Compounds

As the name suggests, ready mixed jointing compound is a pre-mixed product.

This product conveniently comes ready to use directly from the container, meaning you can start the application straight away.

2.1. Benefits of Ready Mixed Jointing Compound

No Mixing

The core benefit of ready-mixed jointing compound is that it doesn’t require mixing. This means you can get to work straight away – cutting out the time and effort needed to create a usable mixture and maximising convenience.

Uniform Consistency

Without the need for mixing, you also don’t need to worry about creating the right consistency. This not only reduces waste from mixing errors, but also means the mixture quality remains consistent across the project.

Drying Time

Another benefit of uniform consistency is that the drying time is the same across the whole project. By knowing how long the coat will take to dry, you are able to plan ahead and work systematically during the application process. 

Waste Reduction

There is a reduction in waste when it comes to knowing the amount of usable product you have. By purchasing the material premixed, you can get the right amount for the job, instead of iteratively adding powder and water based on the consistency of the mixture.

No Additional Water

Additionally, premixed jointing compound doesn’t require any additional water to be added. So, if you’re working in an environment where water is not readily available or inconvenient to transport, ready-mixed is a practical solution.

Reduced Mess

Applying jointing compound straight from the container reduces the mess involved in finishing drywall. With ready mixed, the chance of spillages and the time needed to clean is drastically reduced.

User-Friendly

With DIYers in mind, ready mixed jointing compound is incredibly easy to use. When used in combination with drywall tape, the application process is quick and convenient and provides a high quality finish, even for those with minimal experience.

3. Powder Jointing Compound

Powder jointing compound.

Powder jointing compound is non-mixed. It is purchased as a white powder, and when mixed with adequate water, forms a paste that can be applied to plasterboard. Mixing the compound can be done either manually, or by attaching a mixing paddle to a drill. 

3.1. Benefits of Powder Jointing Compound

Control Consistency

By adjusting the amount of water added, you can control the consistency of the powder mixture. This customization allows you to tailor the compound to diverse project needs, from filling small cracks to creating a smooth finish on joints.

Easy Dry Storage

Since powder jointing compound is stored in a dry, powdered form, it takes up less space and generally has a longer shelf life compared to ready mixed. This means large quantities of dry powder can be neatly stored for extended periods without degrading.

Cost-Effective

Powder jointing compound tends to be cheaper than its ready mixed counterparts. This cost-effectiveness is especially attractive for both budget-conscious individuals and on large-scale projects where cost outweighs convenience. 

Transportable

The lightweight nature of powder simplifies transportation, handling, and mixing. This is especially important for professionals who need to carry materials around job sites or DIY enthusiasts who find lighter materials more manageable.

Sustainability

Due to its reduced packaging and light weight, powder jointing compound could be considered to be more environmentally friendly. This is a topical benefit in the construction industry today where sustainability is often a high priority.

4. Should I Use Ready Mixed or Powder?

Should You Use Ready Mixed or Powder Jointing Compound

When it comes to choosing between ready mixed and powder jointing compounds for your project, several important factors come into play. 

You should consider your level of experience, budget, the size and complexity of your project and time constraints when deciding whether to use ready mixed or powder.

Level of Experience

Ready mixed compounds are more user friendly and don’t require you to make a usable mixture yourself, making them suitable for individuals with any level of experience.

However, if you’re a professional tradesmen or a skilled DIYer, you may be more appreciative of the ability to customise the consistency of your mixture, making powder jointing compound a better fit.

Budget

While convenient, ready mixed compounds are often more expensive than powder. So where cost is a critical factor, powder jointing compound may be a more suitable option.

Size/Number of Projects

For small-scale projects or quick touch-ups, ready mixed compounds offer convenience and can save time. You may also know exactly how much product you need to complete the job, so to minimise waste, premixed may be more appropriate.

Whereas, the light weight and cost efficiency of powder compounds may provide a stronger appeal when working on large or multiple projects, as it could drastically reduce your material spend and make transporting your supplies easier.

Complexity of Project

Ready mixed compounds are ideal for straightforward, standard drywall projects where simplicity is a priority.

Powder compounds are more suitable for complex projects due to their versatility, allowing you to vary consistencies and extend drying times based on the project needs.

Time Constraints

If you’re working on a tight schedule, ready mixed compounds are a better choice for speed. By cutting out the task of mixing, you can start the application process straight away, making for a faster project time.  

5. Advice for Using Ready Mixed Jointing Compound

When working with ready mixed jointing compound there are some key tips to help you achieve high quality results.

Stir Before Use

Before use, stir the compound thoroughly to ensure you get a consistent texture. However, avoid over-stirring, as this can shorten the hardening time and add air bubbles into the mixture.

Stirring only the amount you plan to use within a reasonable timeframe also helps to prevent the mixture from drying out.

Don’t Overwork the Mixture

When applying the compound, resist the temptation to excessively rework it after application. Overworking can lead to a less smooth finish and may cause the compound to lose adhesion and begin cracking or peeling.

Open Time

You need to be aware of the open time of the compound you’re using. Open time refers to the amount of time the premix remains workable before it starts to set.

As the mixture has been pre-made, you can follow the manufacturer’s instructions to ensure you apply the compound within the specified timeframe.

Storage

Finally, if you have spare ready mixed jointing compound, it’s important to know how to store it for use on your next project.

For optimal storage, ensure there is no dried compound that could fall into the mixture, pour half an inch of clean water onto the top of the compound, press the lid on tightly and remember to remove the water before next use.

When stored properly, ready mixed can be usable for up to 9 months.

6. Tips for Using Powder Jointing Compound

Tips for using powder jointing compound

To get the best results on your finishing projects, there are some key things to keep in mind when mixing and storing the product.

Mixing

The key to a high-quality finish is a suitable jointing compound consistency. This consistency comes from properly mixing the powder and water. 

Start by carefully measuring the required amount of powder and add it to a clean mixing container. Use a mixing paddle or a stir stick to combine the powder with the appropriate amount of water.

Follow the manufacturer’s recommended water-to-powder ratio for the optimum consistency. However it is important to note, adding the water is an iterative process, so add the water incrementally, keeping an eye on the consistency of the mixture.

Ensure you mix thoroughly to achieve a smooth, lump-free paste.

Slaking

After mixing, allow the compound to slake for a few minutes. Slaking allows the powder to absorb the water fully and reach its ideal working consistency. 

During this time, you may notice the mixture thickening slightly. Stir it again to maintain the desired consistency before use.

Adjust the Consistency

Check the compound’s consistency after mixing and slaking. If it’s too thick or too thin for your intended application, you can make adjustments.

To thin the jointing compound, add a small amount of water and mix thoroughly. To thicken it, incorporate more powder. Make gradual adjustments and mix well until you achieve the desired result.

Storage

If you have any leftover powder jointing compound, store it correctly to prevent moisture absorption and clumping. 

You store mixed powder jointing compound in a similar way to pre-mixed – clean the edges of the container, pour water over the leftover compound and seal the container.

However, when using powder, you may not have a lid for your container, as is often the case with ready-mixed products. In this case, create an airtight seal using something you have to hand, such as plastic wrap.

Dissimilarly to ready-mixed, the storage time, particularly without an airtight lid, is drastically reduced. If you’re not using the remaining product in the next day or two, the leftover compound will become unusable. 

The issues associated with storing mixed powder jointing compound highlights the importance of only mixing the estimated amount needed.  

7. Summary

Summary

This article has explored the respective benefits of ready mixed and powder jointing compounds.

Ready mixed is a premade product, taking out the hassle of mixing. It is quick and easy to use and can save time on cleaning up. 

However, it’s important to consider that ready mixed is less cost-effective than its powder counterpart, with open time, overworking and storage needing to be considered when using this product.

These features make ready mixed jointing compound ideal for smaller, simpler projects where time is a critical factor, or for those with limited drywall finishing experience.

Powder jointing compound is ideal for those who want a customizable consistency and to buy in bulk. This is because before mixing, powder jointing compound is cost-effective, lighter in weight, easy to store and boasts a longer shelf life compared to ready mixed.

It’s important to consider the mixing process when choosing the right product. Powder jointing compound requires you to create a usable consistency, and once mixed, the leftovers have a short storage time.

If you’re a plasterer by trade or an apt DIYer working on a large or complex job, powder jointing compound is the ideal solution. Similarly, if you are working on a budget or environmentally conscious project, powder comes out on top. 

As discussed, both ready mixed and powder jointing compound have their advantages and considerations. It’s important to weigh these up alongside your personal preferences when deciding which product is best suited to your project. 

Once you’ve decided which form of jointing compound is right for you, browse our range of jointing compounds at Gypsum to find the perfect product at a great price.

8. Jointing Compounds FAQs

Jointing Compound FAQs

What is the difference between ready mixed and powder jointing compound?

Ready mixed jointing compound is a pre-mixed product, ready to use straight from the container. Powder jointing compound requires mixing with water.

Which type of jointing compound is better for beginners?

Ready mixed jointing compound is more suitable for beginners due to its ease of use, uniform consistency, and minimal preparation.

When should I use powder jointing compound instead of ready mixed?

Powder jointing compound is ideal for large or complex projects, where cost-effectiveness, customisable consistency, and long shelf life are priorities. It’s also a better choice for professional tradespeople or skilled DIYers.

Can I store leftover ready mixed jointing compound?

Yes, ready mixed compound can be stored for up to 9 months, if properly sealed.

How long can I store mixed powder jointing compound?

Mixed powder compound has a much shorter storage time than ready mixed. It’s best to use it within a day or two, as it will quickly dry out or become unusable.

What are the advantages of ready mixed jointing compound?

Ready mixed compound offers convenience, uniform consistency, reduced mess, and ease of use. It’s ideal for small-scale projects, quick touch-ups, or when time constraints are a concern.

Why is powder jointing compound considered more cost-effective?

Powder compound is generally cheaper per unit compared to ready mixed. It also comes in lighter packaging, making transportation and storage more efficient.

How do I achieve the right consistency with powder jointing compound?

Mix the powder with water incrementally, following the manufacturer’s guidelines. Use a mixing paddle or stir stick to ensure a smooth, lump-free consistency. Allow the compound to slake (rest) for a few minutes, then stir again before application.

Can powder jointing compound be more environmentally friendly?

Yes, powder compound typically has less packaging and is lighter to transport, which reduces its carbon footprint. Its longer shelf life and customizable mixing also help minimise waste.

What factors should I consider when choosing between ready mixed and powder jointing compound?

Consider your level of experience, the size and complexity of your project, your budget, and the available time. Ready mixed is best for quick, small, or simple tasks, while powder is more versatile and cost-effective for large-scale jobs.