The last thing you want is imperfections on your wall that are going to bug you for years to come so first off, make sure when you plaster a wall that you follow the six stages of plastering in the correct order, that you keep your tools clean and have the right kit to hand.
We have put together the ultimate guide to plastering a wall which will take you through the stages you need to follow, show you what you need and explain exactly how to master the perfect layer of plaster – with some handy hints and tips added in along the way!
Click here to see our plastering tools and equipment – we stock everything you need!
Kit Needed
You may be wondering about the kit needed to get you started. After all, its always a good idea to be prepared well in advance, so you don’t have to down tools and leave the job halfway through to stock up. It therefore would be useful to make sure you have the following:
1.Plasterer’s trowel and bucket trowel
4.Hawk
7.Plaster
8.Clean Water
10.Stepladder or stilts
11.Flat Mask
How to plaster a wall step by step
Using a hawk and trowel correctly can be quite a challenge to start with if you’re not used to handling them, so before you put the layer of plaster on the wall, practise using them effectively so you don’t end up in a mess.
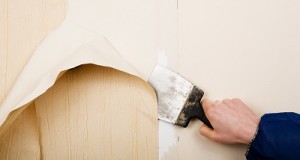
Before you start, make sure your wall is clean by removing bits of existing plaster, dust or wallpaper as you go and check the suction of your wall to make sure it isn’t too porous. If this is the case, it will suck the moisture out of the plaster so fast that it won’t have a chance to work before it dries. So, control the suction of your wall with water or PVA, which should satisfy the thirst of the wall, stopping it from stealing the moisture from your plaster too quick.
Low suction backgrounds, such as painted surfaces will also need to be properly prepared, perhaps by using a mix of PVA glue and water to ensure the plaster sticks to the wall. You could also try adding a handful of sand to the PVA glue mixture to give it a rougher texture and better adhesion when you apply PVA. You’re then ready to start plastering your wall.
Click here to see out plastering tools and equipment – we stock everything you need!
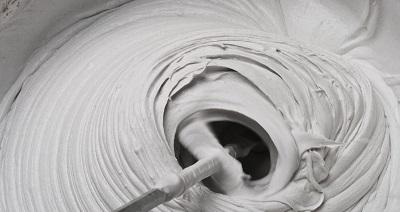
Plaster and water mix together roughly half and half – so half a (clean) bucket of water should make a full bucket of plaster. When mixing up your plaster it should have a thick, creamy consistency with no lumps. Try adding just enough to make a heap on top of the water to start with and the dry plaster must be added TO a bucket of clean water, NOT the other way around.
TIP – When plastering a room, try not to do two walls that are touching each other as you risk damaging one wall while plastering the other. Turn all radiators off in the room too, to stop the plaster drying too quick. Beginners should start on a small area first to ensure they’re getting the technique right, so start with an area which only takes 30 mins or less for the first coat.
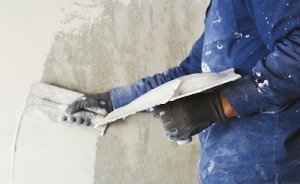
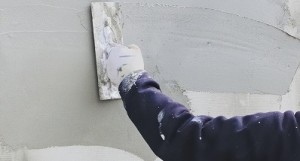
Tilting the hawk towards you, skim a small amount of the plaster from your hawk onto your trowel in one swift smooth movement (this can take some practice). Then run a horizontal top border line along the top section of the area you are looking to plaster and try to work from right to left. Work the plaster right into the edges creating a flat even layer of plaster. Don’t worry at this point about small holes and ridges, or smoothness, as long as that first coat is flat and even. It should be around 2mm thick (no more).
Every time you do a sweep upwards, go over it with a fairly flat trowel at an angle of 10-15mms to flatten everything you’ve just done. Remember you are looking for a flat and even surface here, with no bulges – don’t worry too much about trowel marks at this stage.
It could be the case (especially if it’s your first time) that you haven’t gradually decreased the angle of your trowel as you moved along the wall, perhaps you flattened the trowel to the wall too soon or overcompensated and things got quite messy. If this is the case and you have ended up with lots of levels of thickness you can go over it again with a fairly flat trowel angled at about 10mm to flatten out where you’ve been. Combine the flatness of the trowel with firm pressure all the way through to flatten and fill in any holes.
If you’re going too quick and not flattening the trowel quickly enough, you may get the scraping effect which means the top edge of the trowel is coming away from the wall, so it needs to come in a bit. The secret here is to go slowly and keep an eye on the gap between the trowel and the wall, using a firm pressure as you go.
Click here to see our plastering tools and equipment – we stock everything you need!
Also, when you plaster a wall, remember to try and remove annoying bits of grit straight away and make sure you keep everything clean. The next stage is to flatten the first coat off and give your trowel a quick clean. The sole purpose of this stage is to get your wall flat and knock the ridges back because if you don’t at this stage, you are just plastering over an already uneven wall once it has dried and this can only lead to an even more uneven, bumpy wall further down the line.
So, wait until the plaster is tacky and run your trowel over the wall. It’s important to wait until the wall has dried to a tacky consistency (and this can take between 5 and 15 minutes) because if not, you won’t notice the improvement.

Perhaps try putting a small amount of plaster on a piece of off cut and work out how quickly it dries before you attempt a large section of your wall – after all, it’s when the wall has gone tacky (firm, but not hard) that the imperfections can be removed using a trowel. If the plaster has dried completely, only sanding the wall will remove the holes and ridges and this can be a painful and laborious task.
Once you’ve flattened out your first coat of plaster, next is time for the second coat. This is similar to the first layer of plaster but it’s thinner, so use smaller amounts on your trowel. Aim for around 1mm of thickness and a flat even coat.
Also remember to push firmly with your trowel again, because if you don’t push hard enough when you run the trowel over the wall, you could end up with a series of holes. So push hard enough to push the plaster along the whole length of the trowel and into the holes using firm pressure. Move the flattish trowel along the wall with a leading edge of around 10-15mm and combine this with firm pressure.
Click here to view our entire range of plastering and drylining tools!
Don’t worry so much about trowel marks, you may even notice ridges caused by the trowel get worse when doing this, but these will be pushed out in the next stage when the plaster is a little firmer. Try and just focus on not leaving too many holes and make sure everything ends up nice and flat by the time you have finished the second coat of plaster.
Ensure all excess plaster is removed from the corner, then it can be formed with a brush. A paintbrush is useful here – just wet it with clean water then flick off the excess water. Point the paintbrush more at the wall you are skimming up to and run the brush in big strokes up and down the corner. Generally at this stage the plaster can be quite wet so use a little pressure.
Any brush marks left in the corner can be lightly trowelled out – but again if it is really wet it may be better to leave until the next stage. You can use water at this point to get a good clean, but don’t flick too much water on your walls unless you need it, or you can end up with a slurry effect on the plaster. Pass the trowel over sections of the wall and look for hollow areas or holes, then work the plaster into them. Moving from left to right, cover the whole area, working the plaster around the wall to keep it flat and fill hollow areas.
Again the trowel marks will come out later on. Leave the wall to get tacky once more and then it’s time to get the trowel marks out – this is called the trowelling up process. As the plaster sets it will darken in colour, which means it’s time for the final trowel.

Bear in mind that as you complete the finish, the float can pull plaster from high spots on the wall to the lower spots, but remember, you can always add more plaster where and when it is needed or wipe any surplus from your float onto your hawk. The main thing when plastering a wall is to remember to work through all of the different stages one at a time and bear in mind that it gets easier as the setting process begins to happen. If you have done this it should minimise the amount of sanding needed once the wall has dried and save you extra time, effort and frustration in the process. 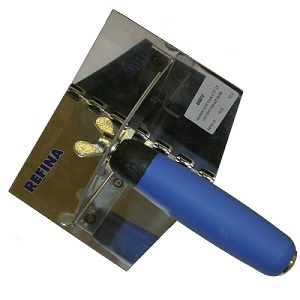 A quick guide to corners… If you make sure your corners are done well, then it gives you a greater chance of making sure that the rest of your wall will look good too, so it’s worth taking the time to get it right.
Try these following steps to help you along… Use a trowel or scraper to fill the corner gap between the plaster walls with the first coat, making sure to scrape off any excess. Once the first coat is dry, use the trowel or scraper blade to take off any small ridges. Then, cut a piece of paper tape to the height of your wall. Fold the tape in half so there is a crease running down the centre of it. You can then apply a thin coat of plaster base coat to both sides of the internal corner and press the tape over the top.
Once it is in place, use the trowel or scraper to flatten it onto the wall, squeezing out any excess plaster, then leave it to dry. Use your paint scraper or trowel to apply a top coat of plaster on both corner faces. Then run an internal corner plaster tool over the top coat to give it a flat and flawless finish.
Order your plastering tools from Gypsumtools
If you’re looking to plaster a wall for the first time and you are unsure of the kit you need, you can order your plastering tools from Gypsumtools, with members of our team readily on hand and available to answer any queries you might have. With over 50 years experience in the plastering industry, we are always looking for the best tools and techniques that there are in plastering, so give us a call, drop us a line or take a browse through our products online to find out more.
One Reply to “The Ultimate Guide to Plastering a Wall”